01 · First launch
Open the portal
Steps
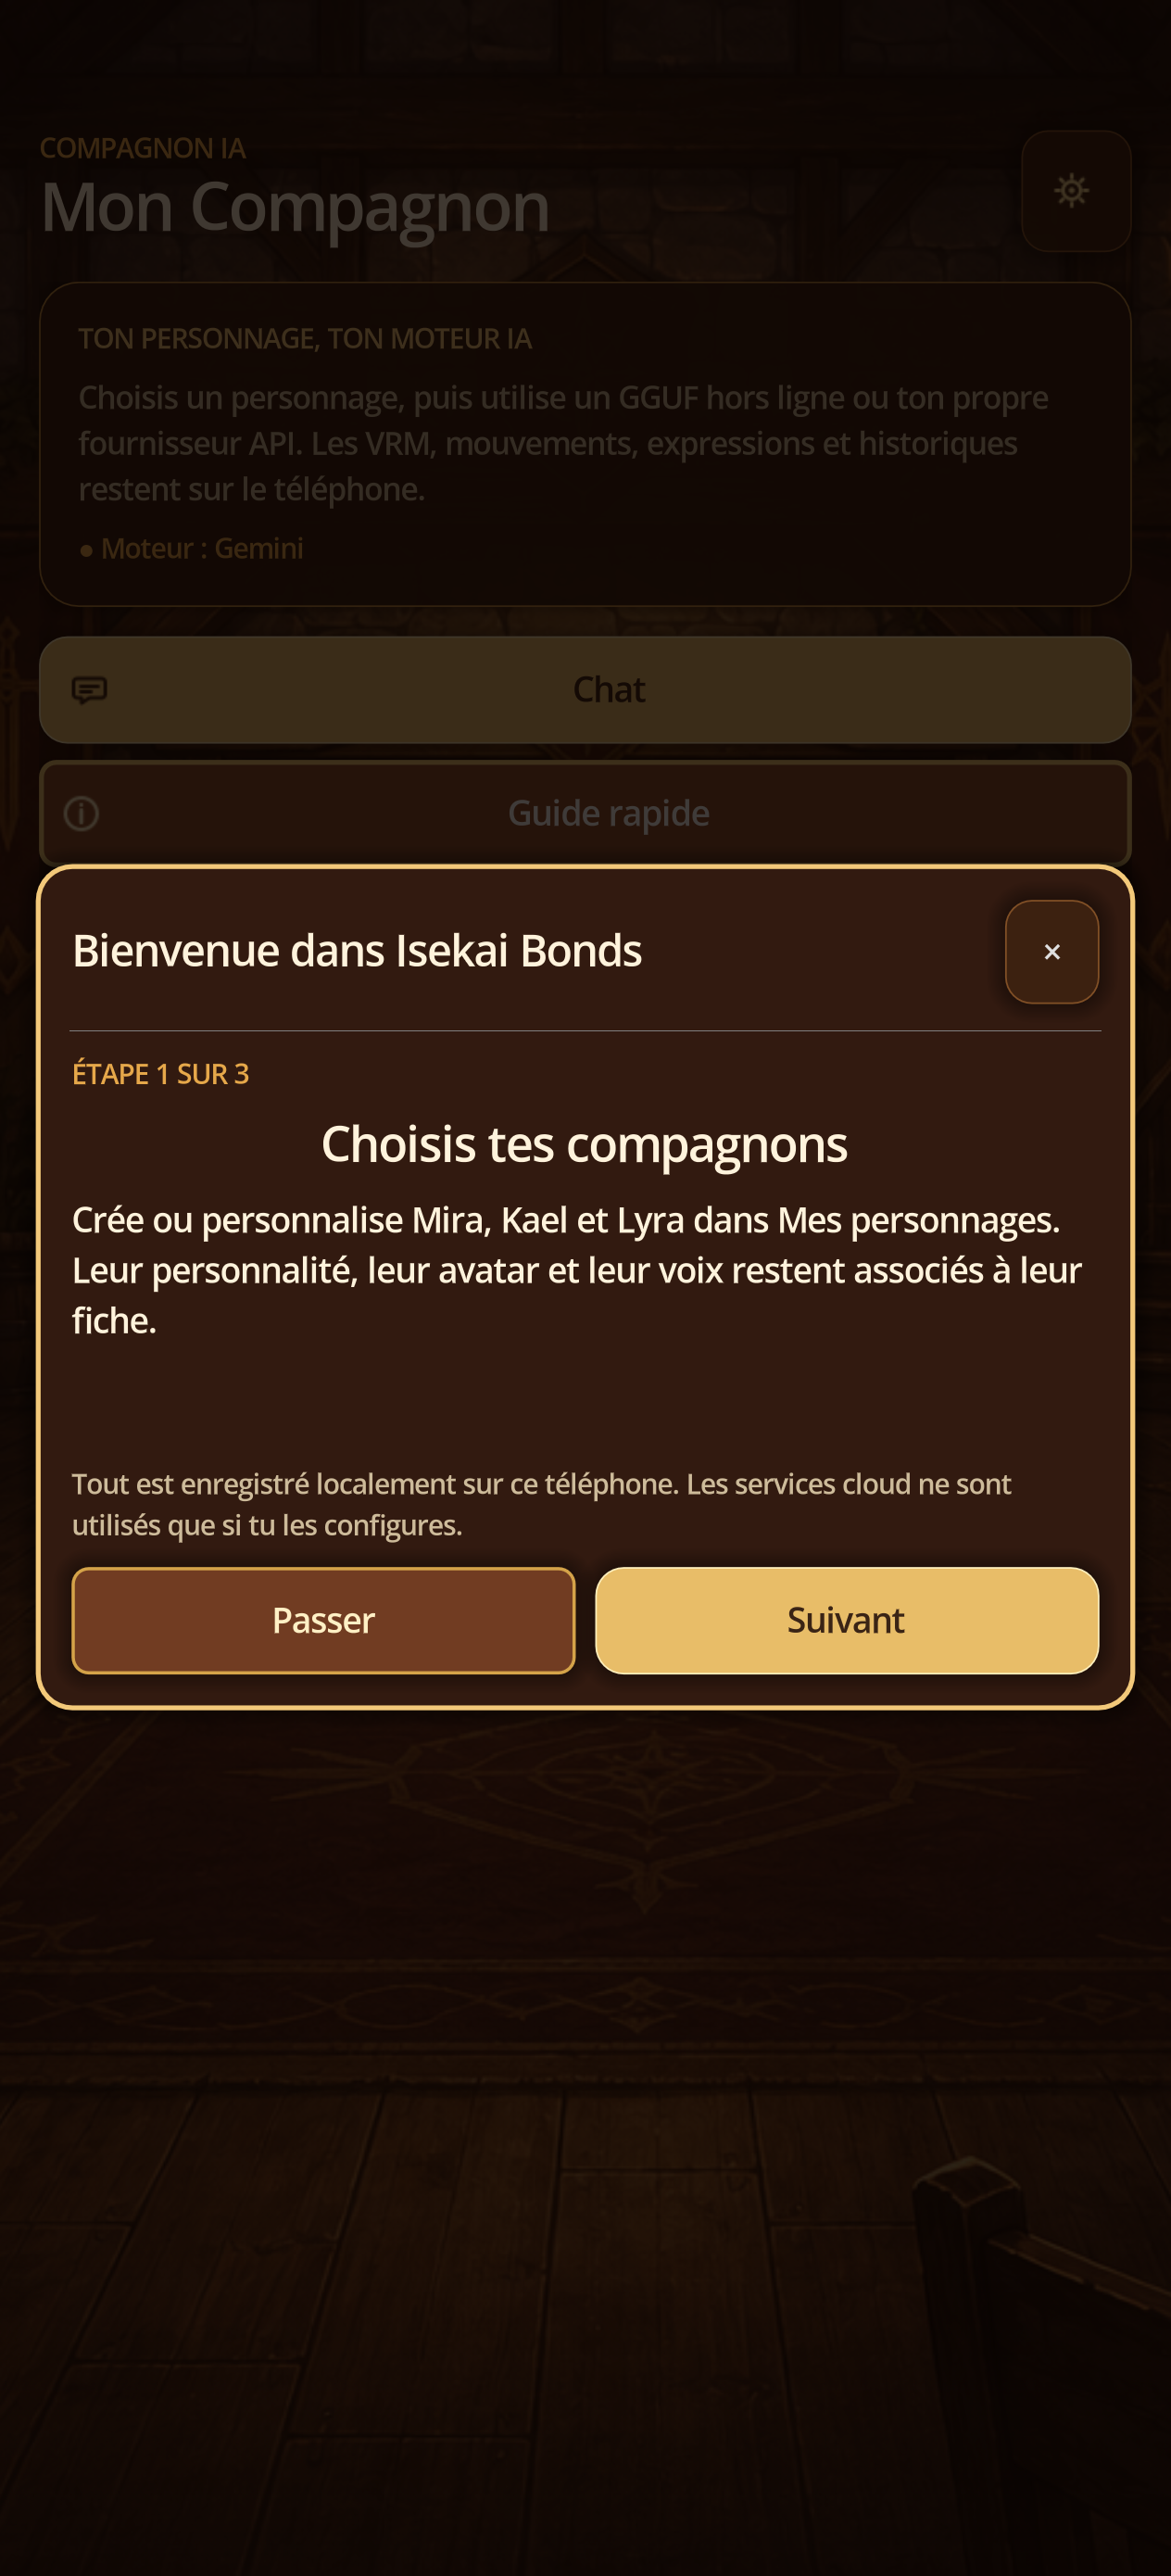
- Read Choose your companions, Start your story, and Write or dictate.
- Use Next, or Skip, then Open Chat.
- Locate Chat, Quick guide, My characters, AI models, Avatar Studio, and Settings.
00 · Starting
Wait for local preparation
Steps
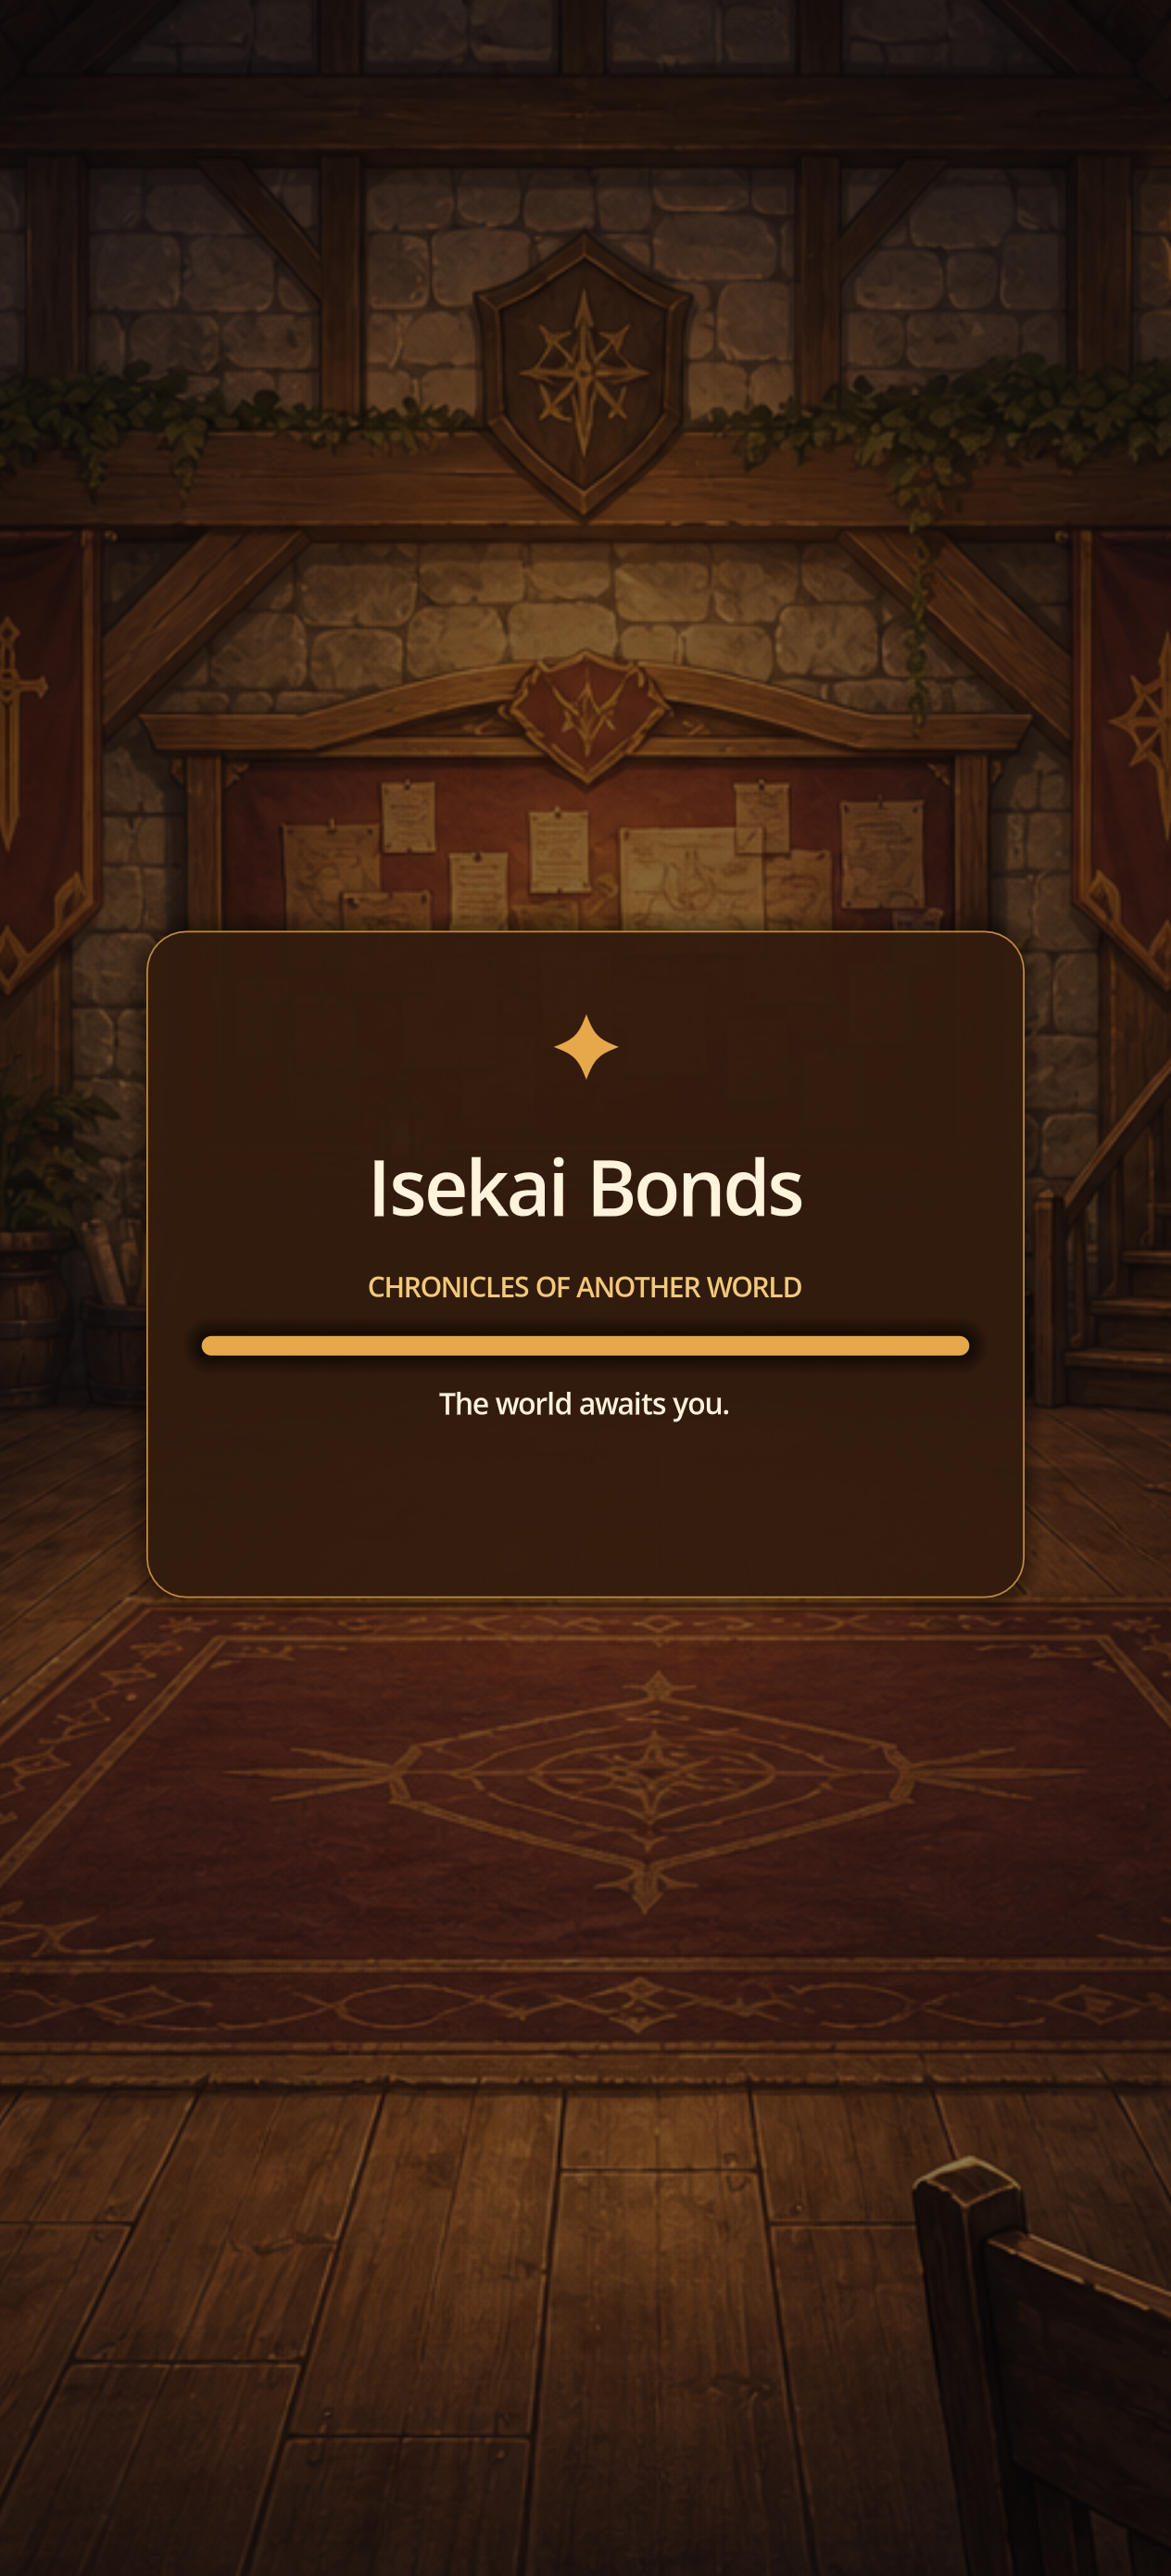
- Launch Isekai Bonds and let the bar reach 100%; do not close the application during the initialization of local stores.
- At the very first launch, the preparation screen is voluntarily in English before the registered language is known.
- If the home does not open, restart once and then attach the displayed message to your report without including any private data.
01B · Quick Guide
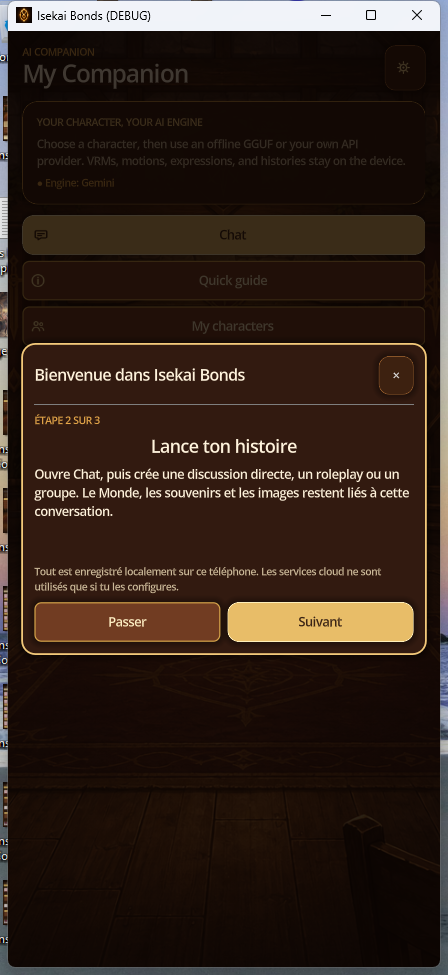
Step 2 - Launch Your Story
Steps
- After the first card, tap Next.
- Read the available accesses to start a conversation and select a companion.
- Return with Previous if you want to read Step 1.
01C · Quick Guide
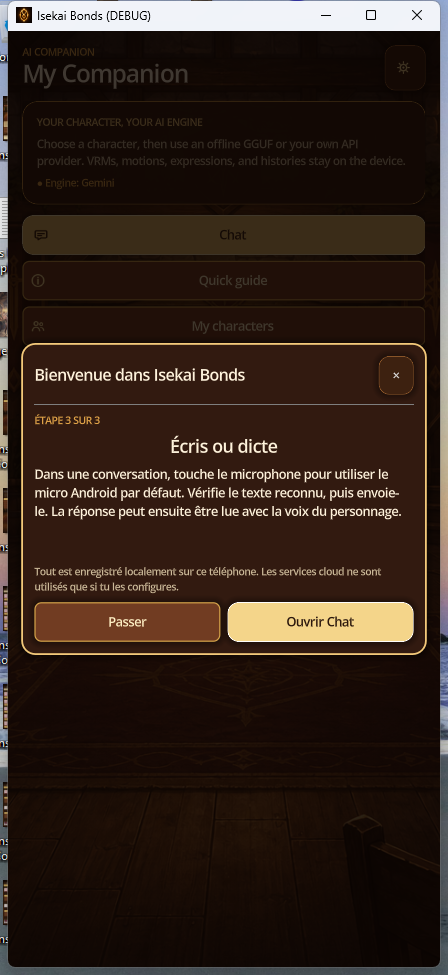
Step 3 - Write or dictate
Steps
- Touch Next from step 2.
- Find the text input and Android dictation described in the map.
- Finish with Open Chat or use Pass to directly reach conversations.
02 · Home and navigation
Find the permanent entry points
Steps
- From Home, use Chat, My characters, AI models, Avatar Studio, or Settings.
- On main screens, the bottom bar jumps directly between Chats, Characters, Studio, and Settings.
- Use the screen Back button or Android Back. On Home, press Back twice to confirm exit.
- The brown-and-gold presentation is the only visual theme in V0.21.26; there is no light/dark theme selector.
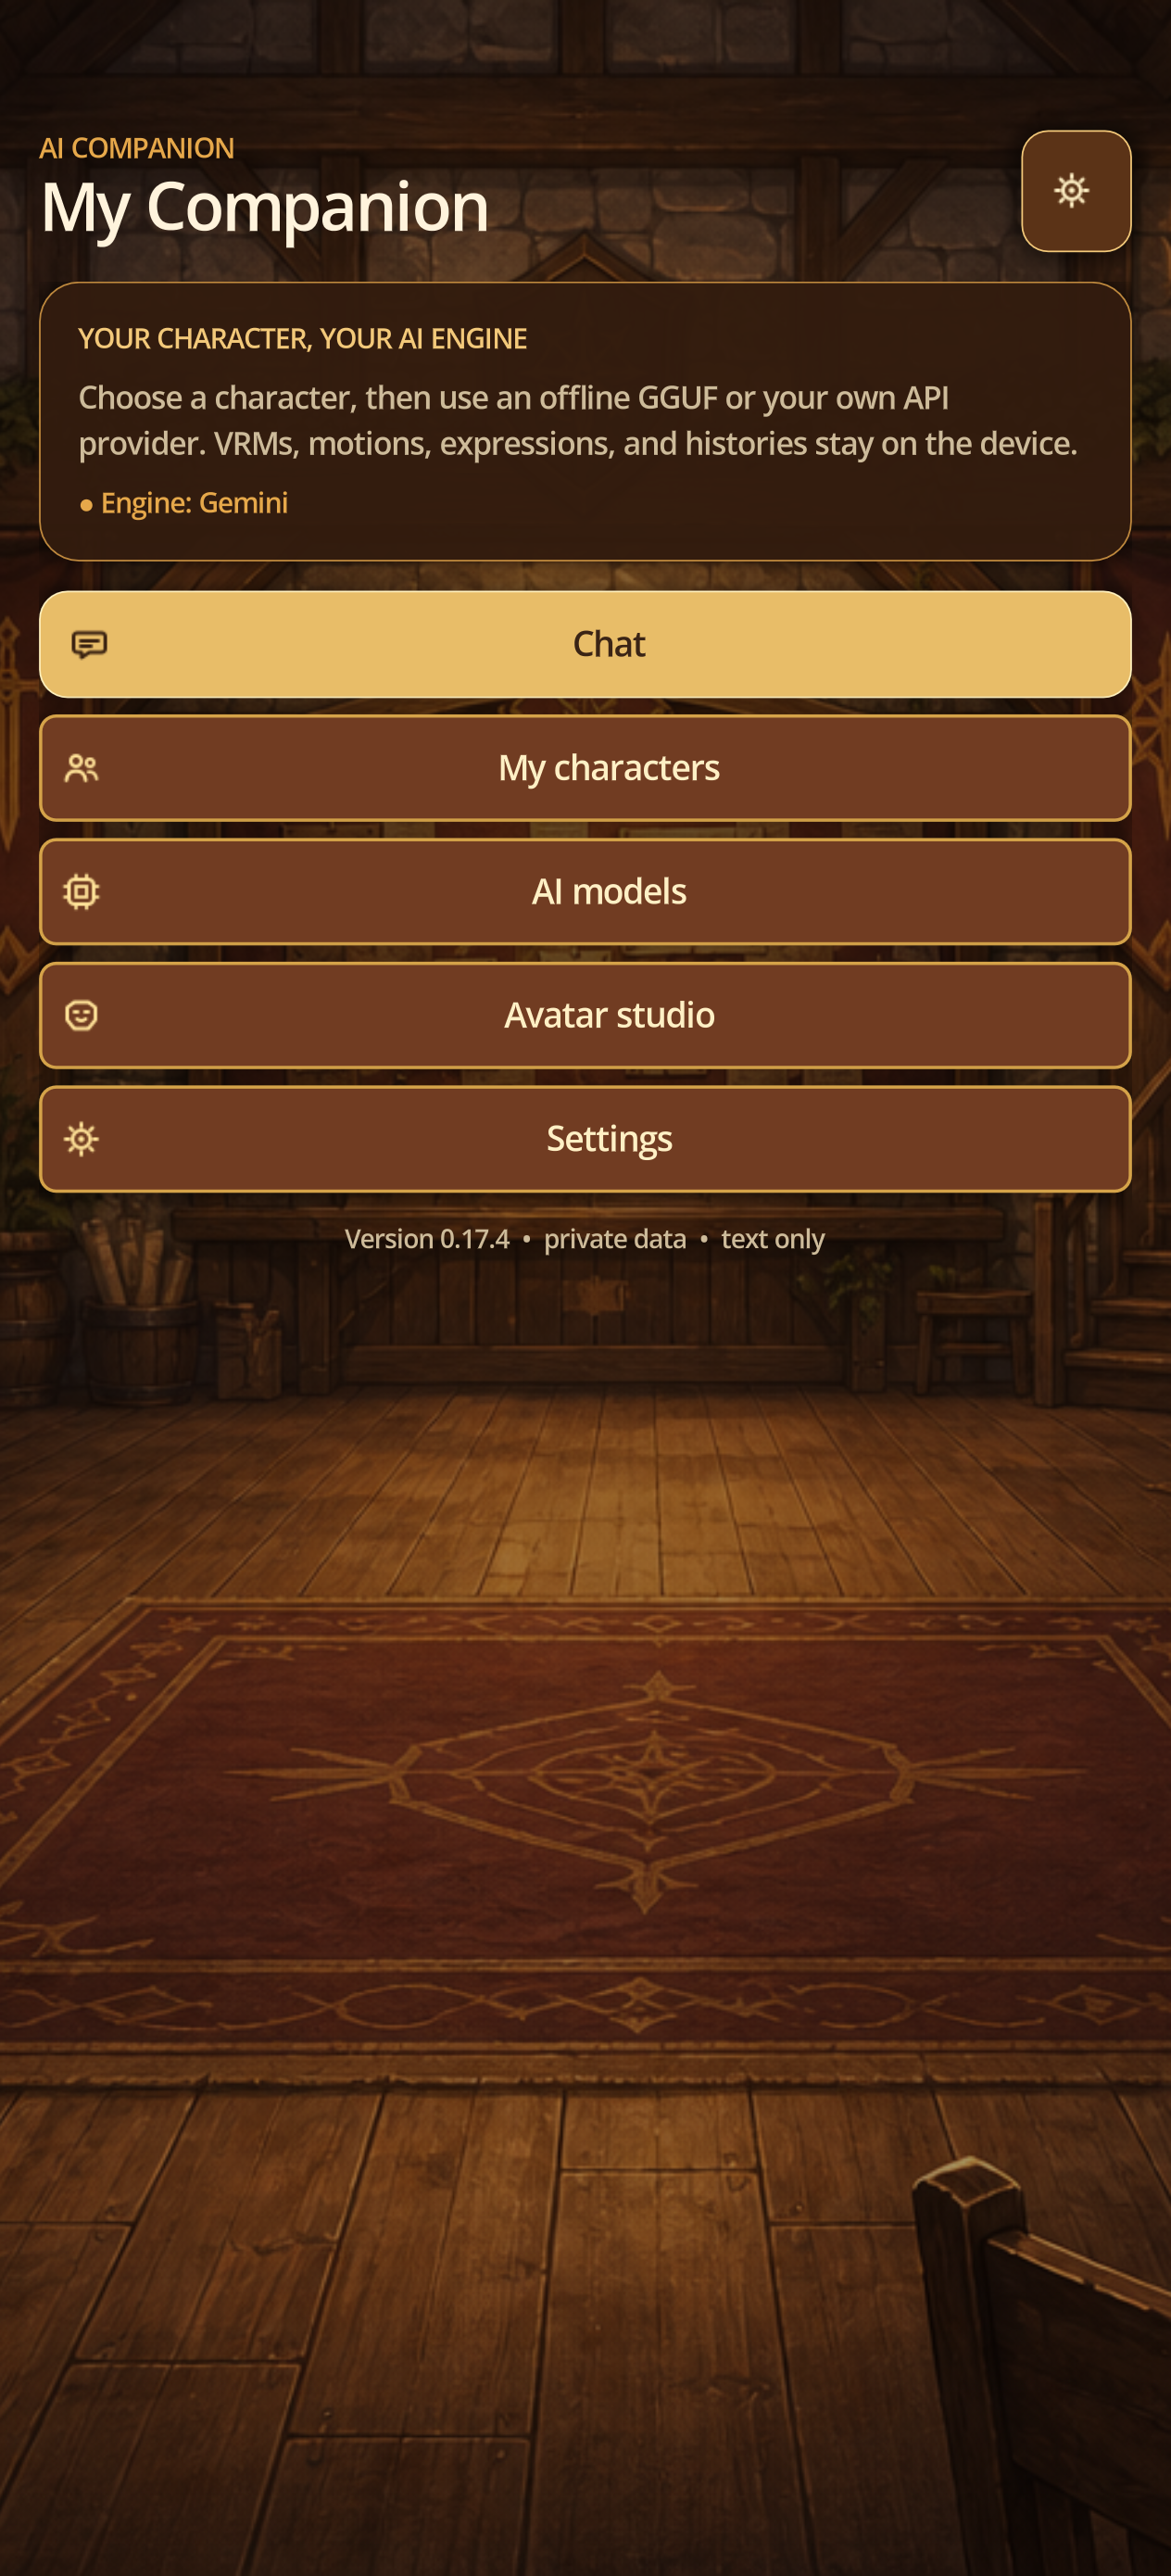
02 · Characters
Choose or create a companion
Steps
- Open My characters and first try a built-in character with Start a chat.
- Tap New character and enter at least a name, role, and personality.
- Optionally add appearance, style, opening messages, a preferred local model, and voice.
- Save and confirm that the character appears in the library.
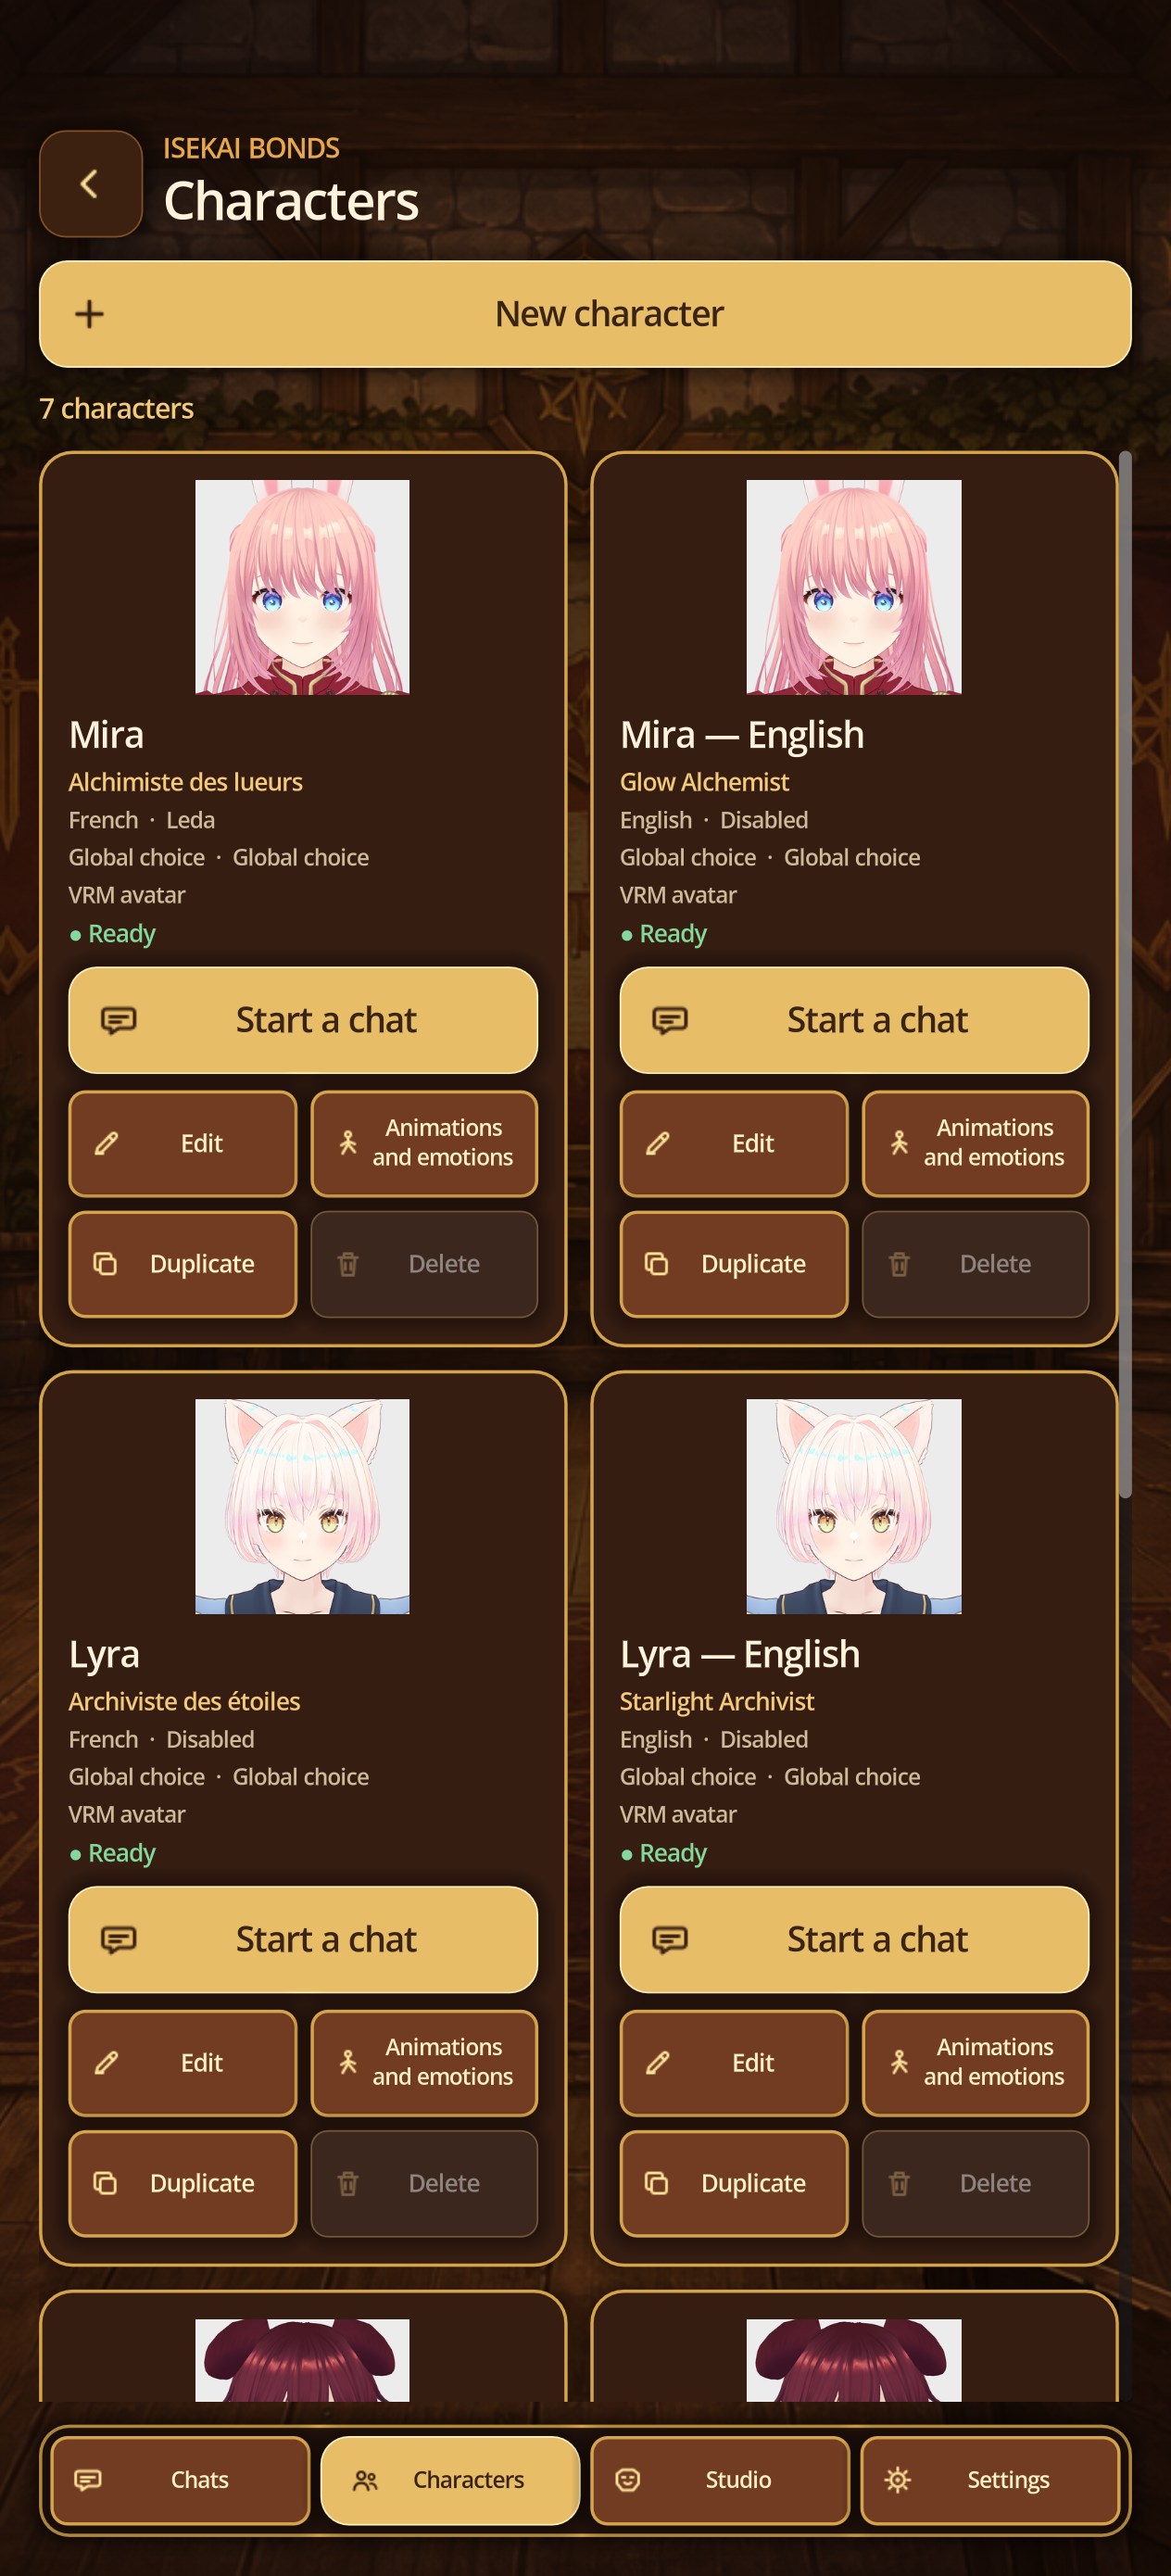
04 · Profile and avatar
Edit a character without losing chats
Steps
- Open My characters, choose Edit, then review identifier, name, role, language, personality, backstory, and opening messages.
- Choose Static image or Animated VRM avatar. For VRM, select a built-in avatar or open the private library.
- Set the preferred local model, generation profile, and voice, then Save changes.
- Create a new conversation: the saved avatar and portrait appear from the first chat screen.
- Duplicate creates an independent profile. Delete asks for confirmation and also removes that character’s local conversations.
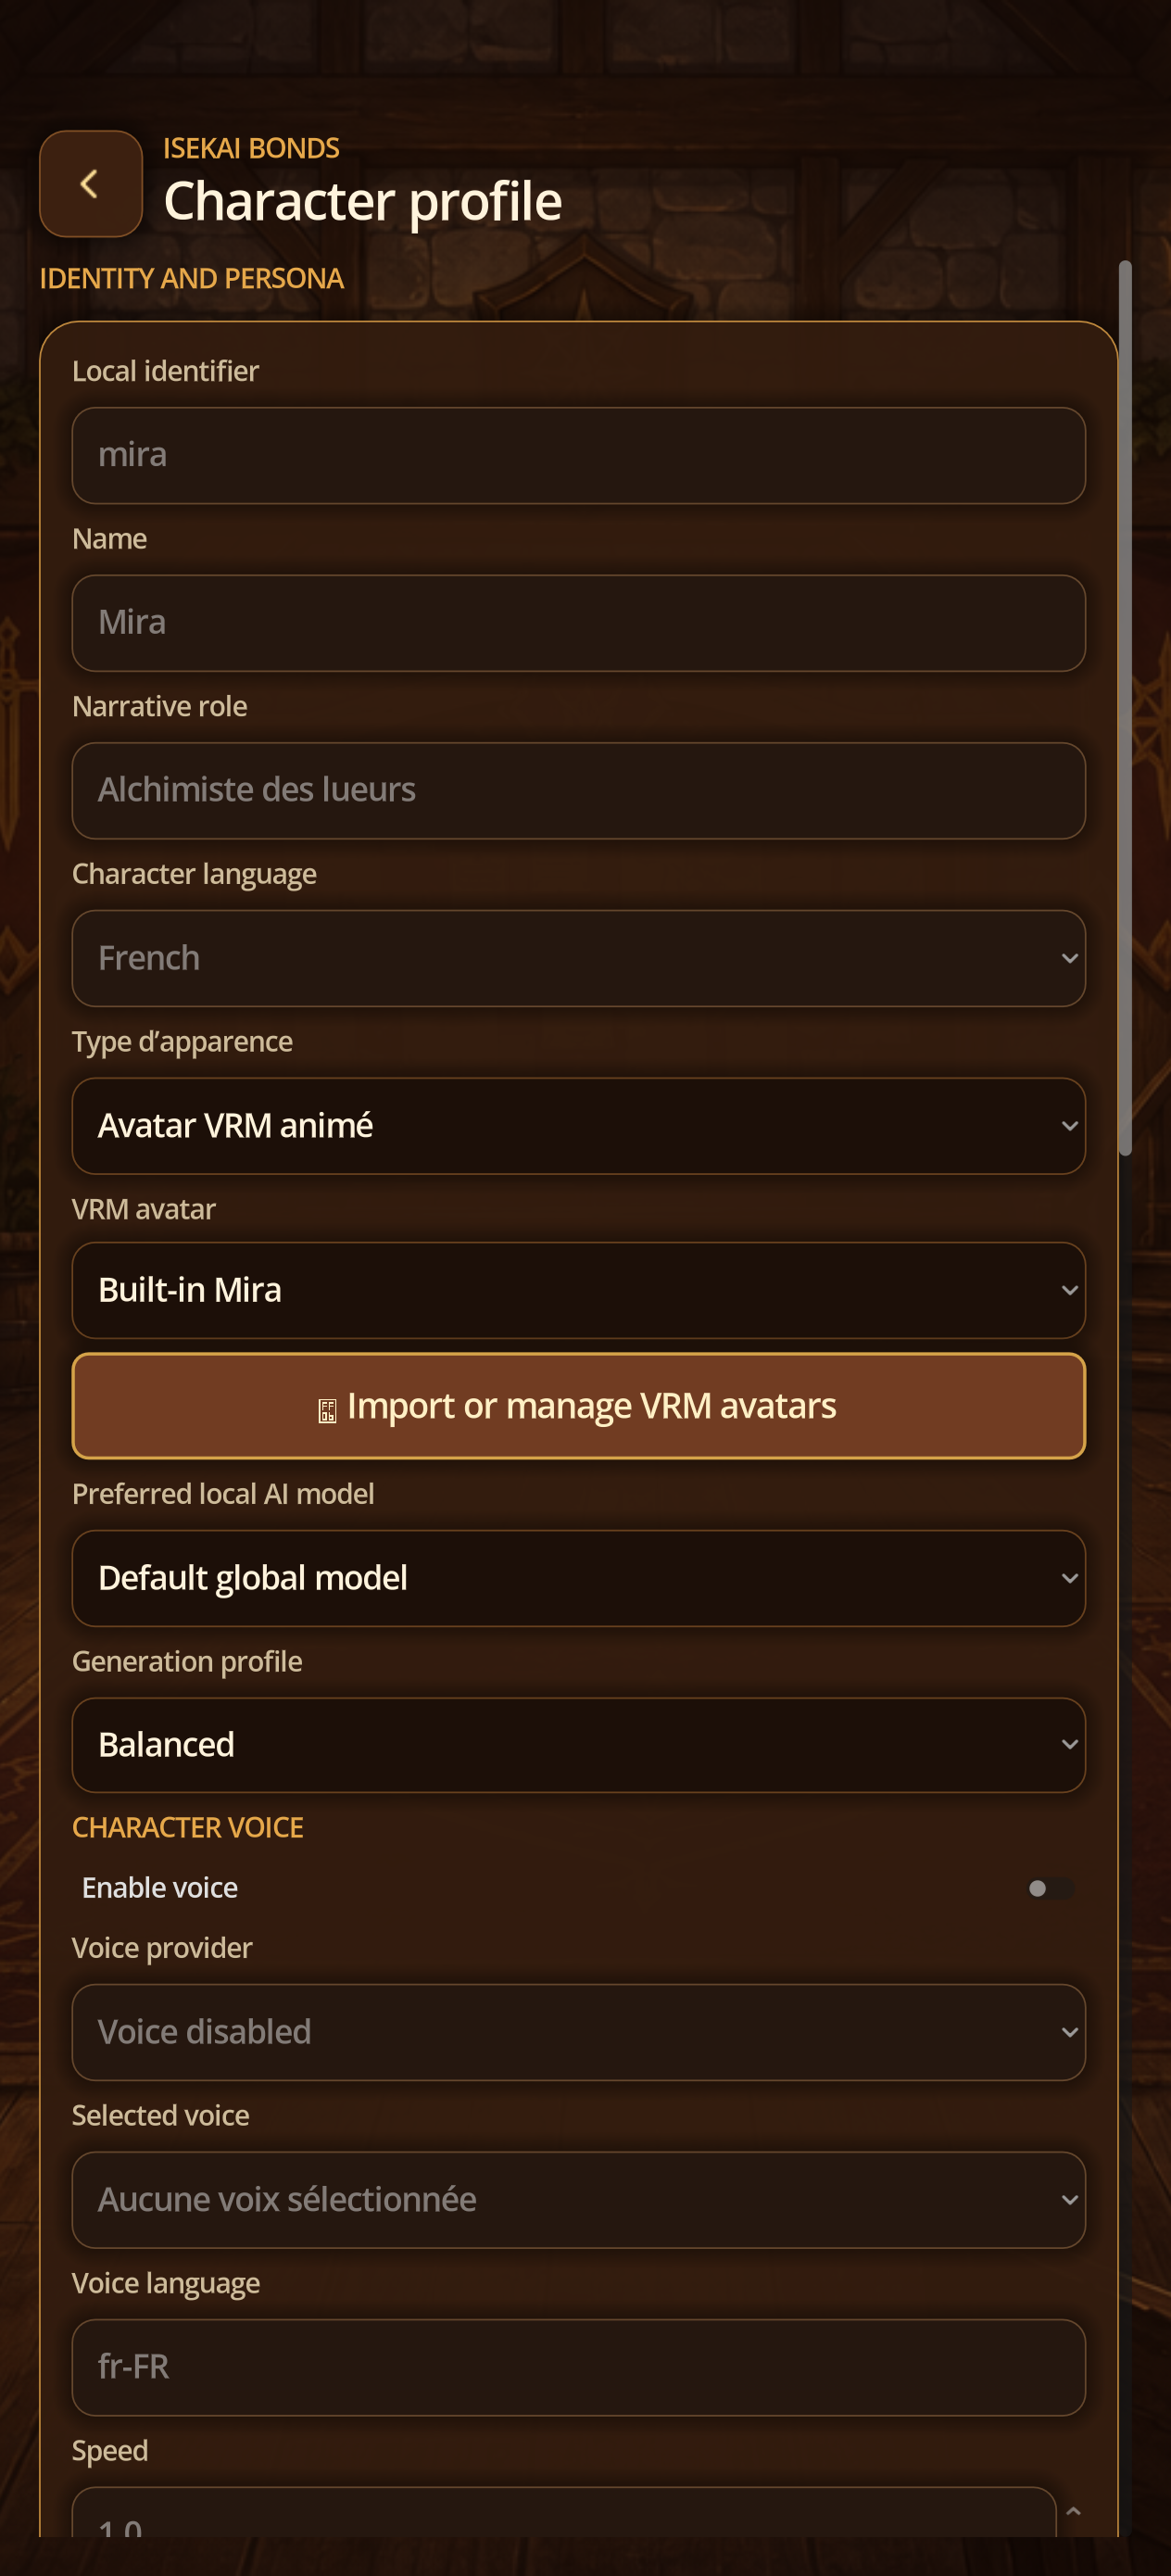
03A · Appearance
Separate images by emotion
Steps
- Open Characters → Edit → Images and emotions.
- Choose An Emotional Image and select the emotion to inform.
- Import only an image with your rights, adjust the framing, test and save.
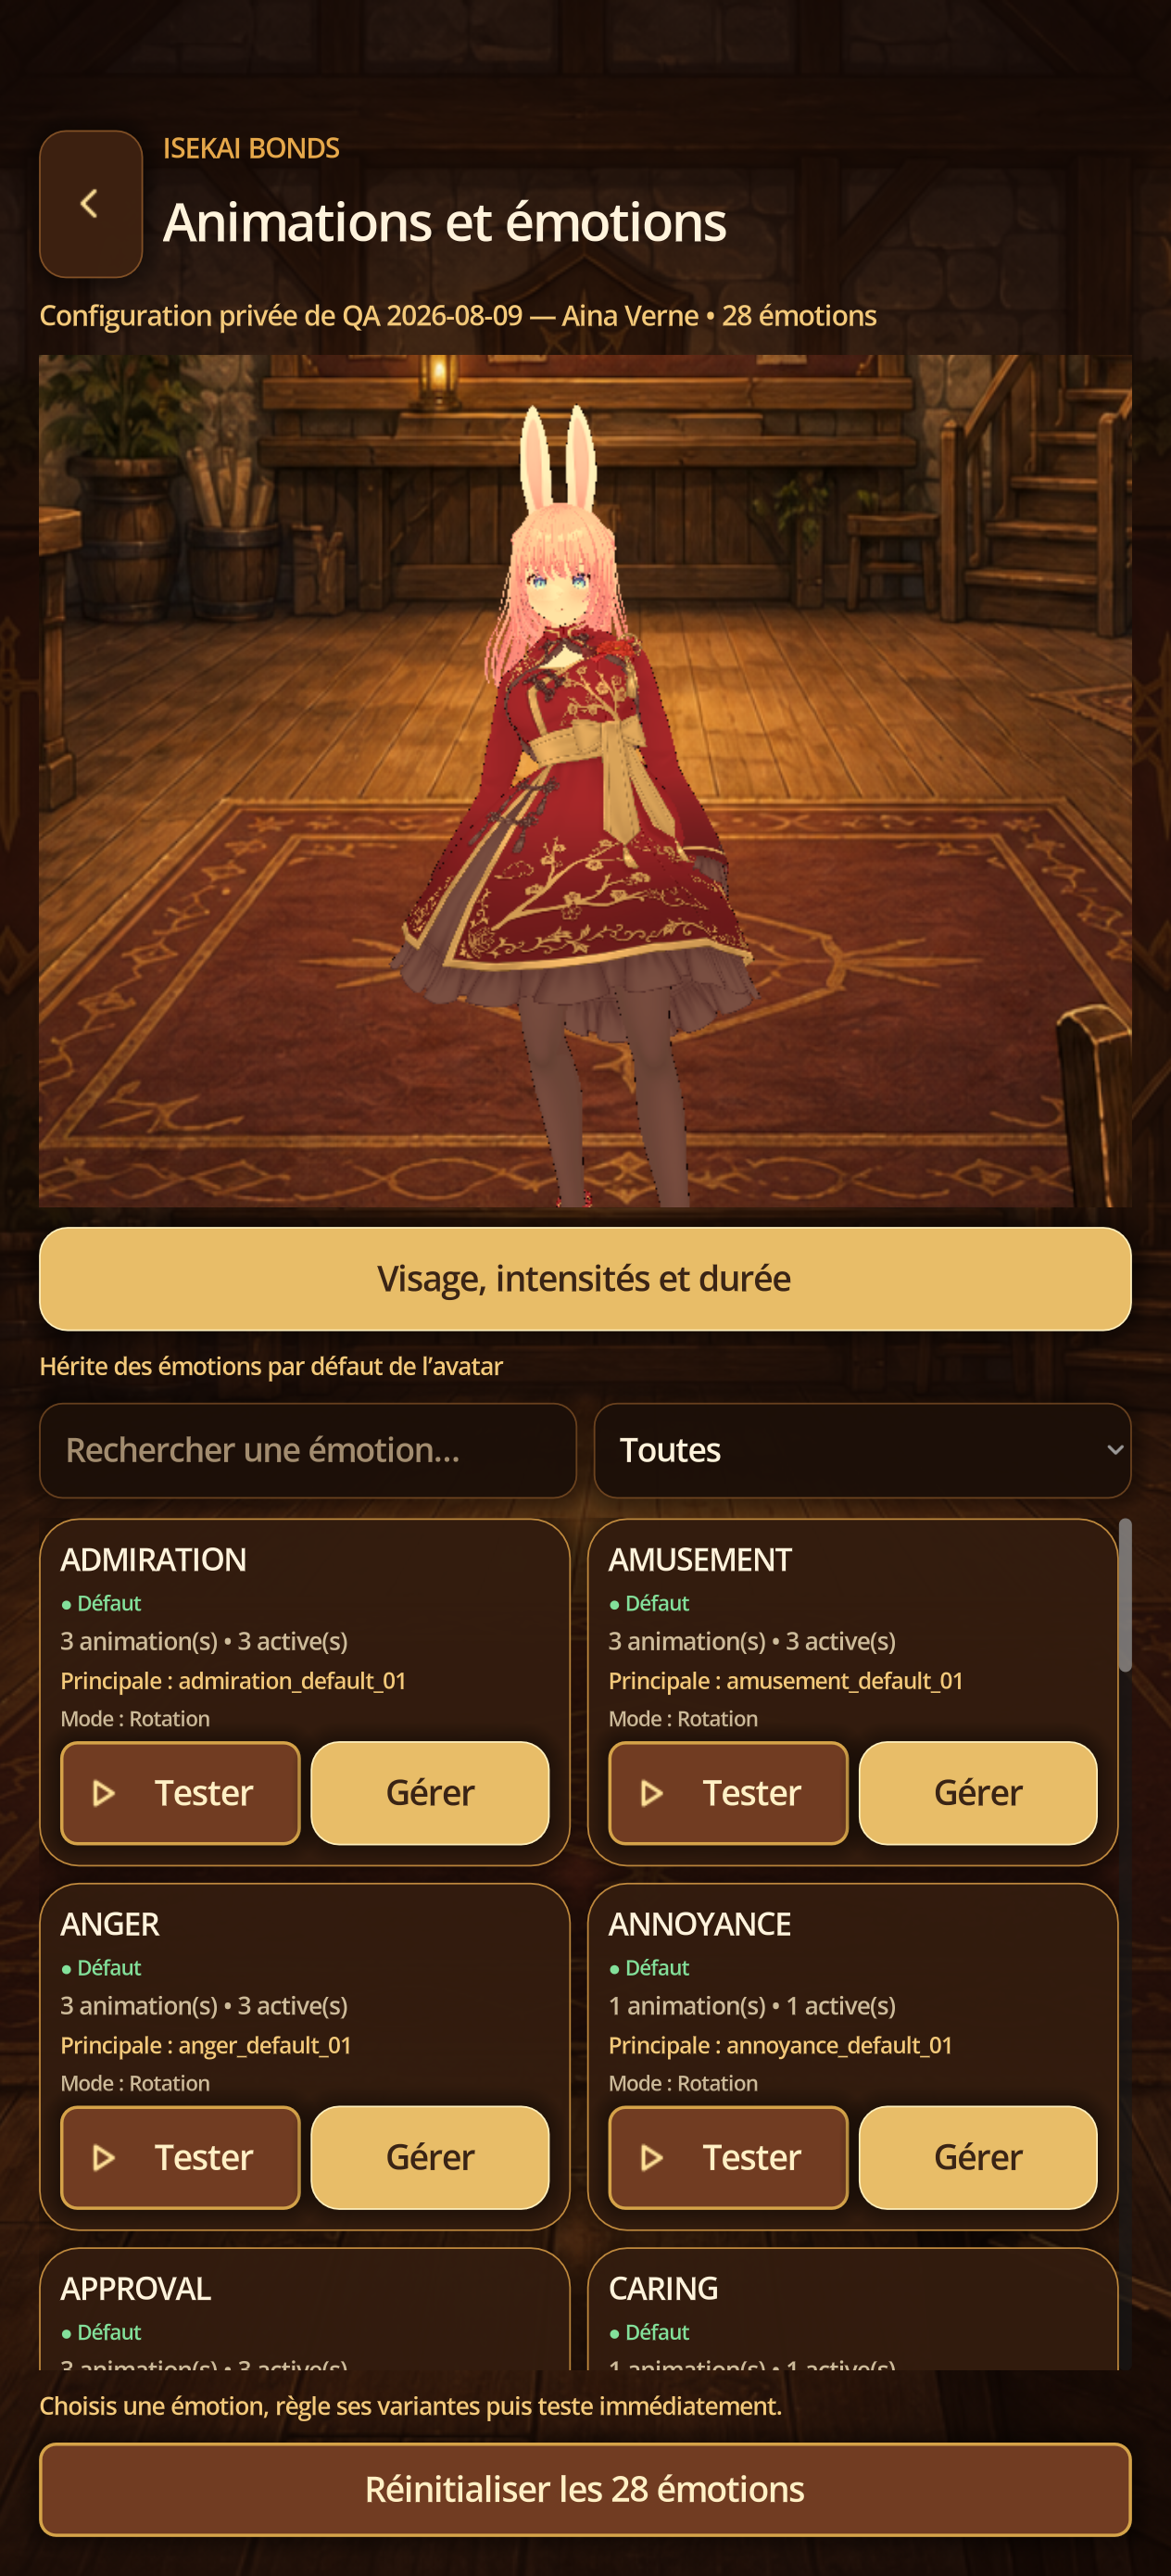
03B · Appearance
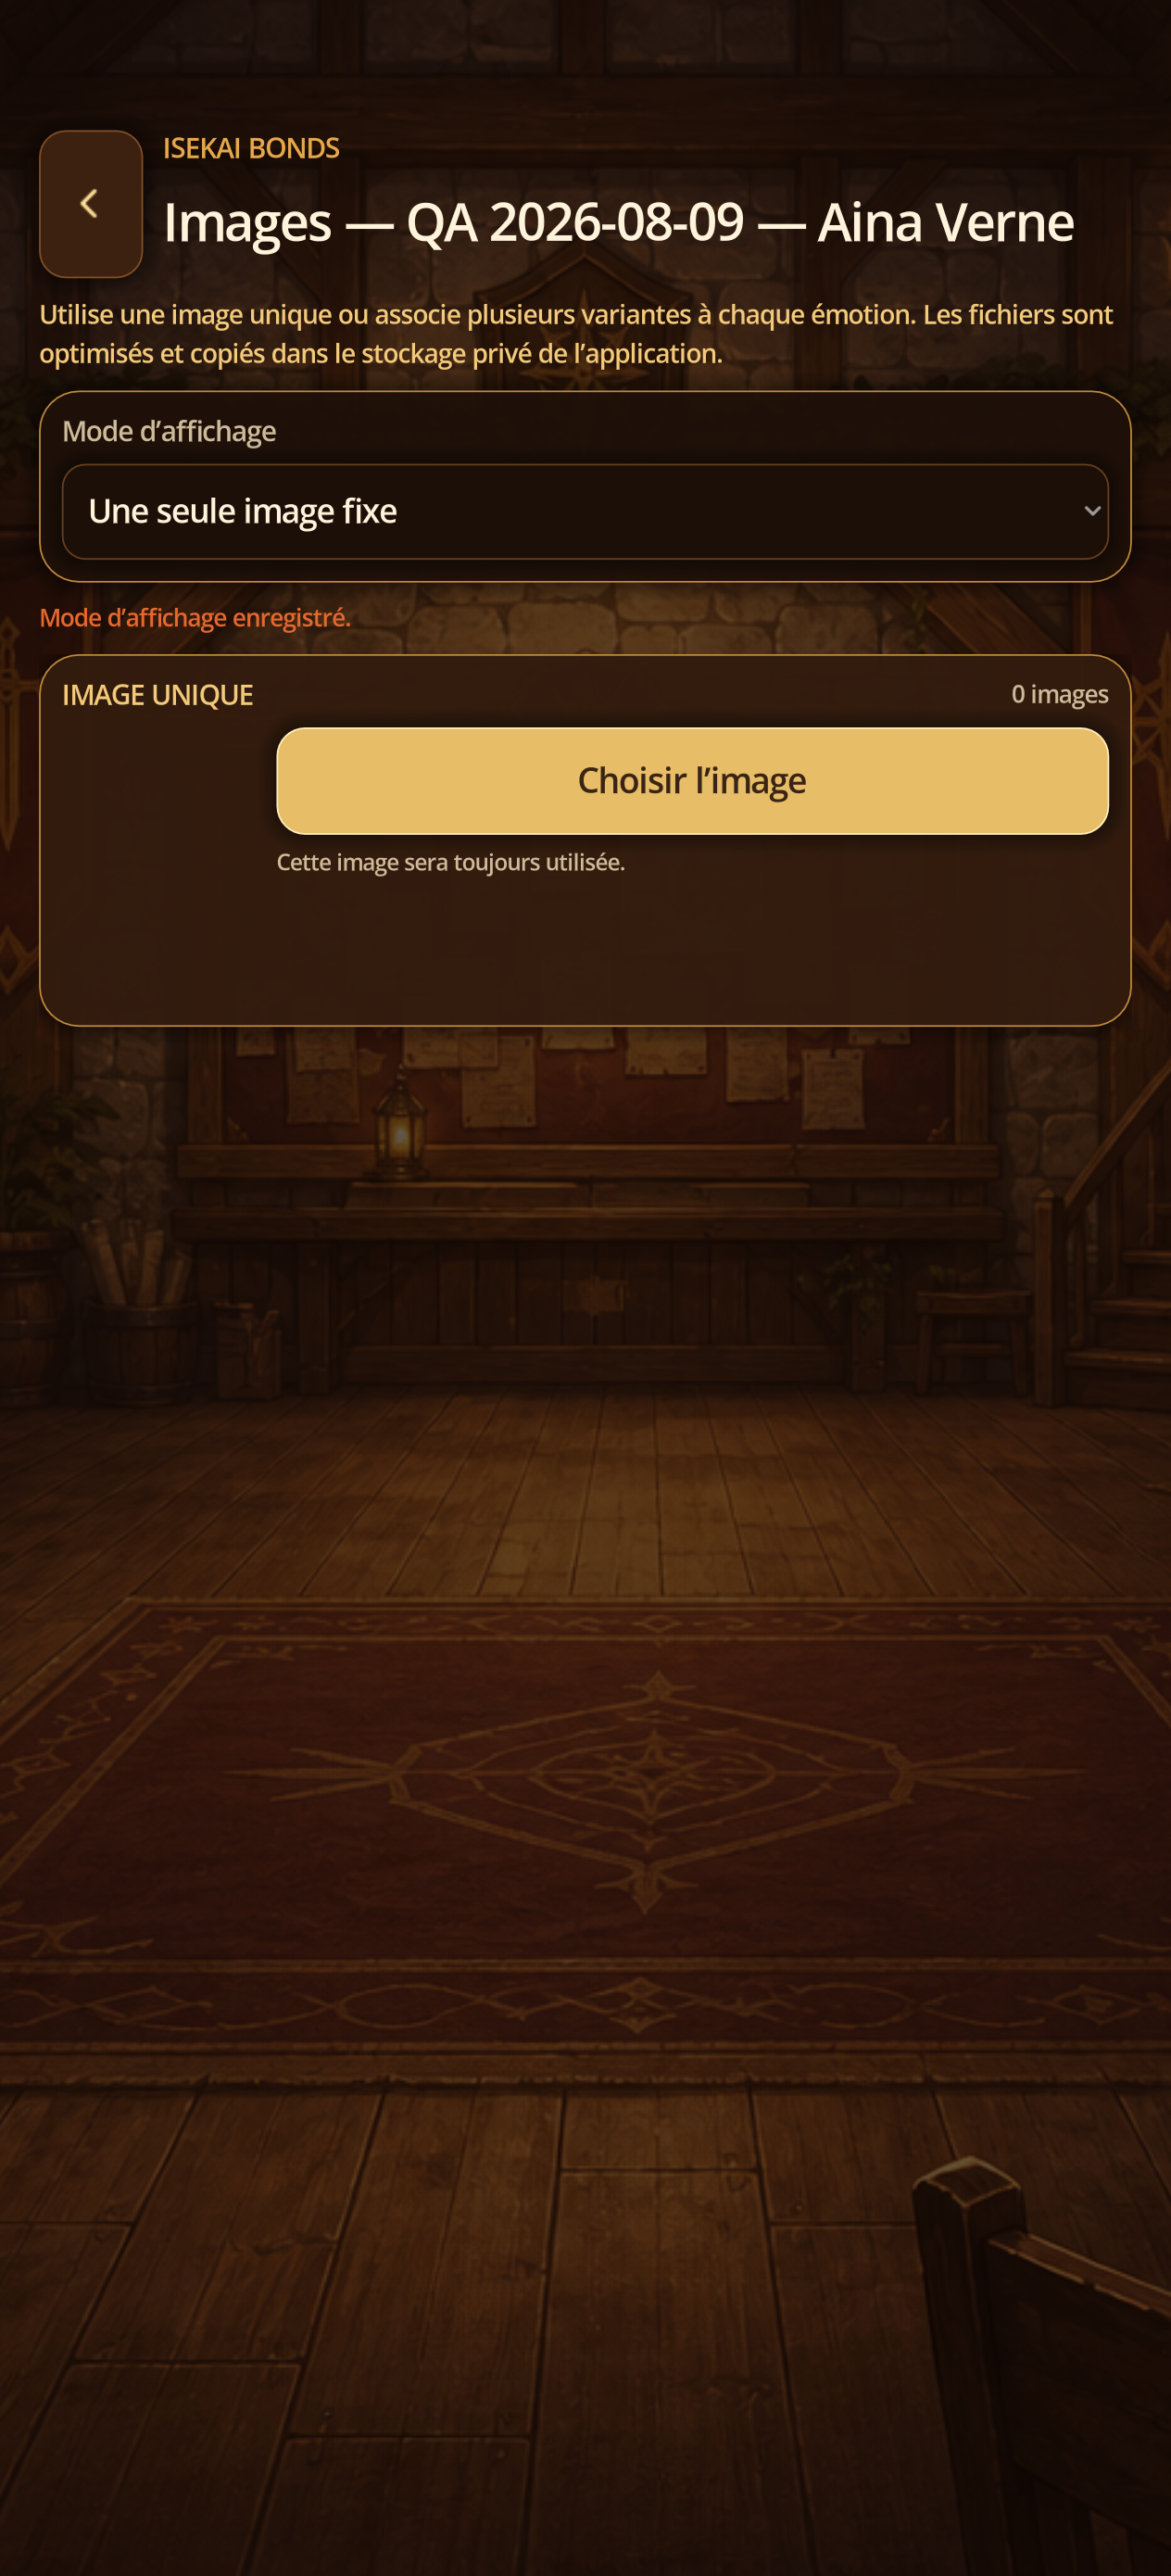
A unique image for all emotions
Steps
- In Images and Emotions, open the mode menu.
- Select Unique Image, import the allowed image and check its framing.
- Record; the same portrait will be used at the beginning of the new chats and for all emotions.
05 · Conversations and history
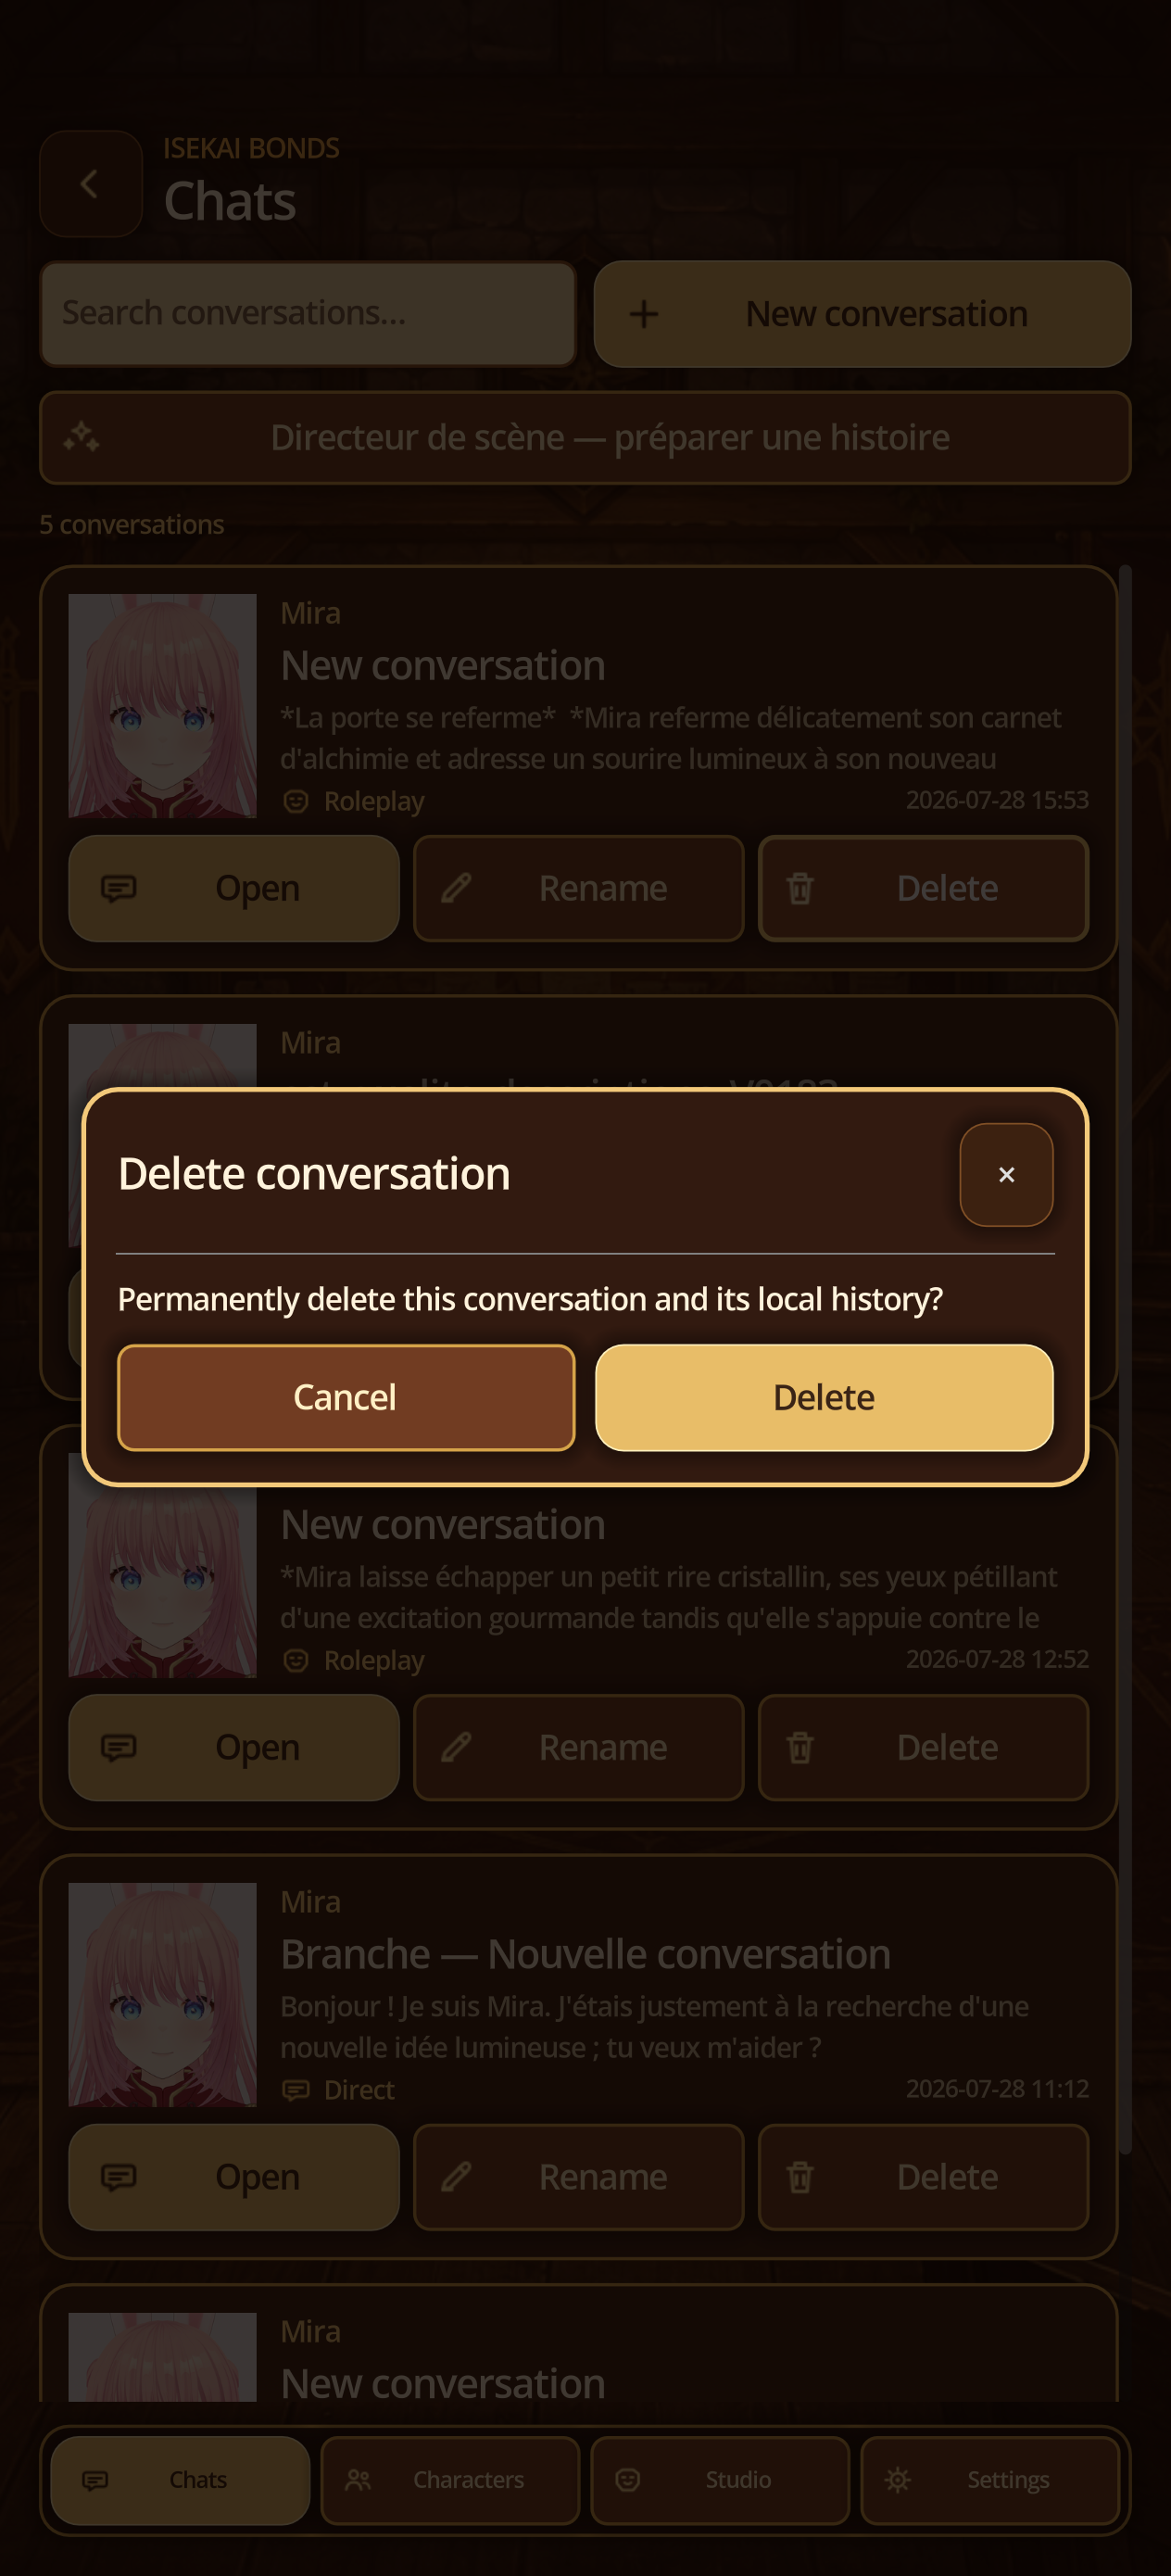
Search, resume, rename, or delete
Steps
- Open Chat: each card shows character, title, excerpt, type, and date.
- Enter a term in Search conversations to filter, then Open to resume the exact local thread.
- Rename changes only the card title; messages and memory stay intact.
- Inside a chat, History opens every message. Close history to return to the same conversation.
- From the list, Delete opens a confirmation. Cancel changes nothing; Delete permanently removes the conversation and its local history.
03 · Solo
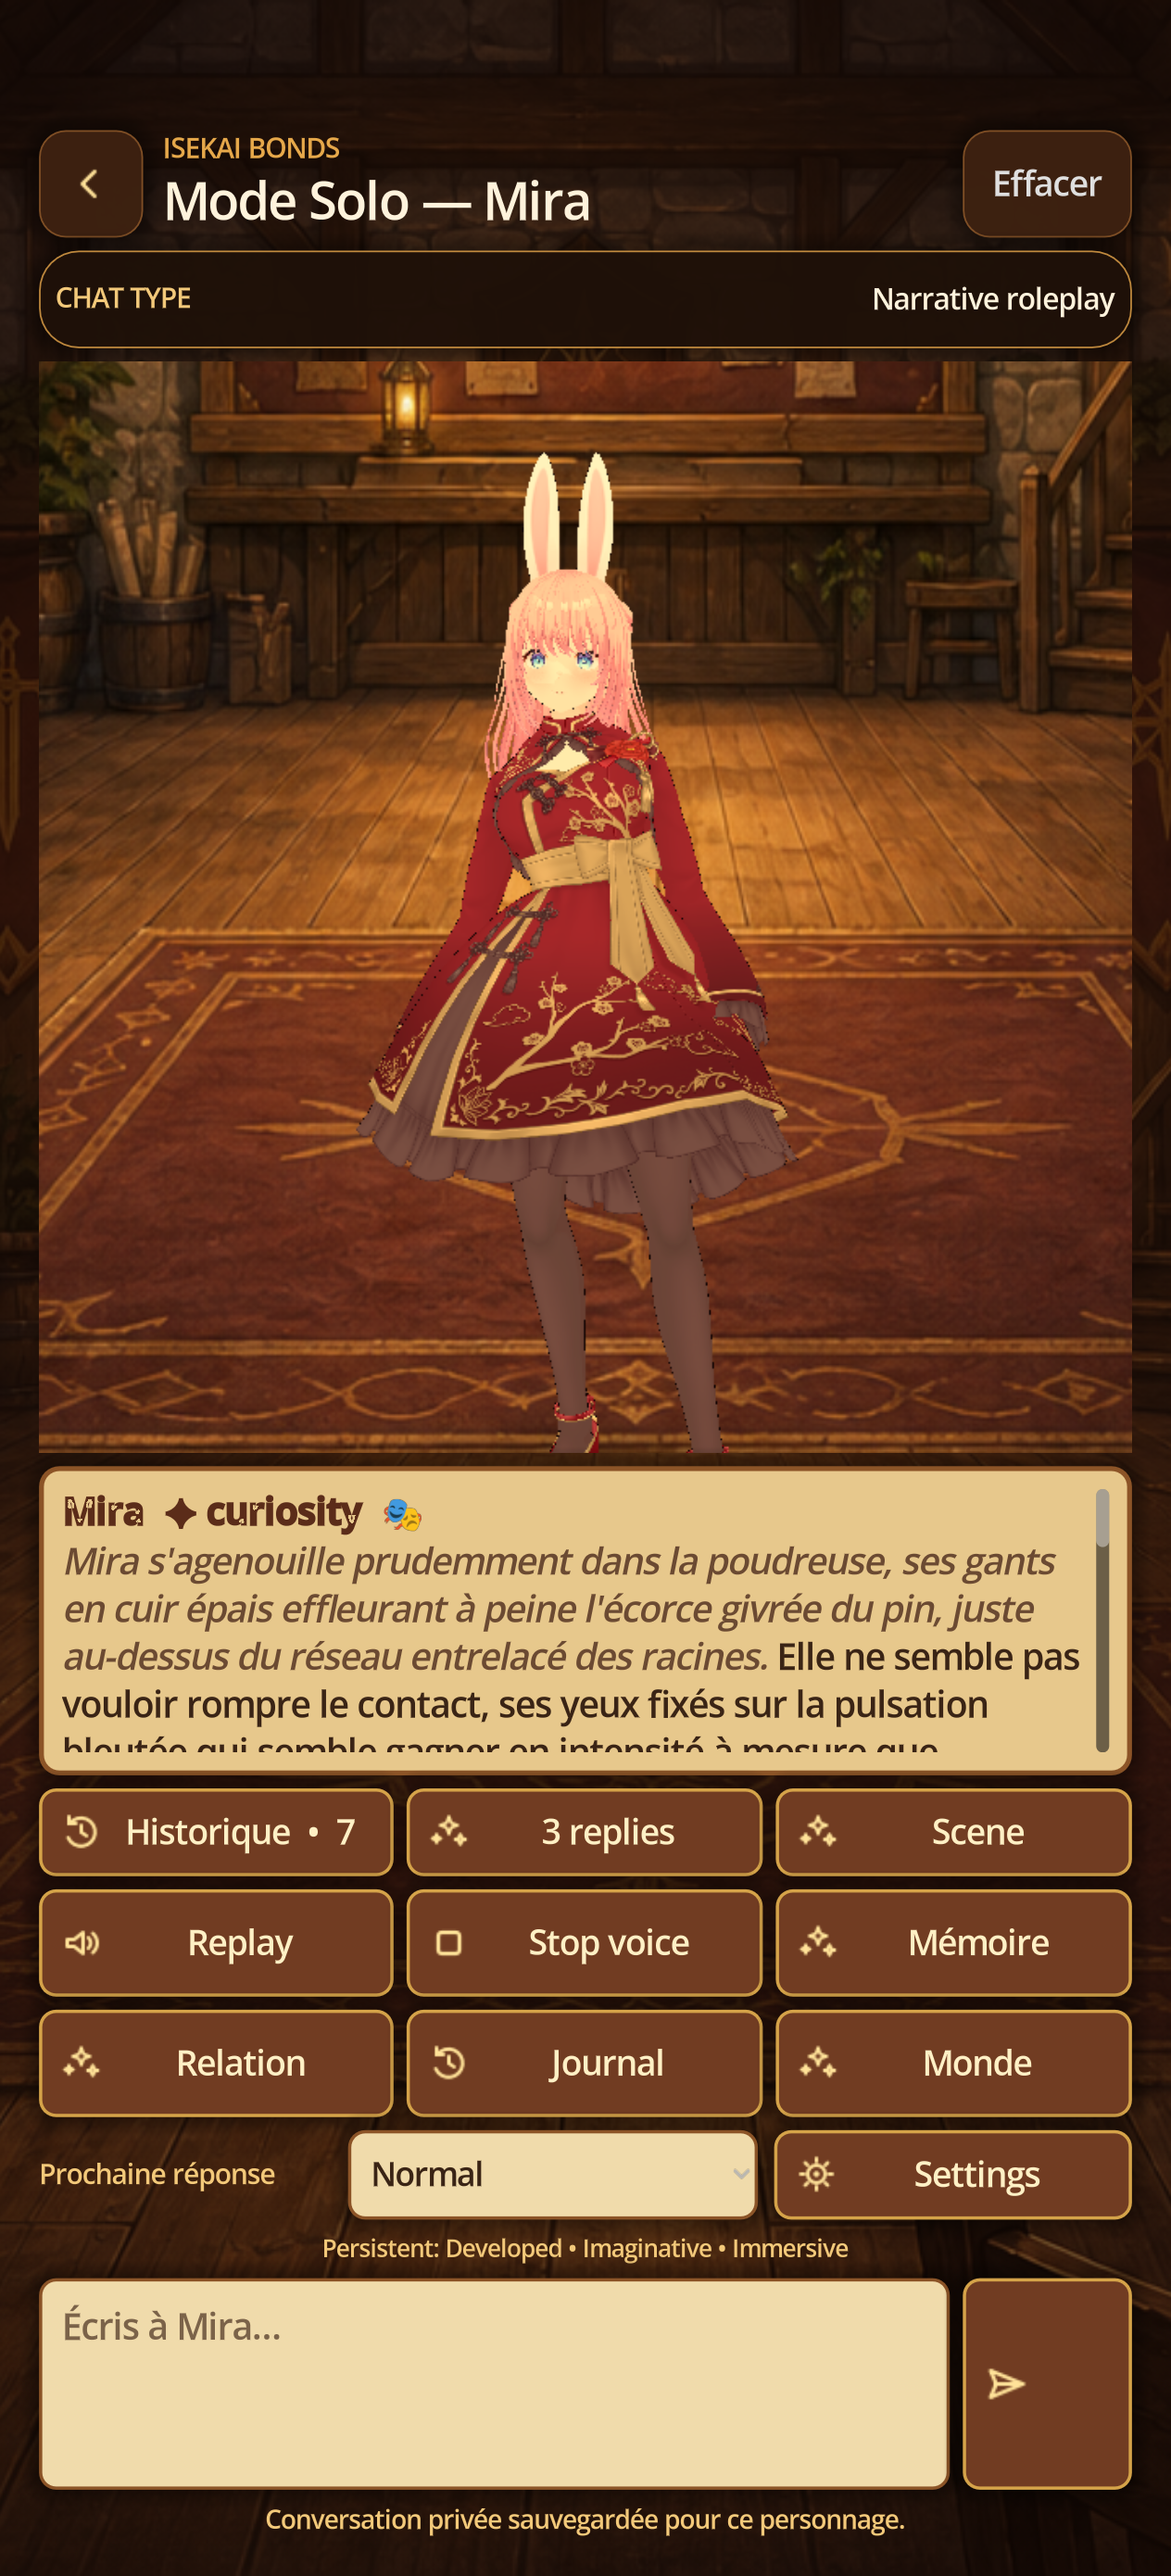
Solo chat and solo roleplay
Steps
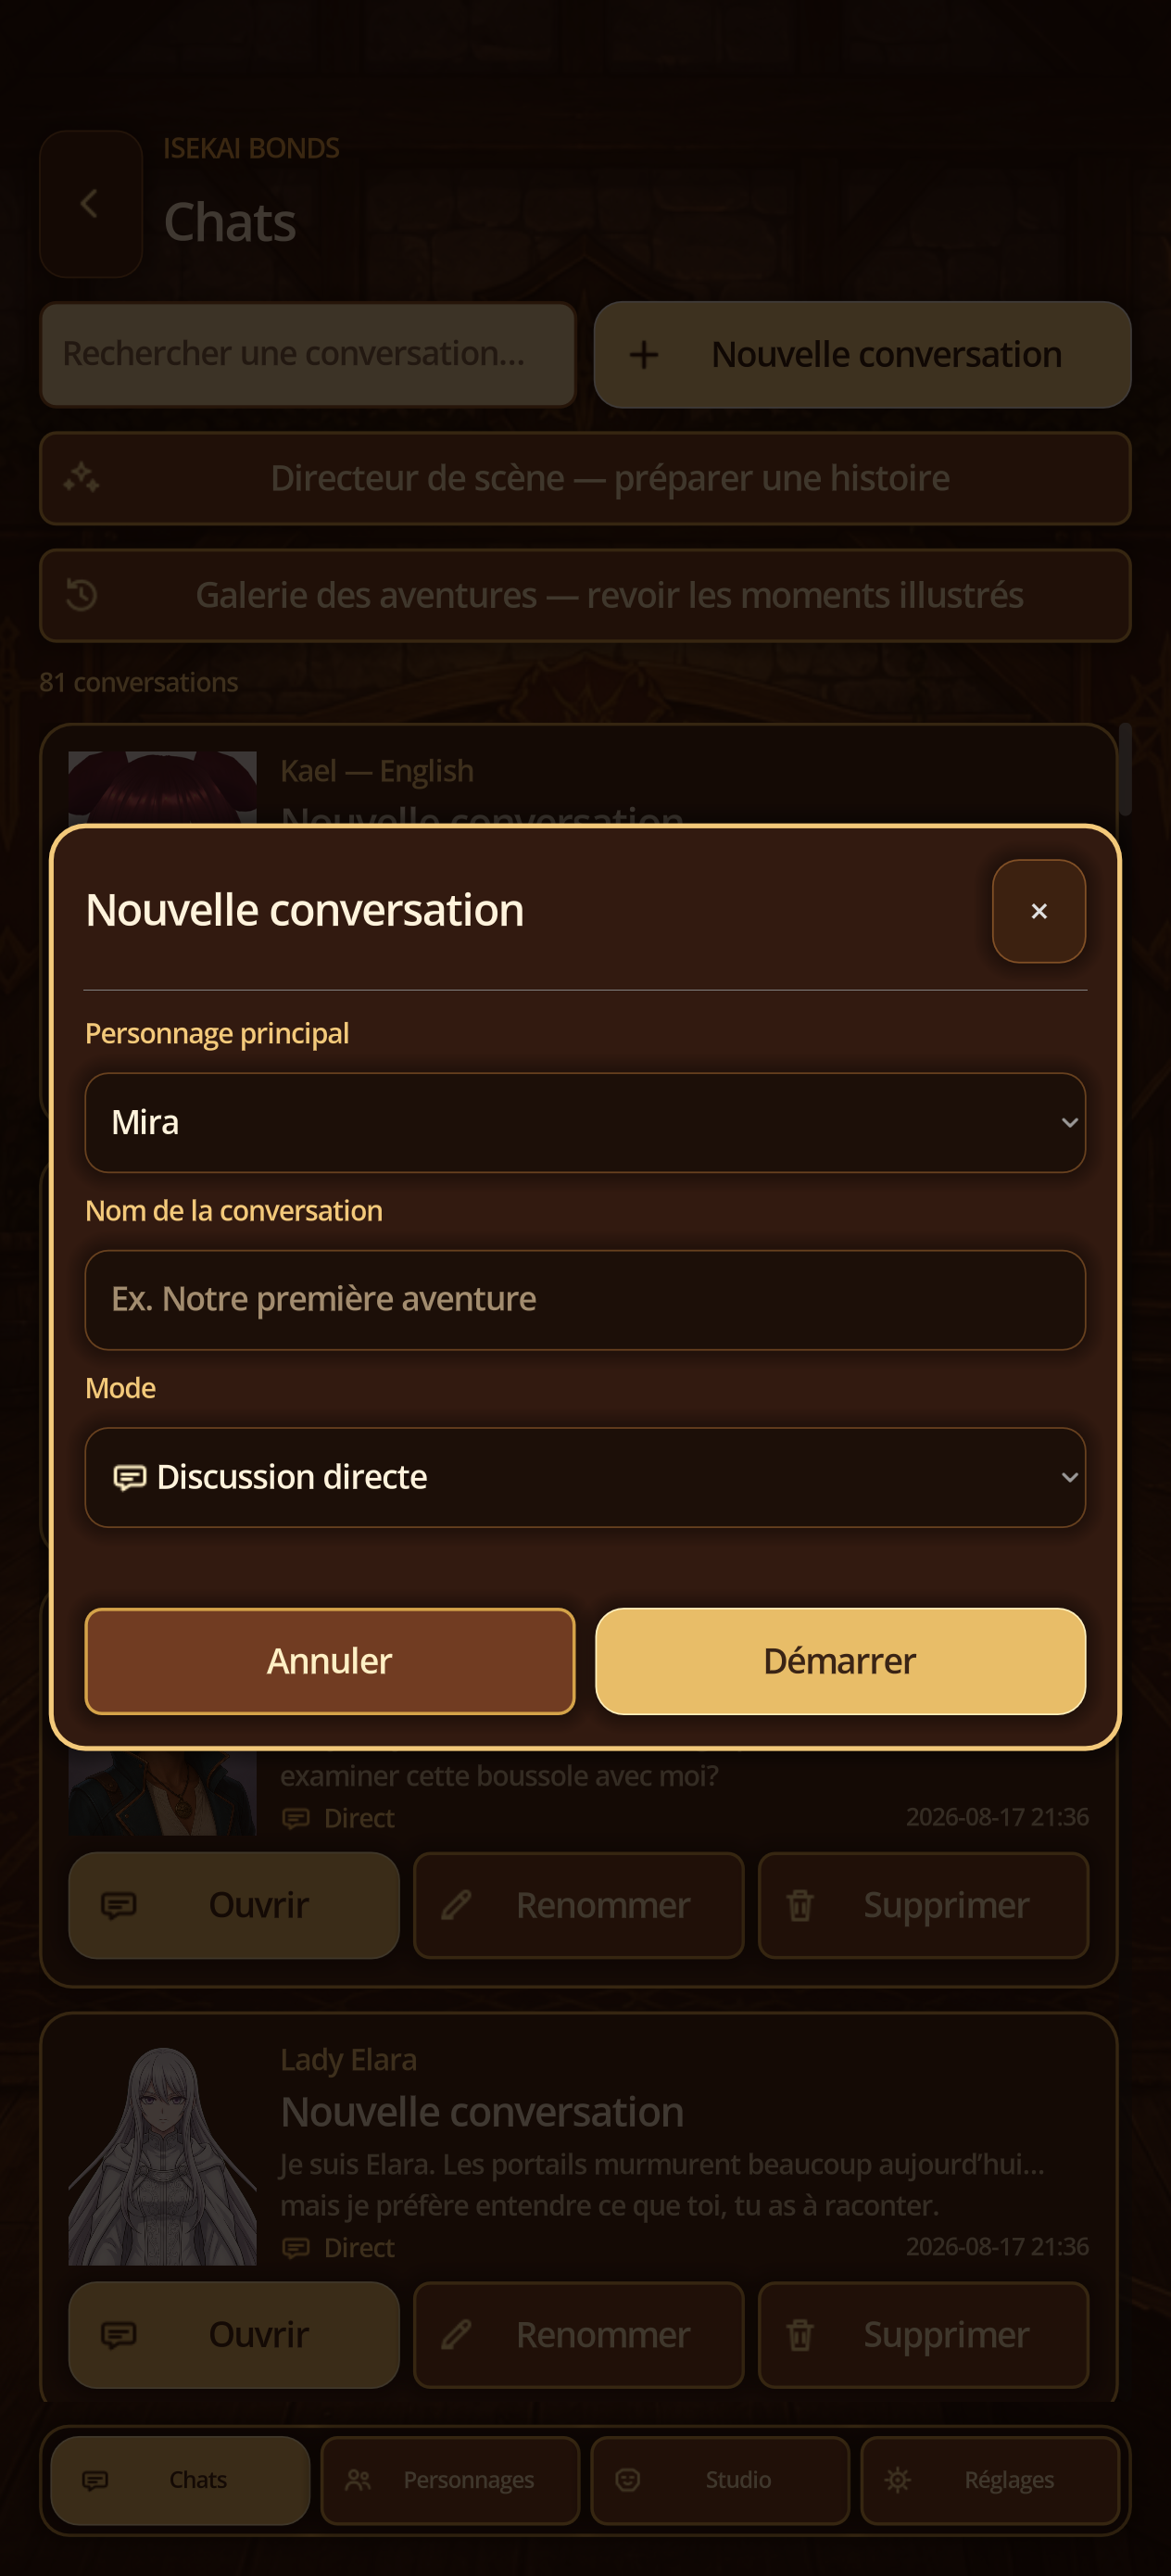
- Open Chat, then New conversation.
- Select a character, name, and Direct chat for a face-to-face conversation.
- Select Narrative roleplay for a narrated scene and optionally apply a reusable scene.
- Send a message. History restores exchanges; three suggestions offer possible replies.
09 · Message actions
Act on one exact point in history
Steps
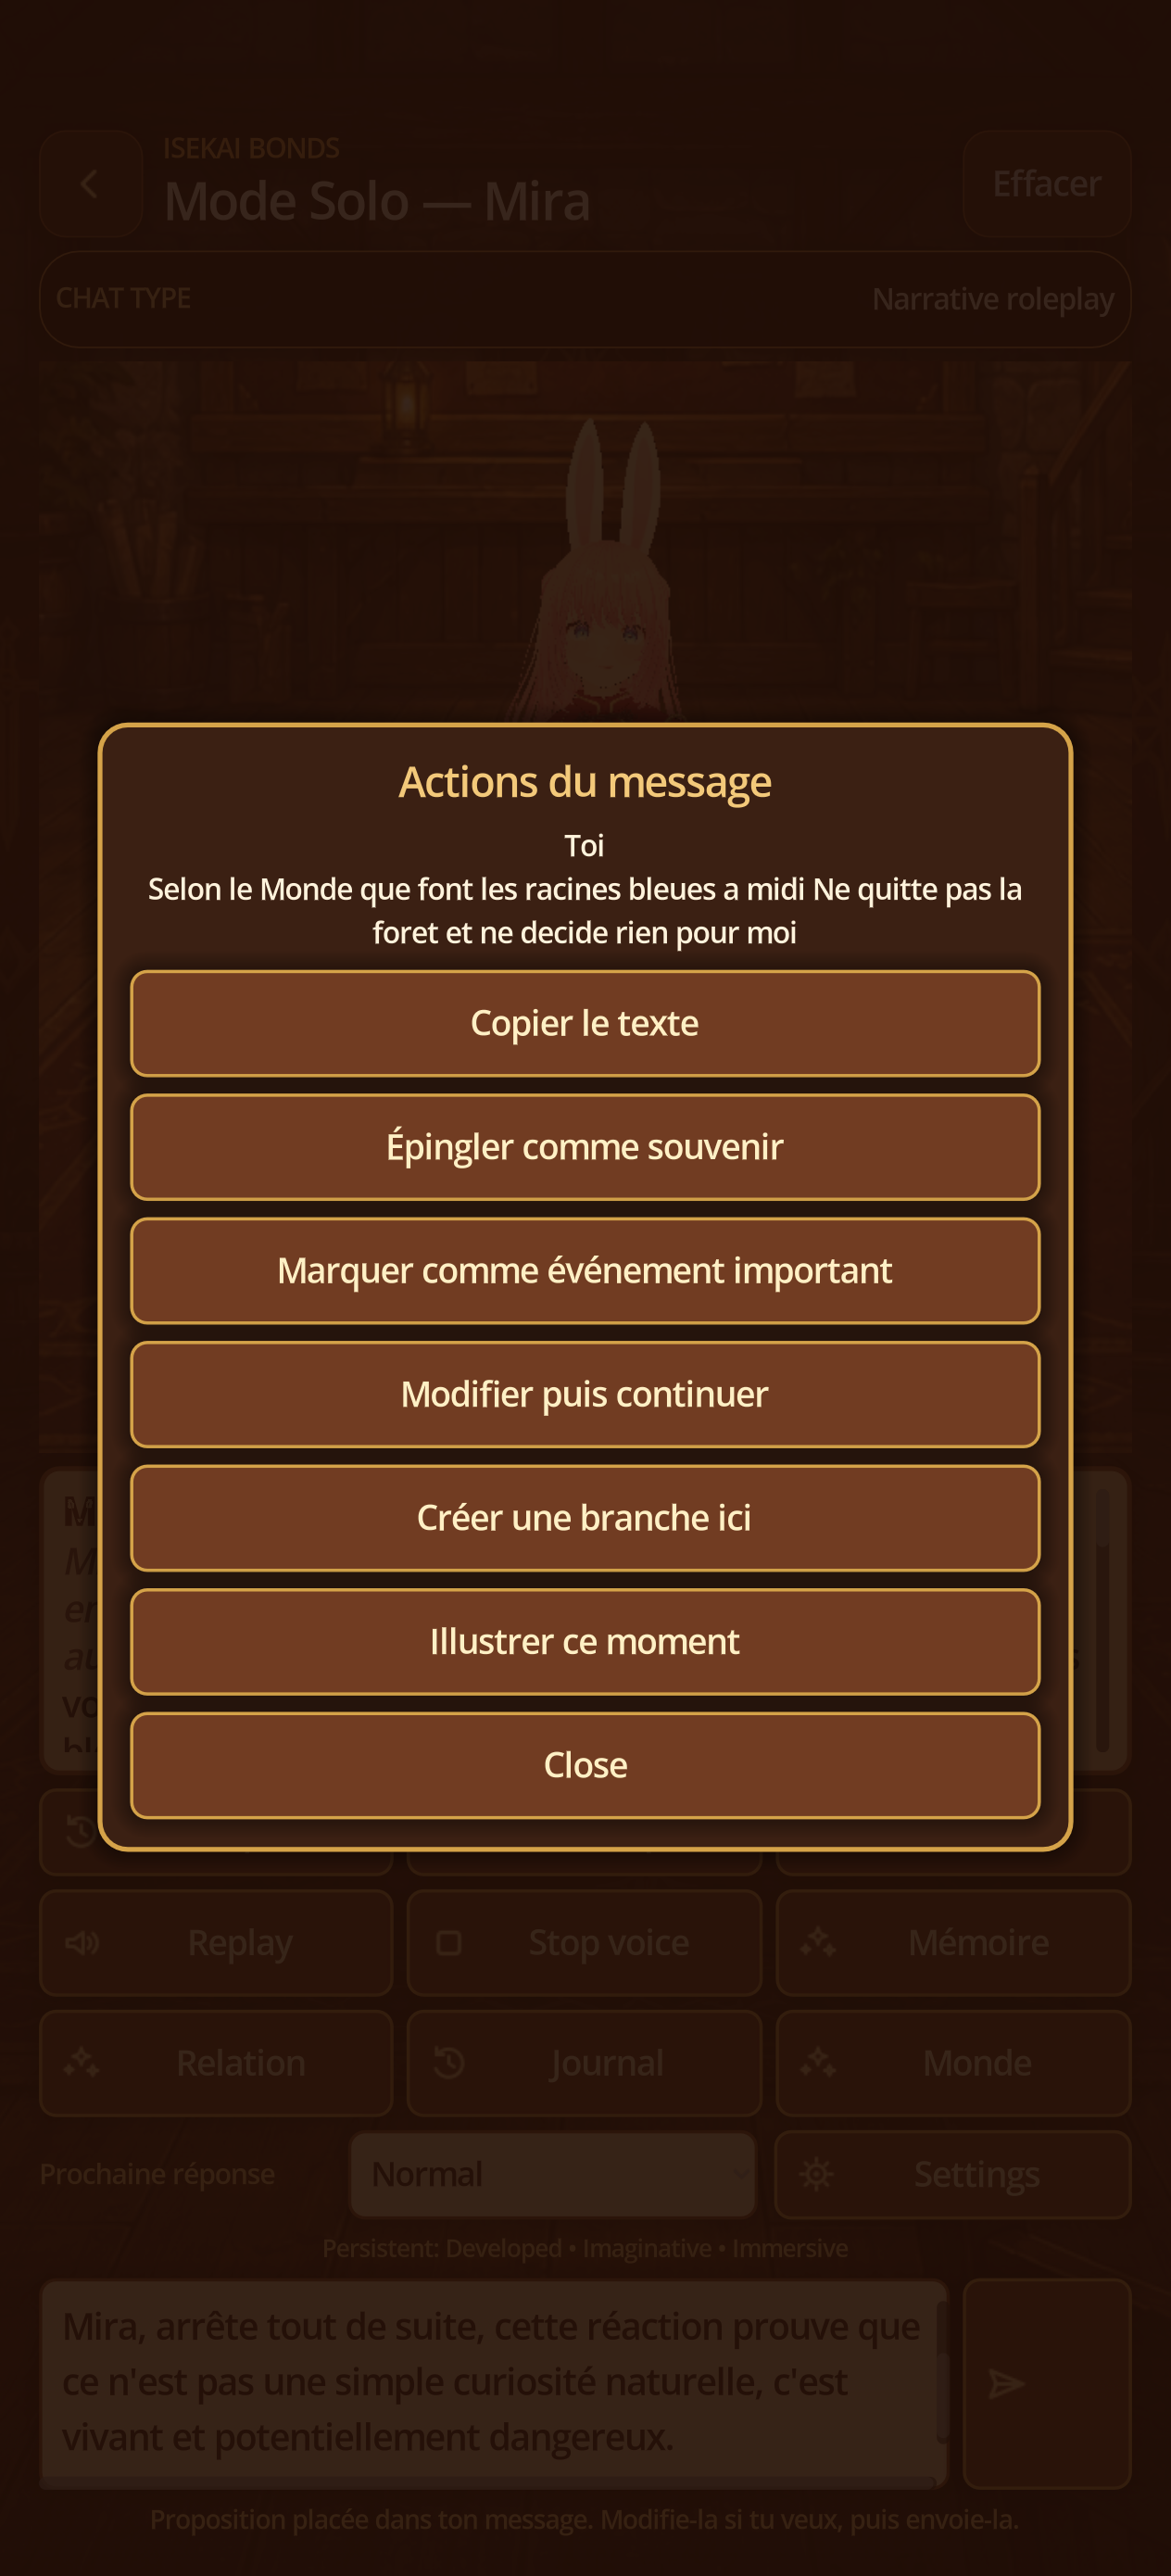
- In History, tap Actions on the relevant message.
- Copy text places only that message on the clipboard.
- Pin as memory and Mark as important event enrich user-controlled memory.
- Edit then continue rewrites that point and rebuilds the continuation; Create a branch here preserves the original and opens a derived conversation.
- Illustrate this moment prepares an image from that message. Report this content appears only on AI replies.
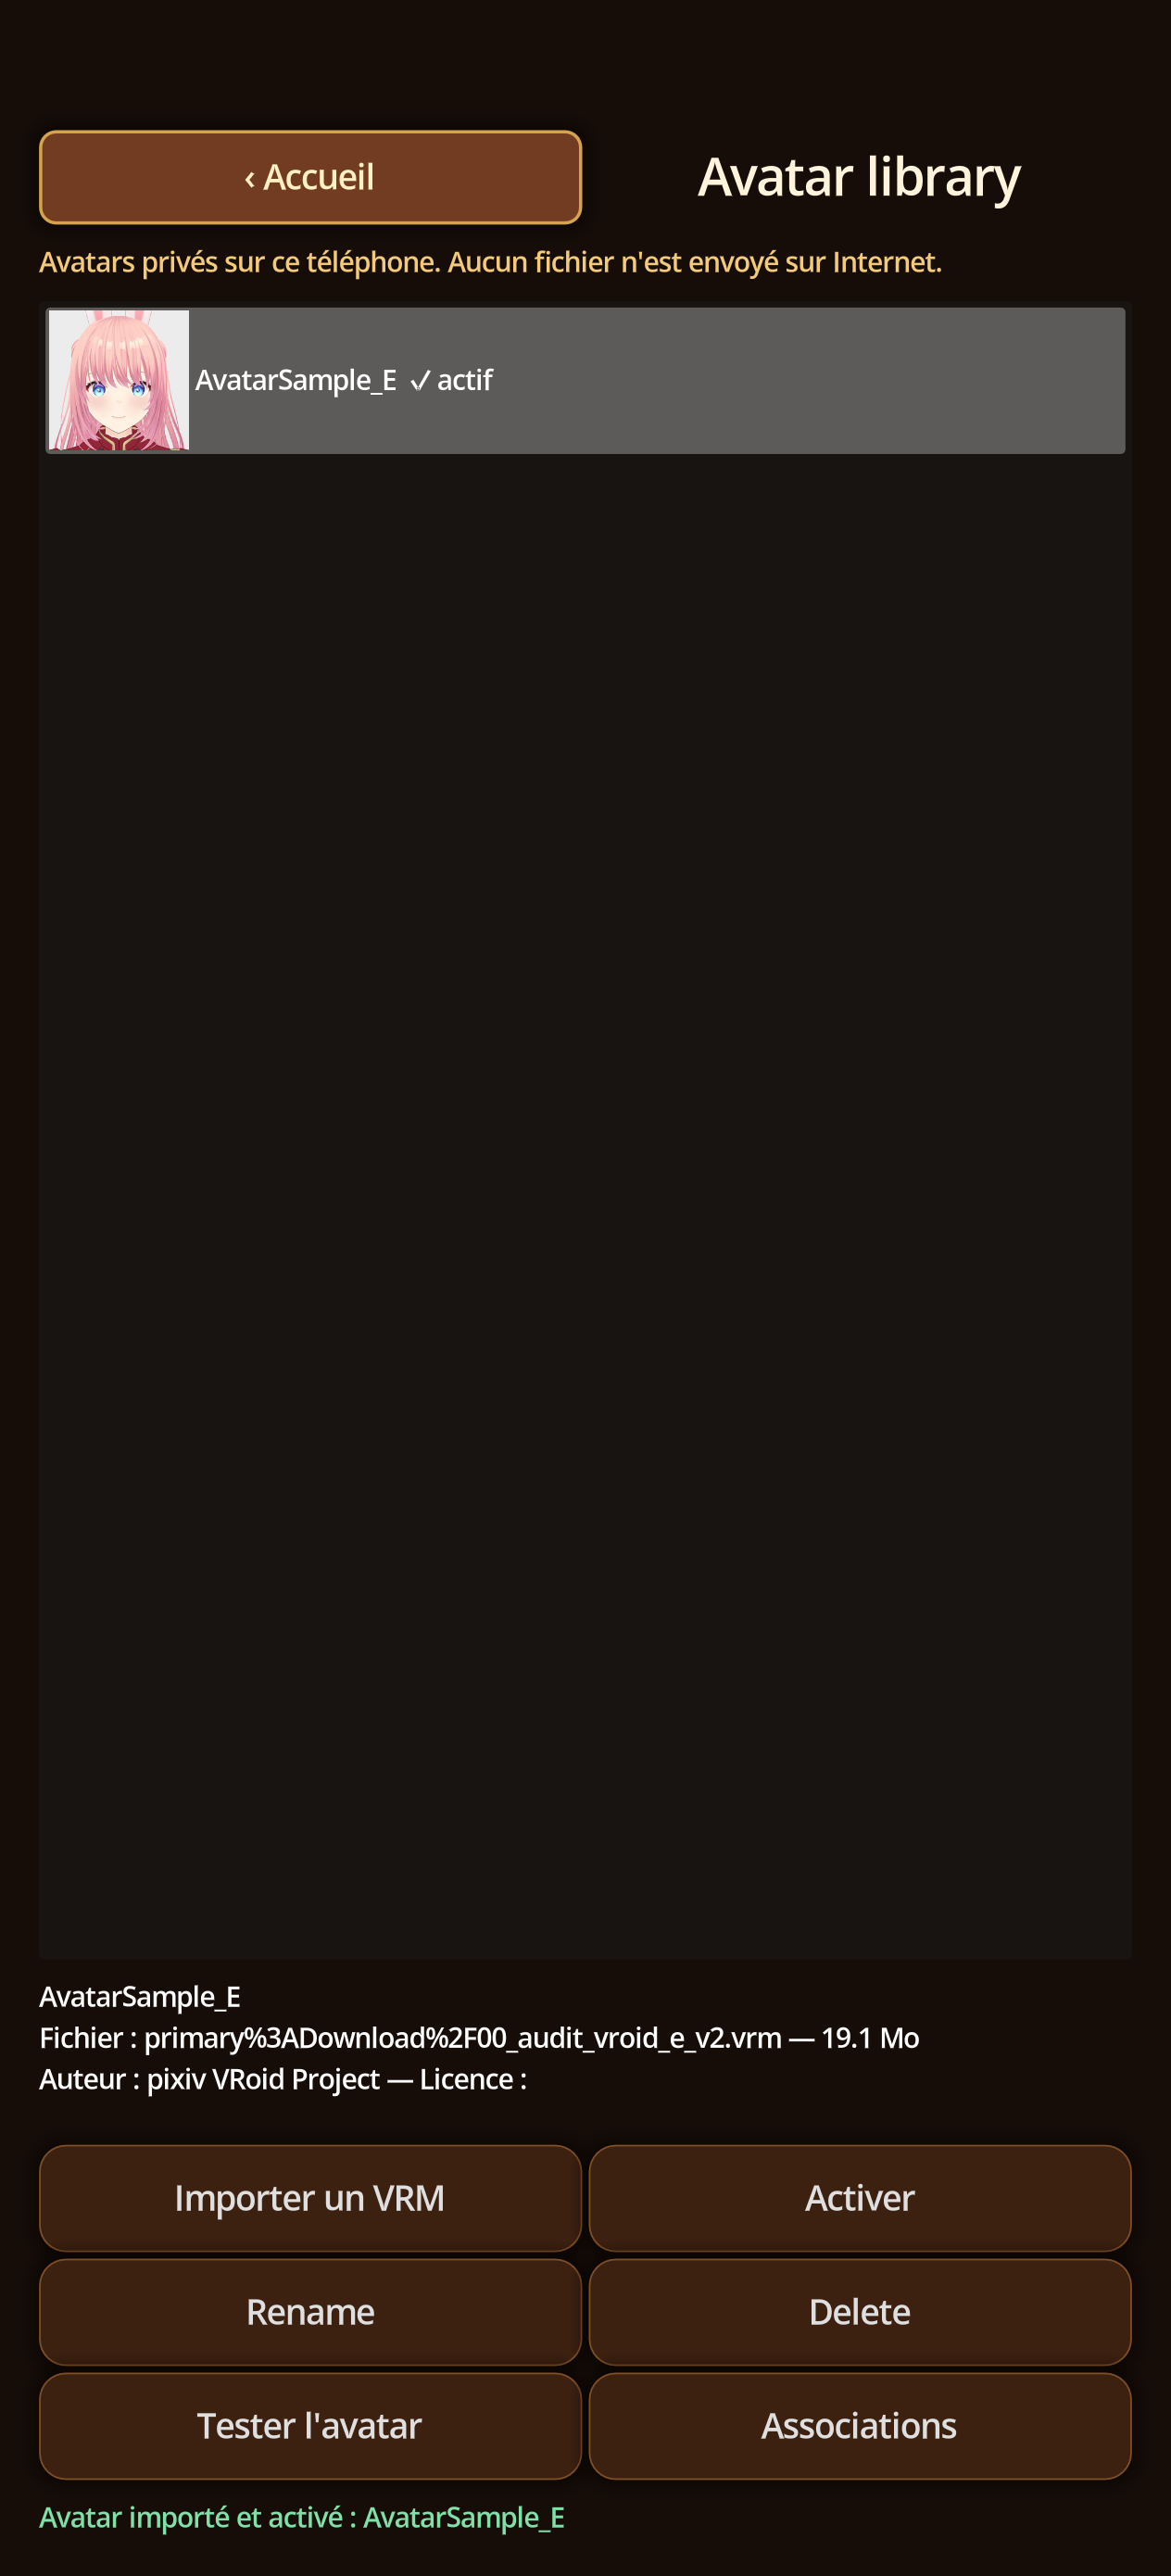
04C · Studio avatar
Test the avatar prototype
Steps
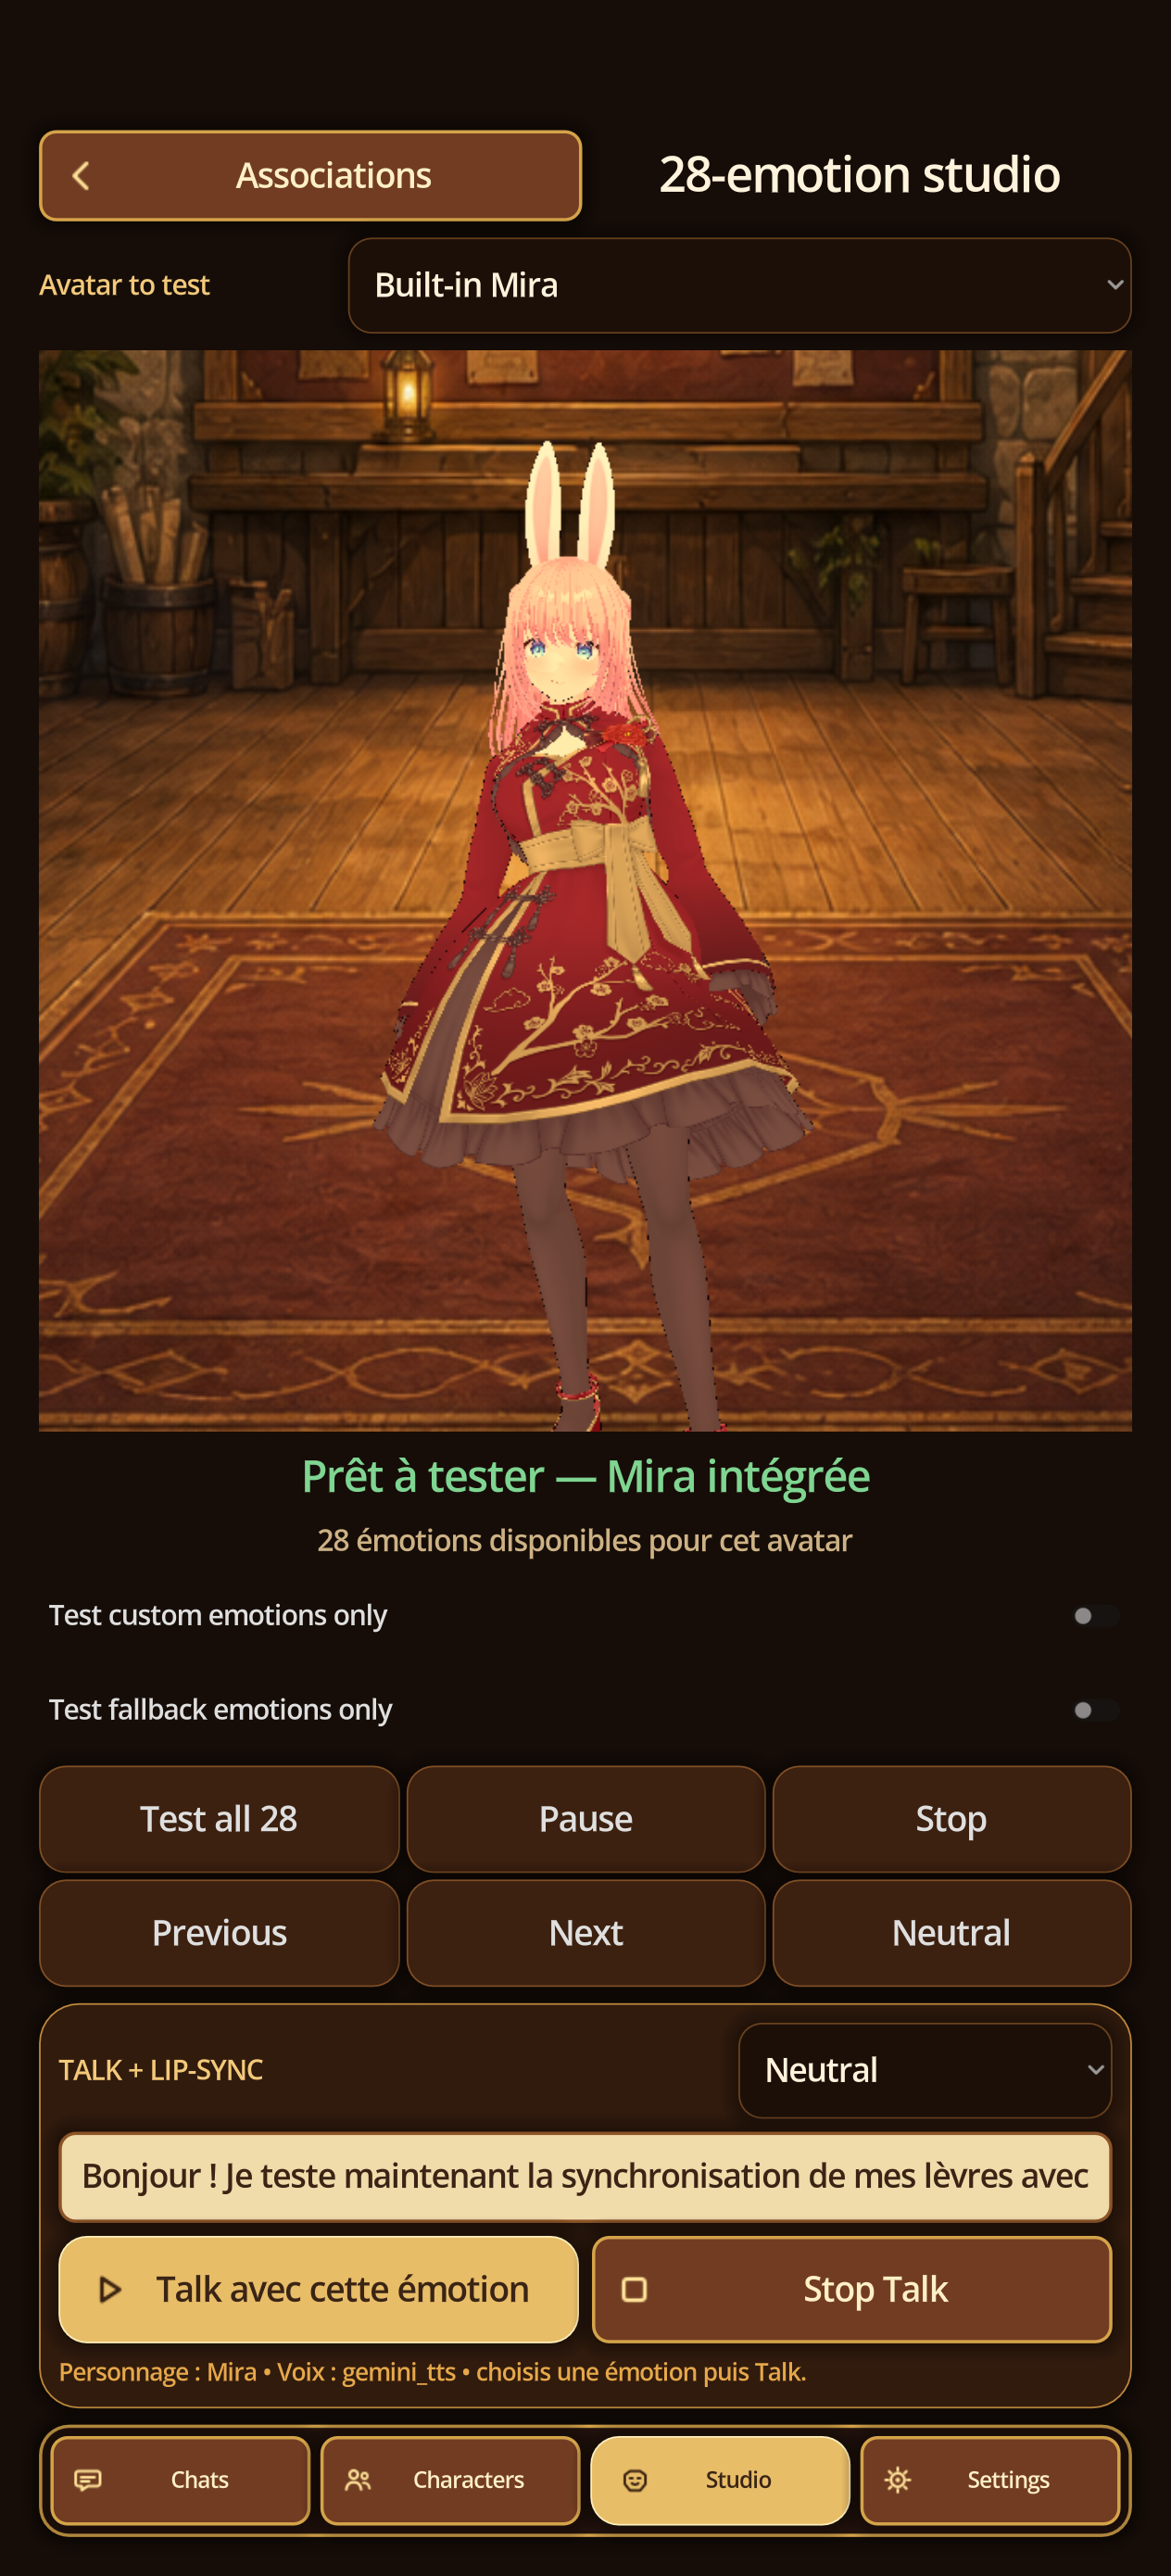
- Open Studio → Test theavatar from the library.
- Wait for the VRM load, then check the settings, rotation, animation, expressions and labial synchronization.
- If the rendering remains empty, go back to the library, reactivate theavatar and check its provenance/licence.
06A · New chat
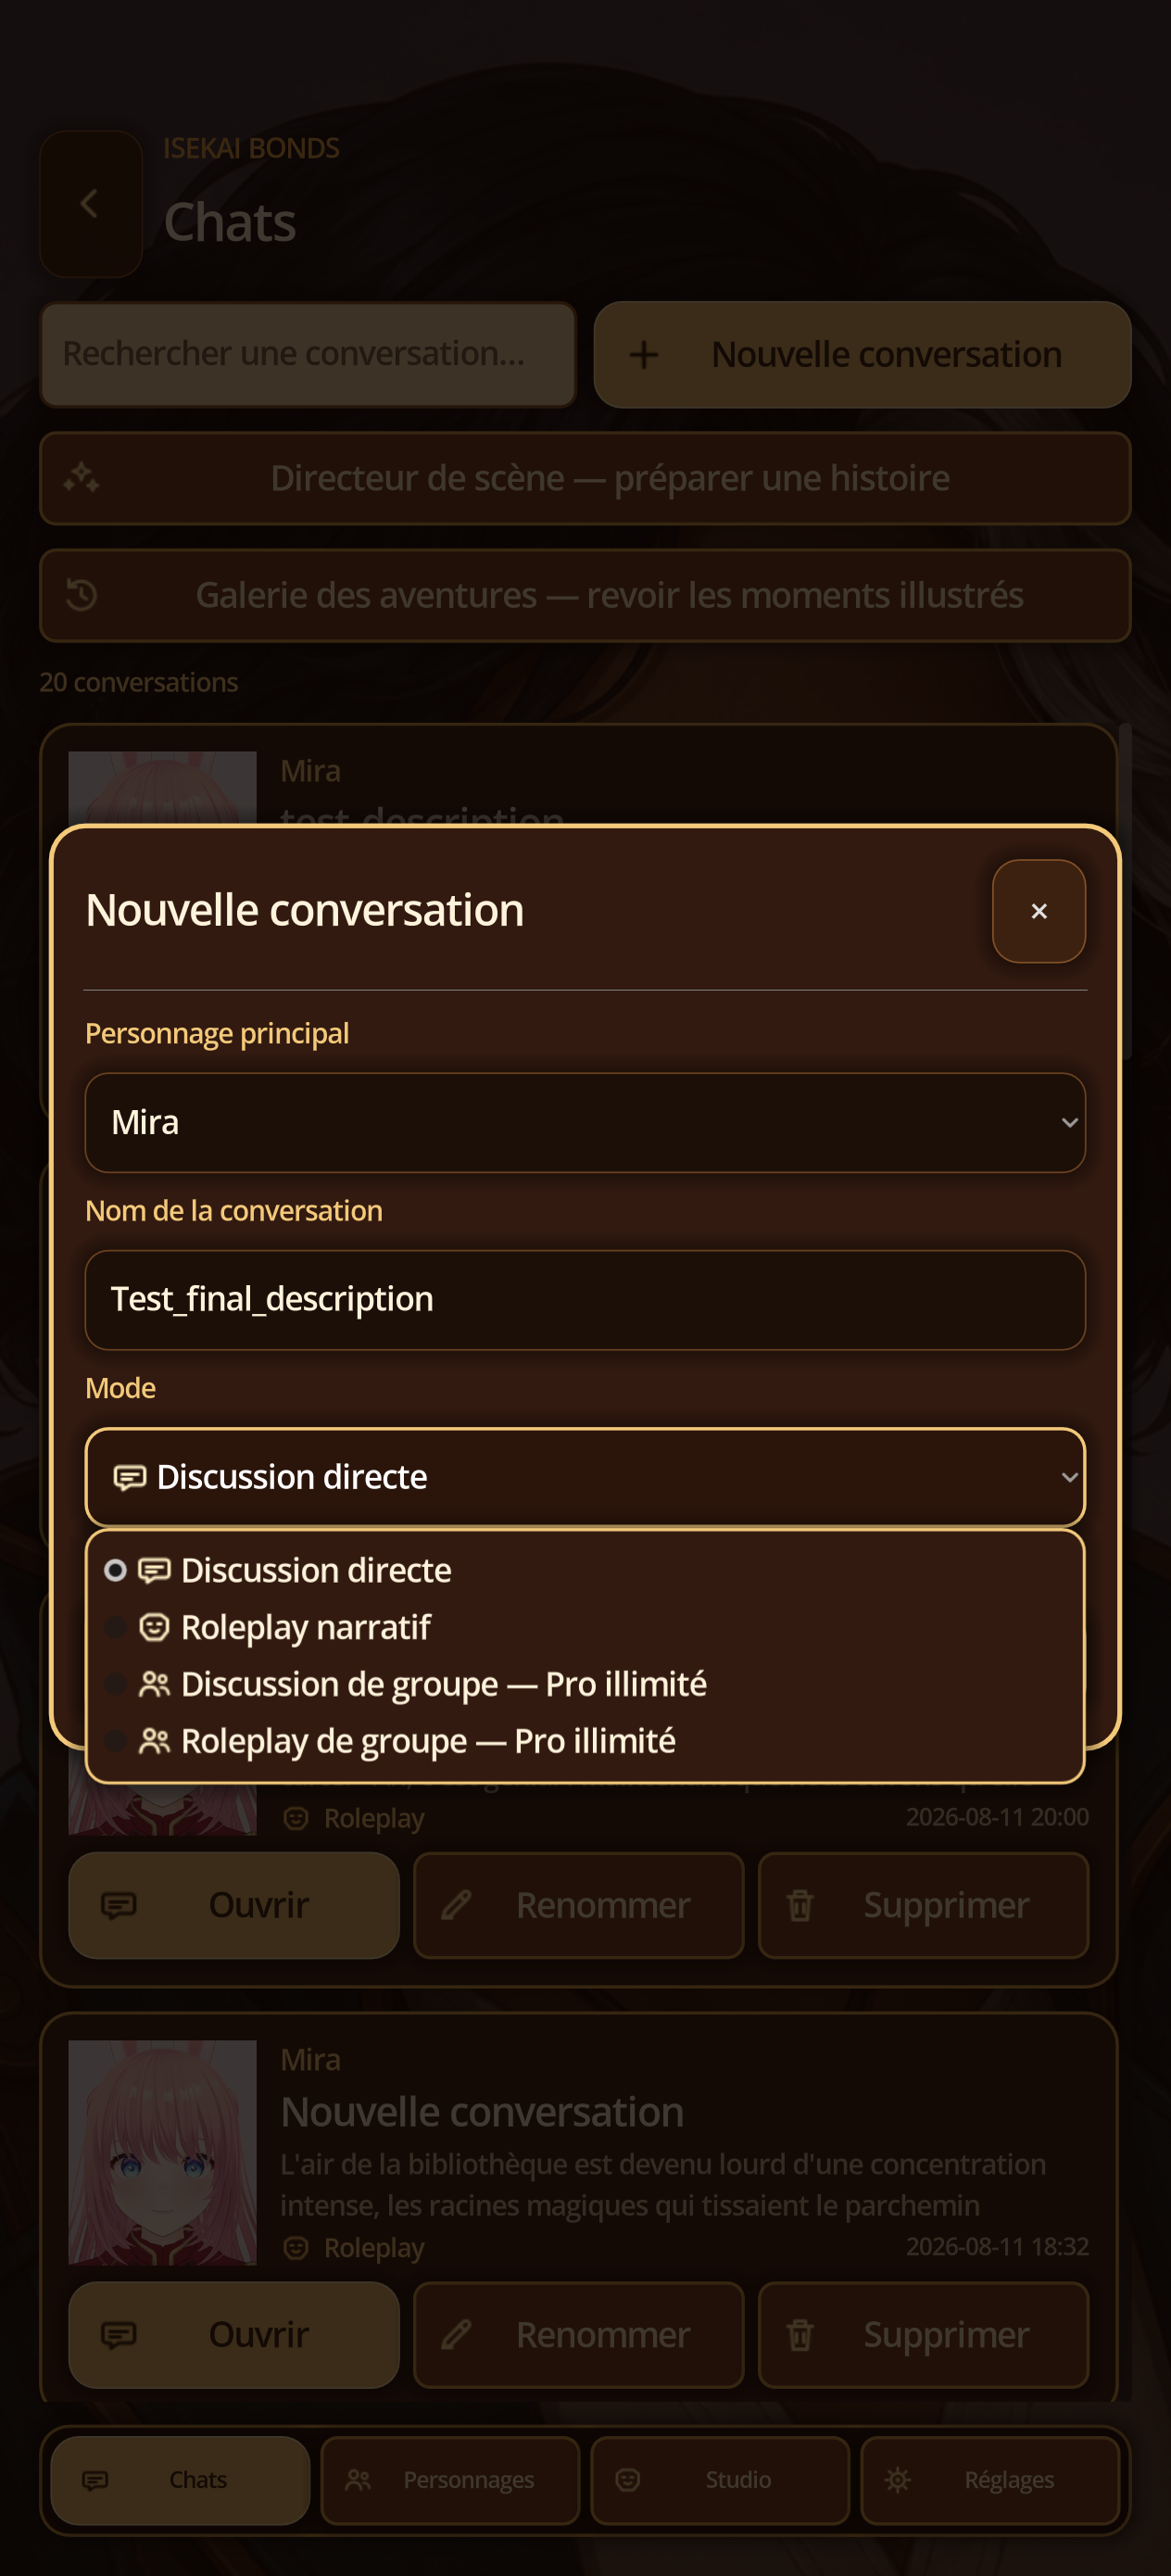
Choose the mode actually available
Steps
- Touch Chats → New conversation.
- Open the Type menu: Direct Discussion, Narrative Roleplay, Group Discussion or Group Roleplay.
- Select the character(s); the direct group and the Roleplay group are subject to the Free/Pro limits displayed.
- Validate and check that the Open Screen Type language matches your choice.
06B · Conversations
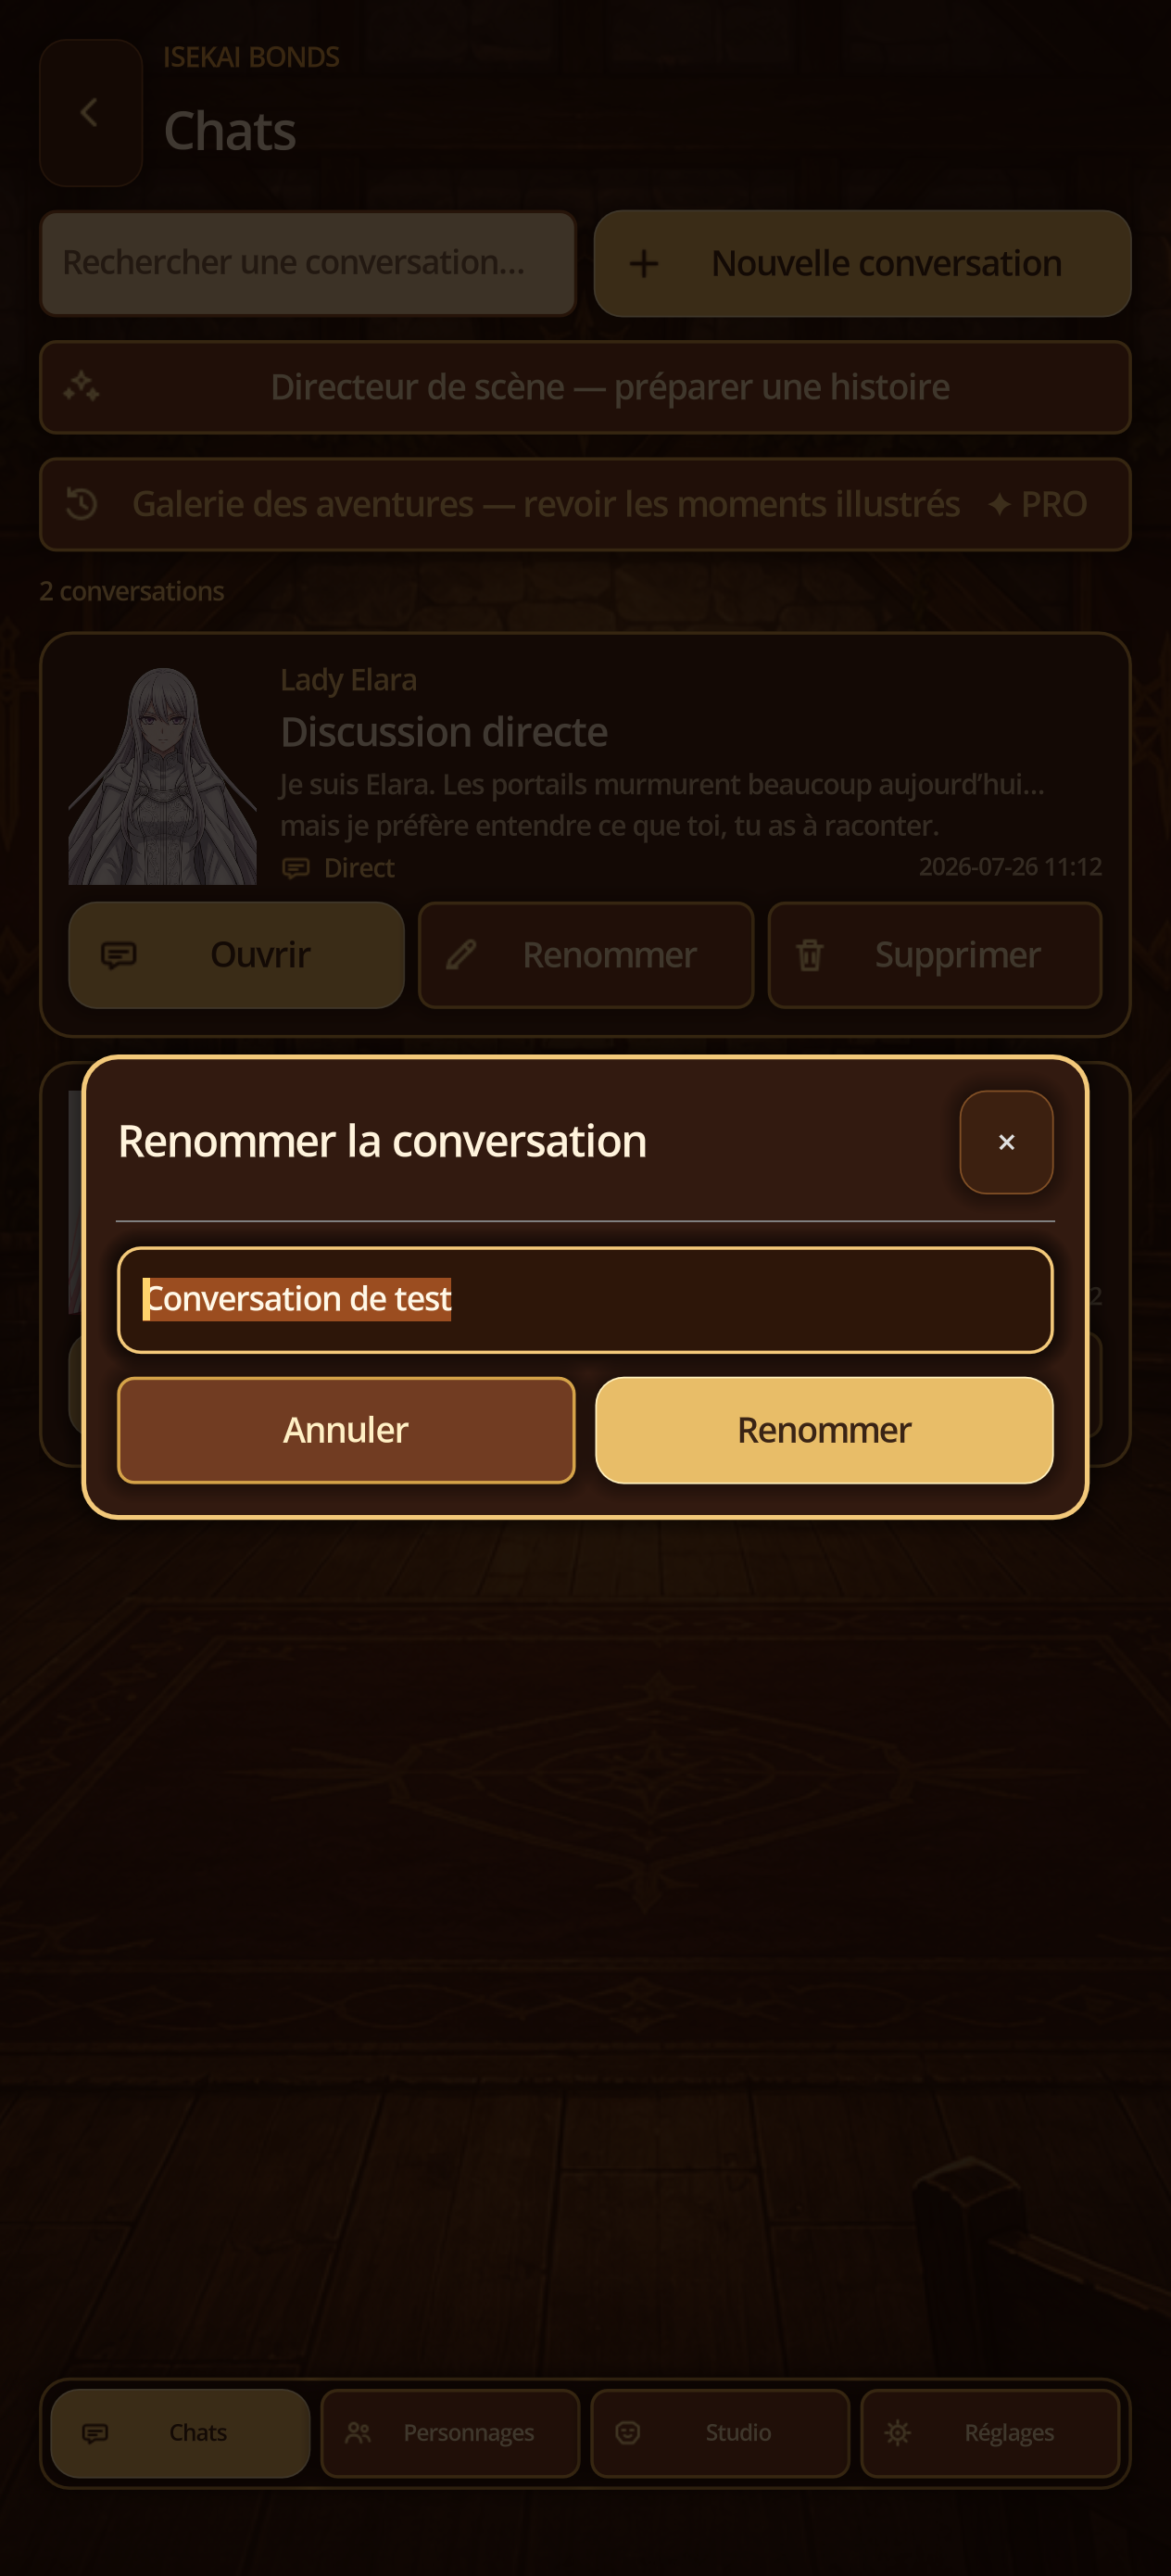
Rename without losing history
Steps
- In Chats, find a conversation card and tap Rename.
- Replace the selected title with a non-sensitive name and then tap Rename.
- Reopen the conversation and check that its messages, memory, journal and world are unchanged.
07A · Background
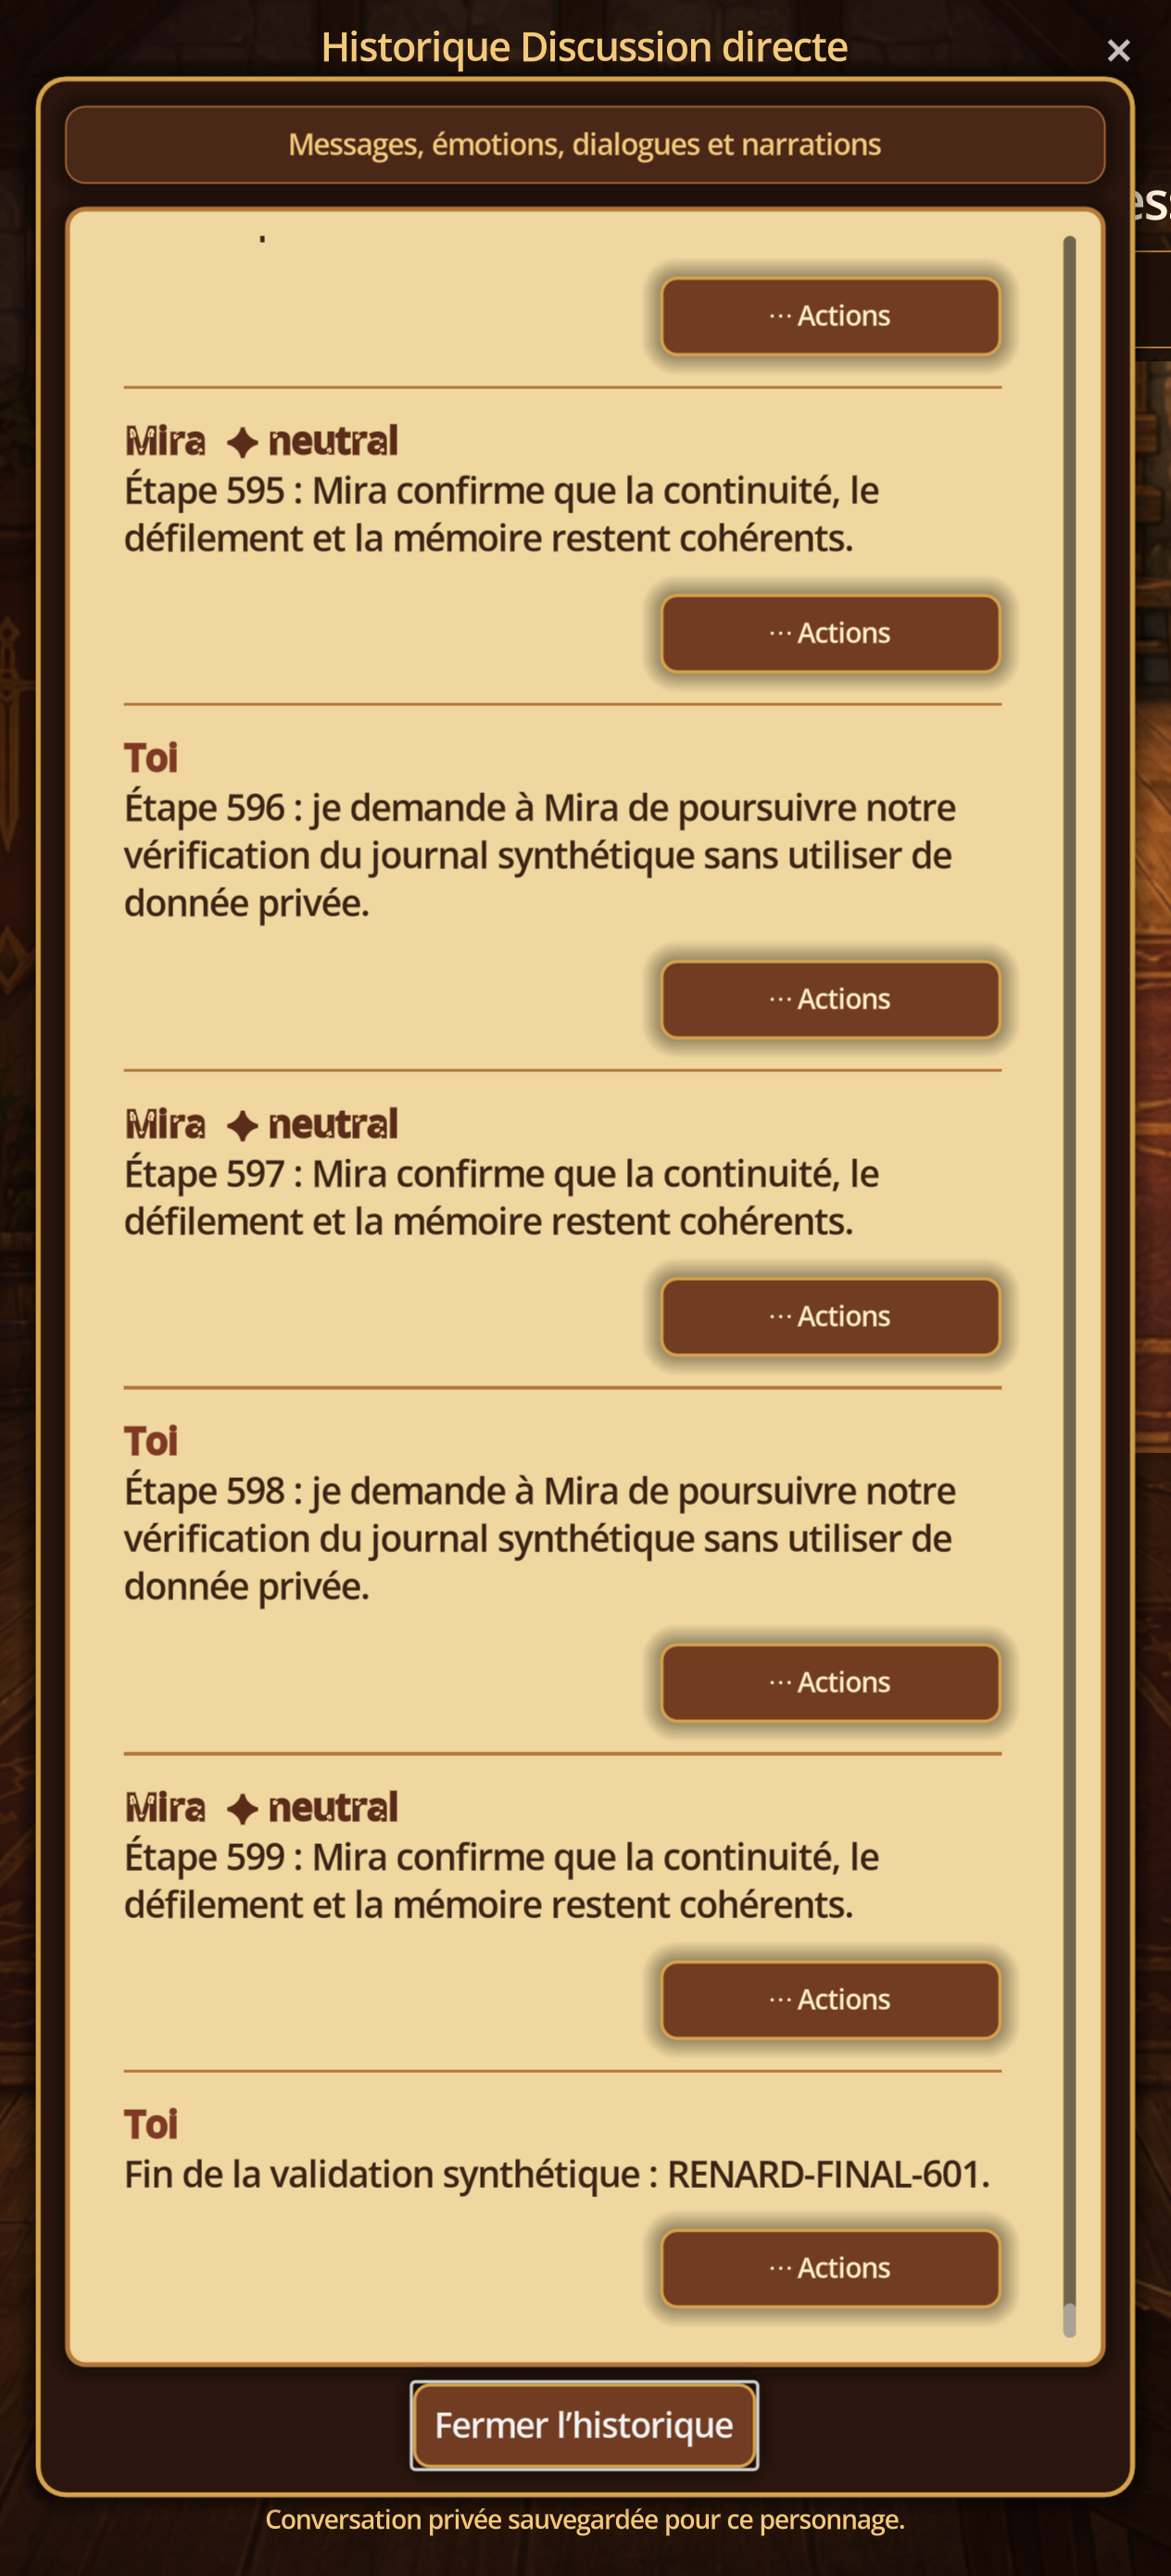
Check and retrieve multiple messages
Steps
- In a conversation, touch History.
- Scroll several tricks and find author, text, possible date and associated illustration.
- Tap Resume/Open Message when the action is proposed; the conversation returns to this point without exposing any other history.
07B · Message actions
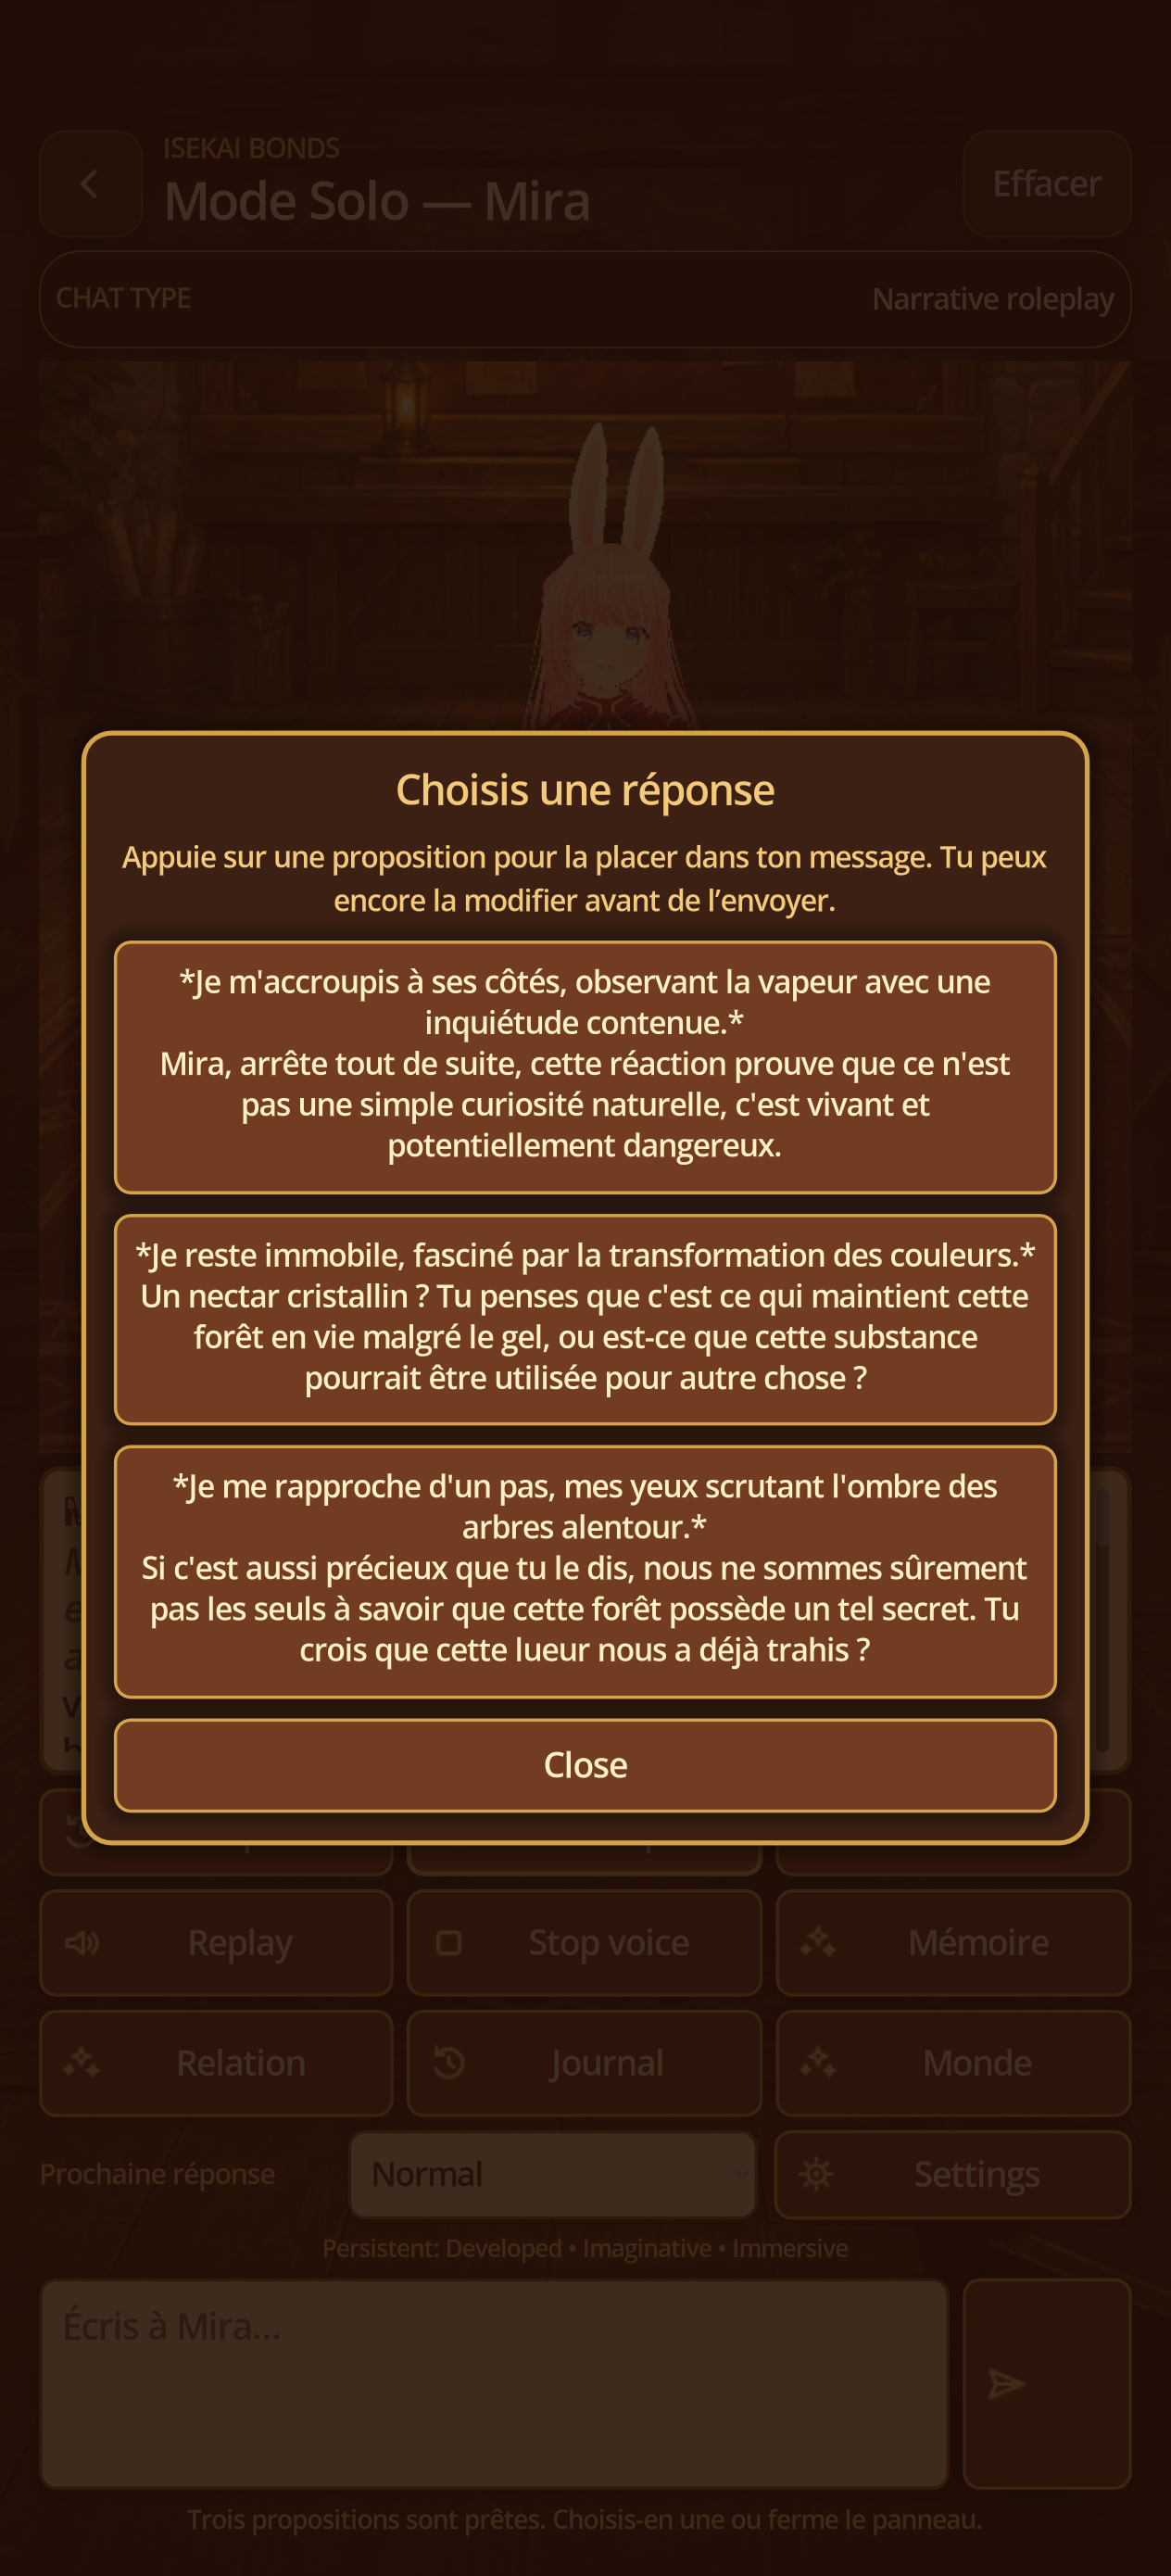
Compare three variants
Steps
- After a complete answer, tap 3 answers.
- Wait for the three proposals and read them before choosing; this action can consume an additional cloud or local call.
- Touch a variant to place it in the draft, edit it if necessary and then send it.
07C · Message actions
Create a safe branch
Steps
- Open History, choose a compatible message and tap Connect.
- Read the confirmation: the branch copies the messages to the selected point and can copy memory, journal, world and private images.
- Confirm, give a title to the branch and check that a new card appears in Chats.
07D · Message actions
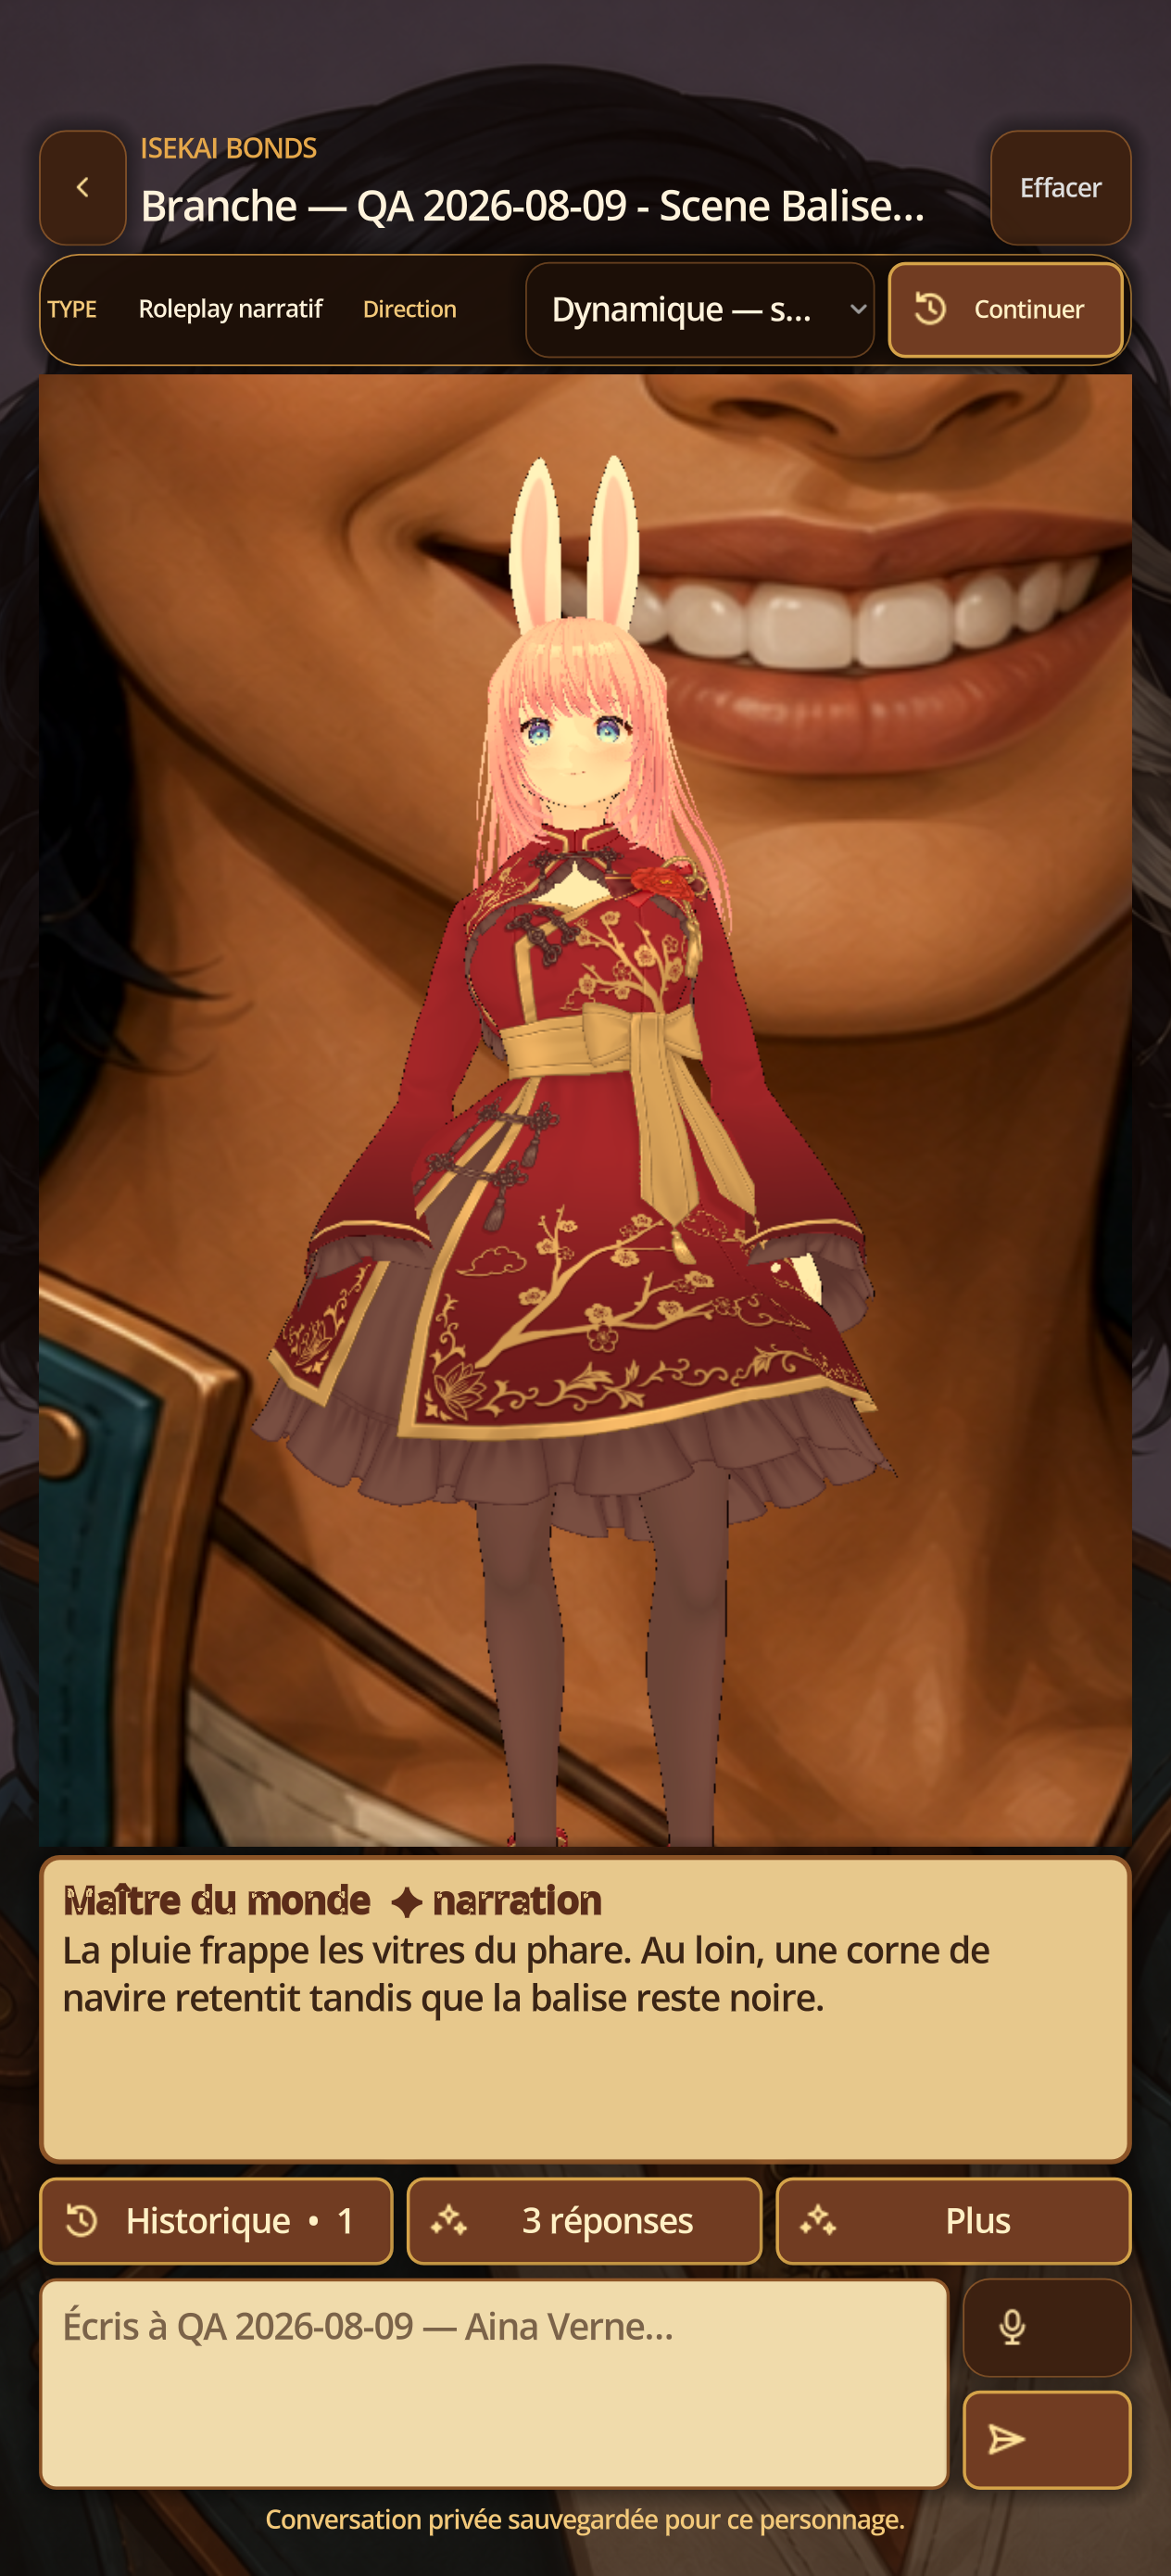
Check the branch created
Steps
- Return to Chats after confirmation.
- Open the new card marked Branch and review the last copied message.
- Compare Memory, Journal and World with the original before continuing a different timeline.
04 · Group and game
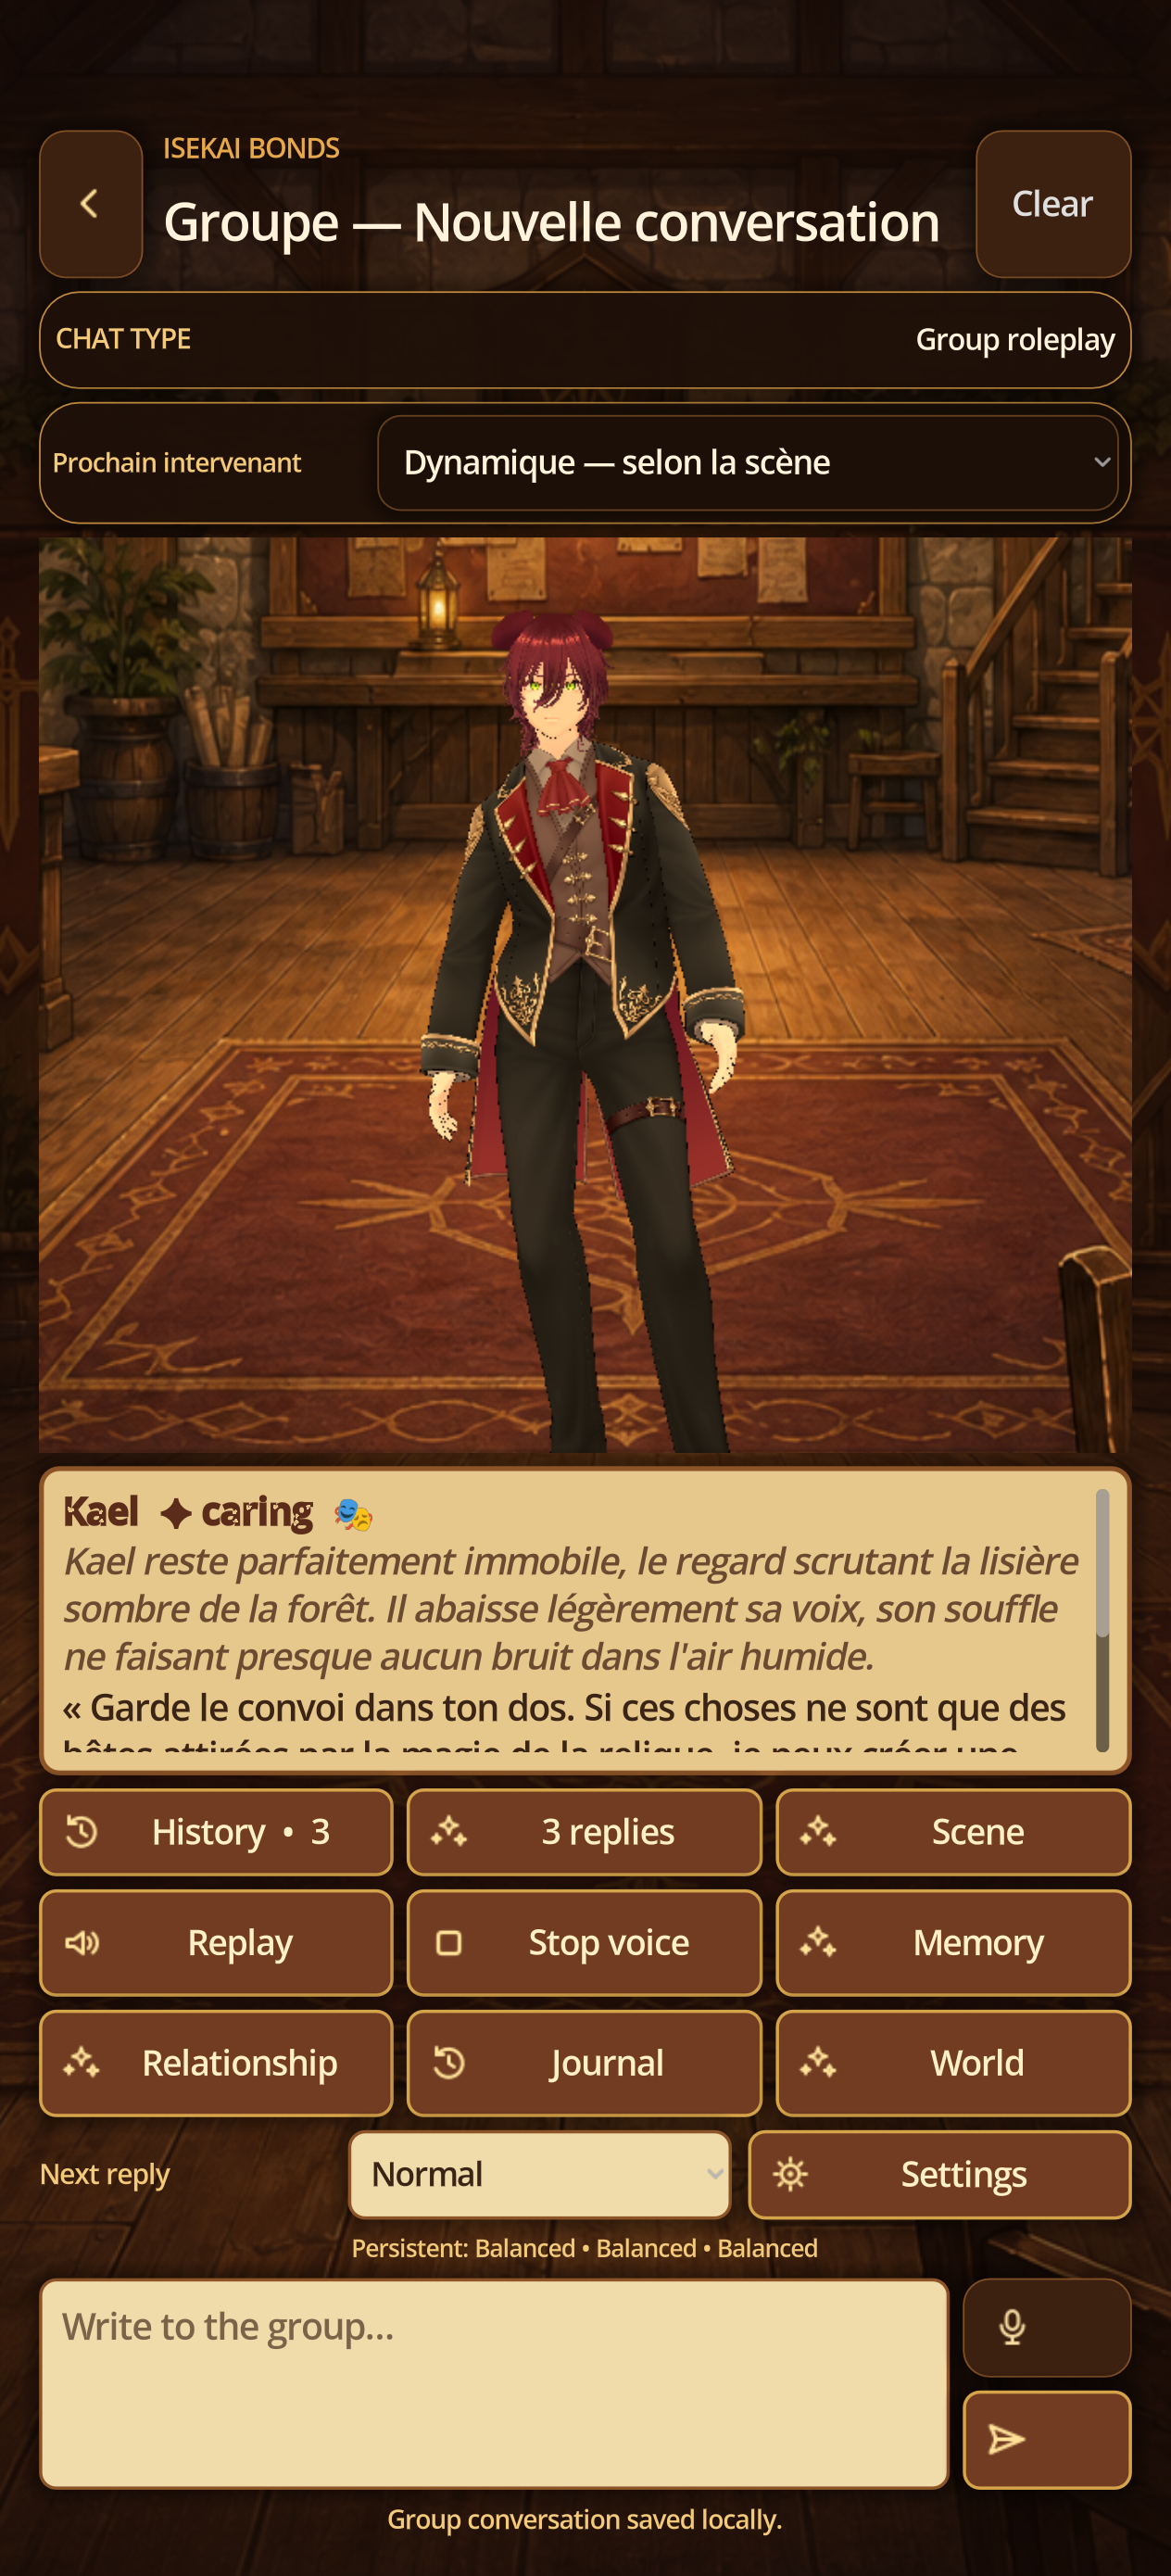
Bring several characters together
Steps
- Group chat accepts two or three same-language characters. Speaker can stay Dynamic - based on messages or force one companion.
- Pass turn changes the respondent without a fake player message or World Master.
- Group roleplay adds Direction: dynamic by scene, a forced character, or World Master - scene and NPCs.
- Continue advances the scene without creating a fake player message.
07 · Streaming
Watch the response arrive
Steps
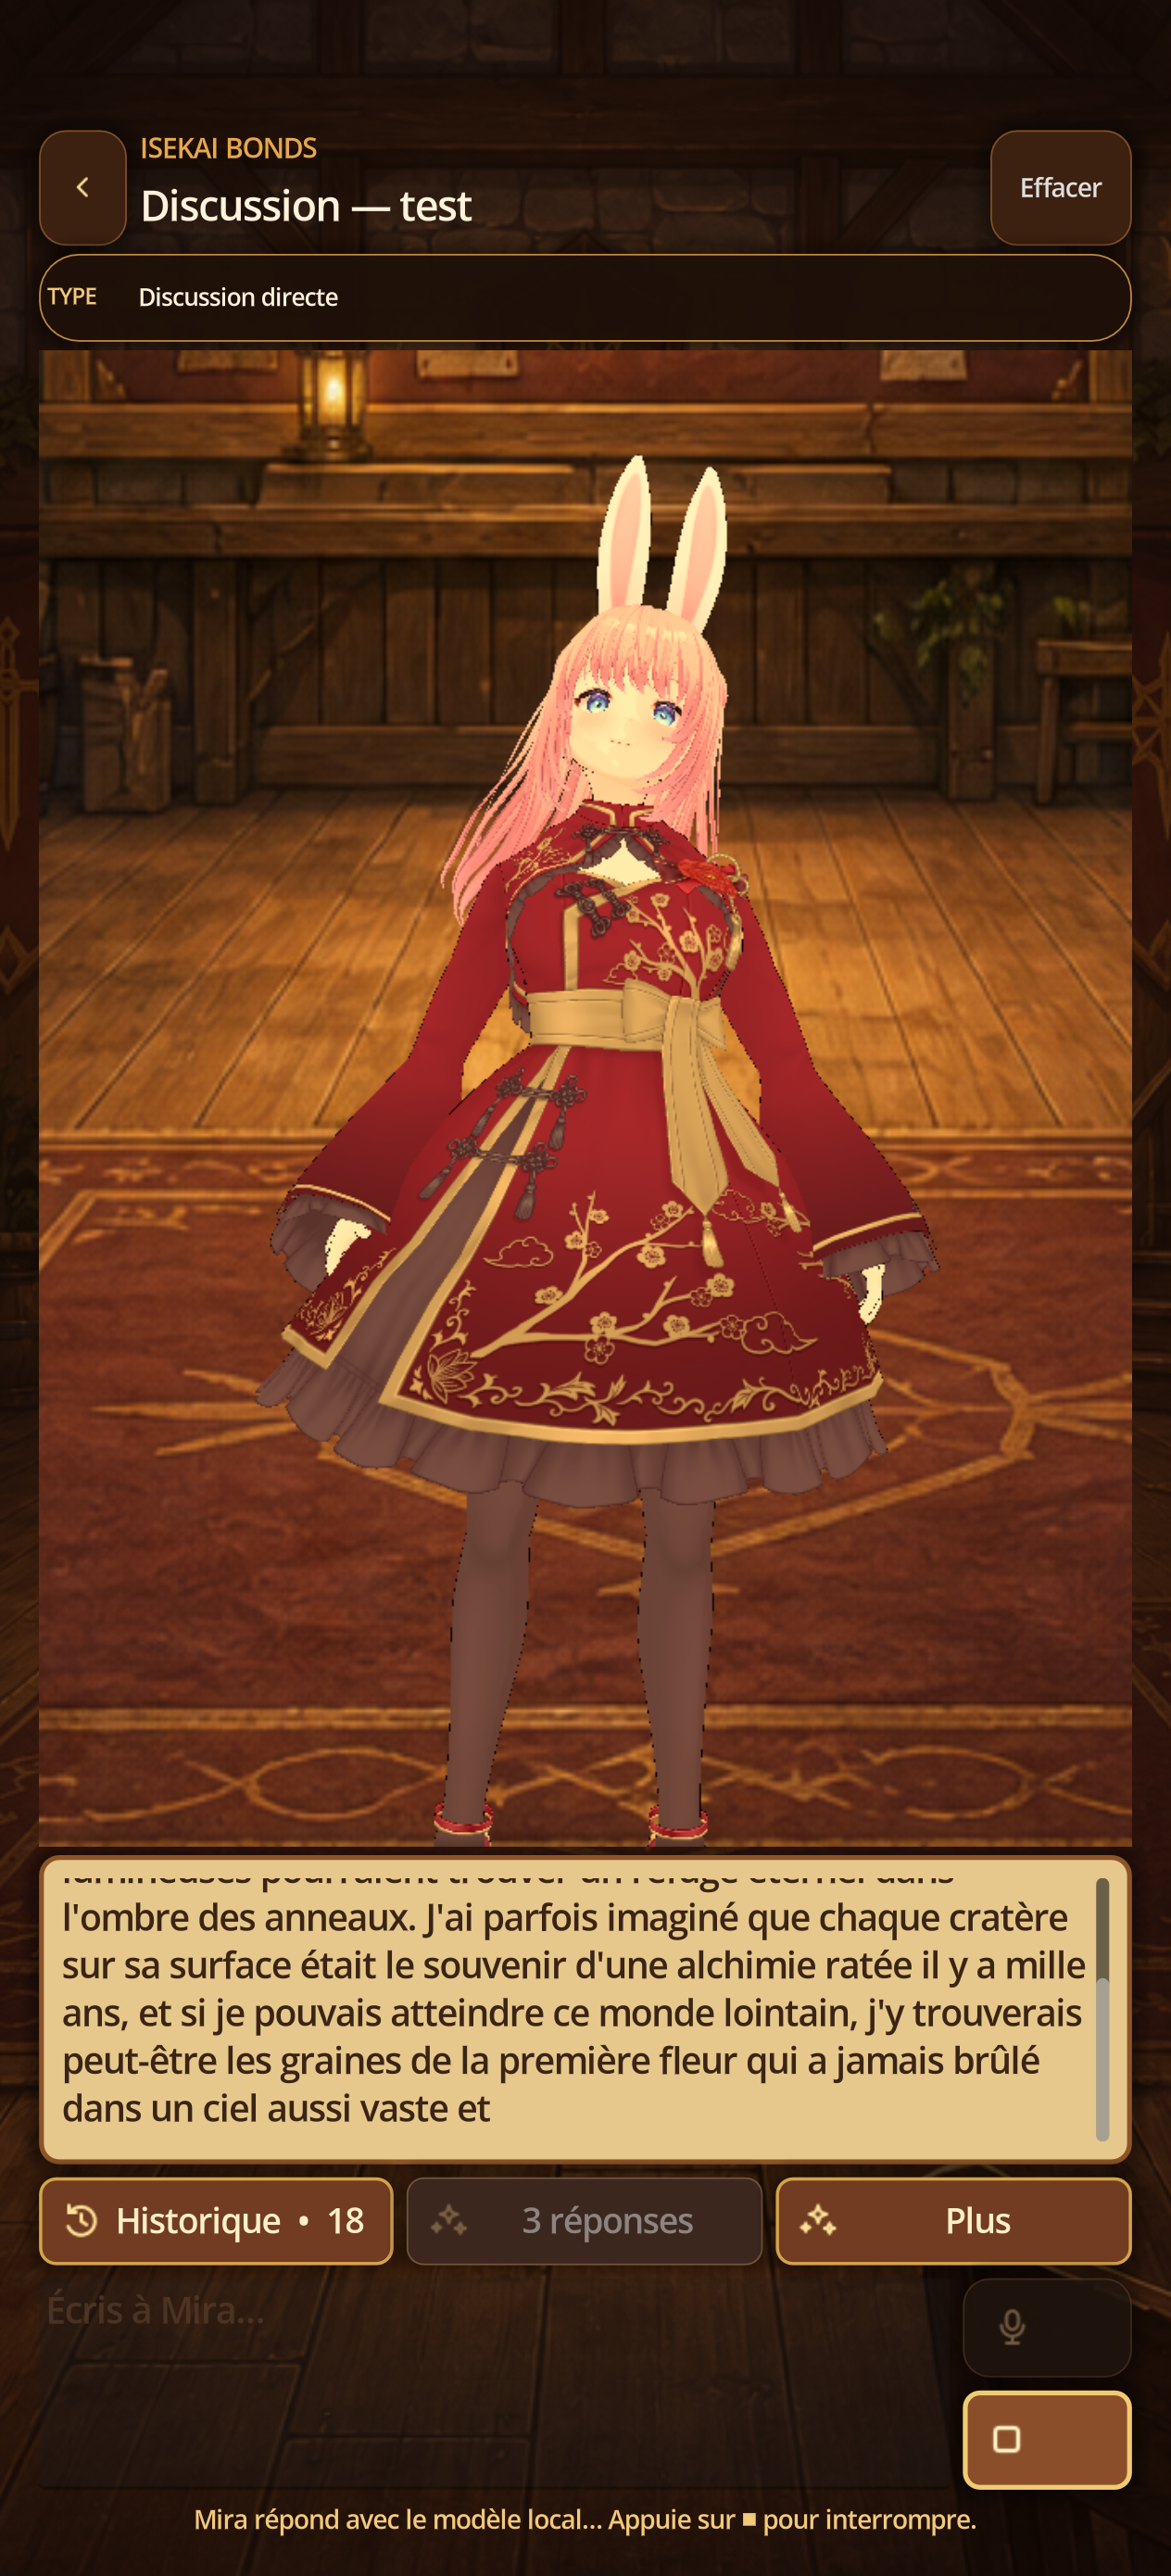
- Select Local GGUF model and load its weights.
- Open a conversation and send a short message.
- Confirm that text appears progressively and the status names the local model.
- Tap the ■ square: generation stops and received text remains visible.
12 · Context, memory, and continuity
Control what guides the next reply
Steps
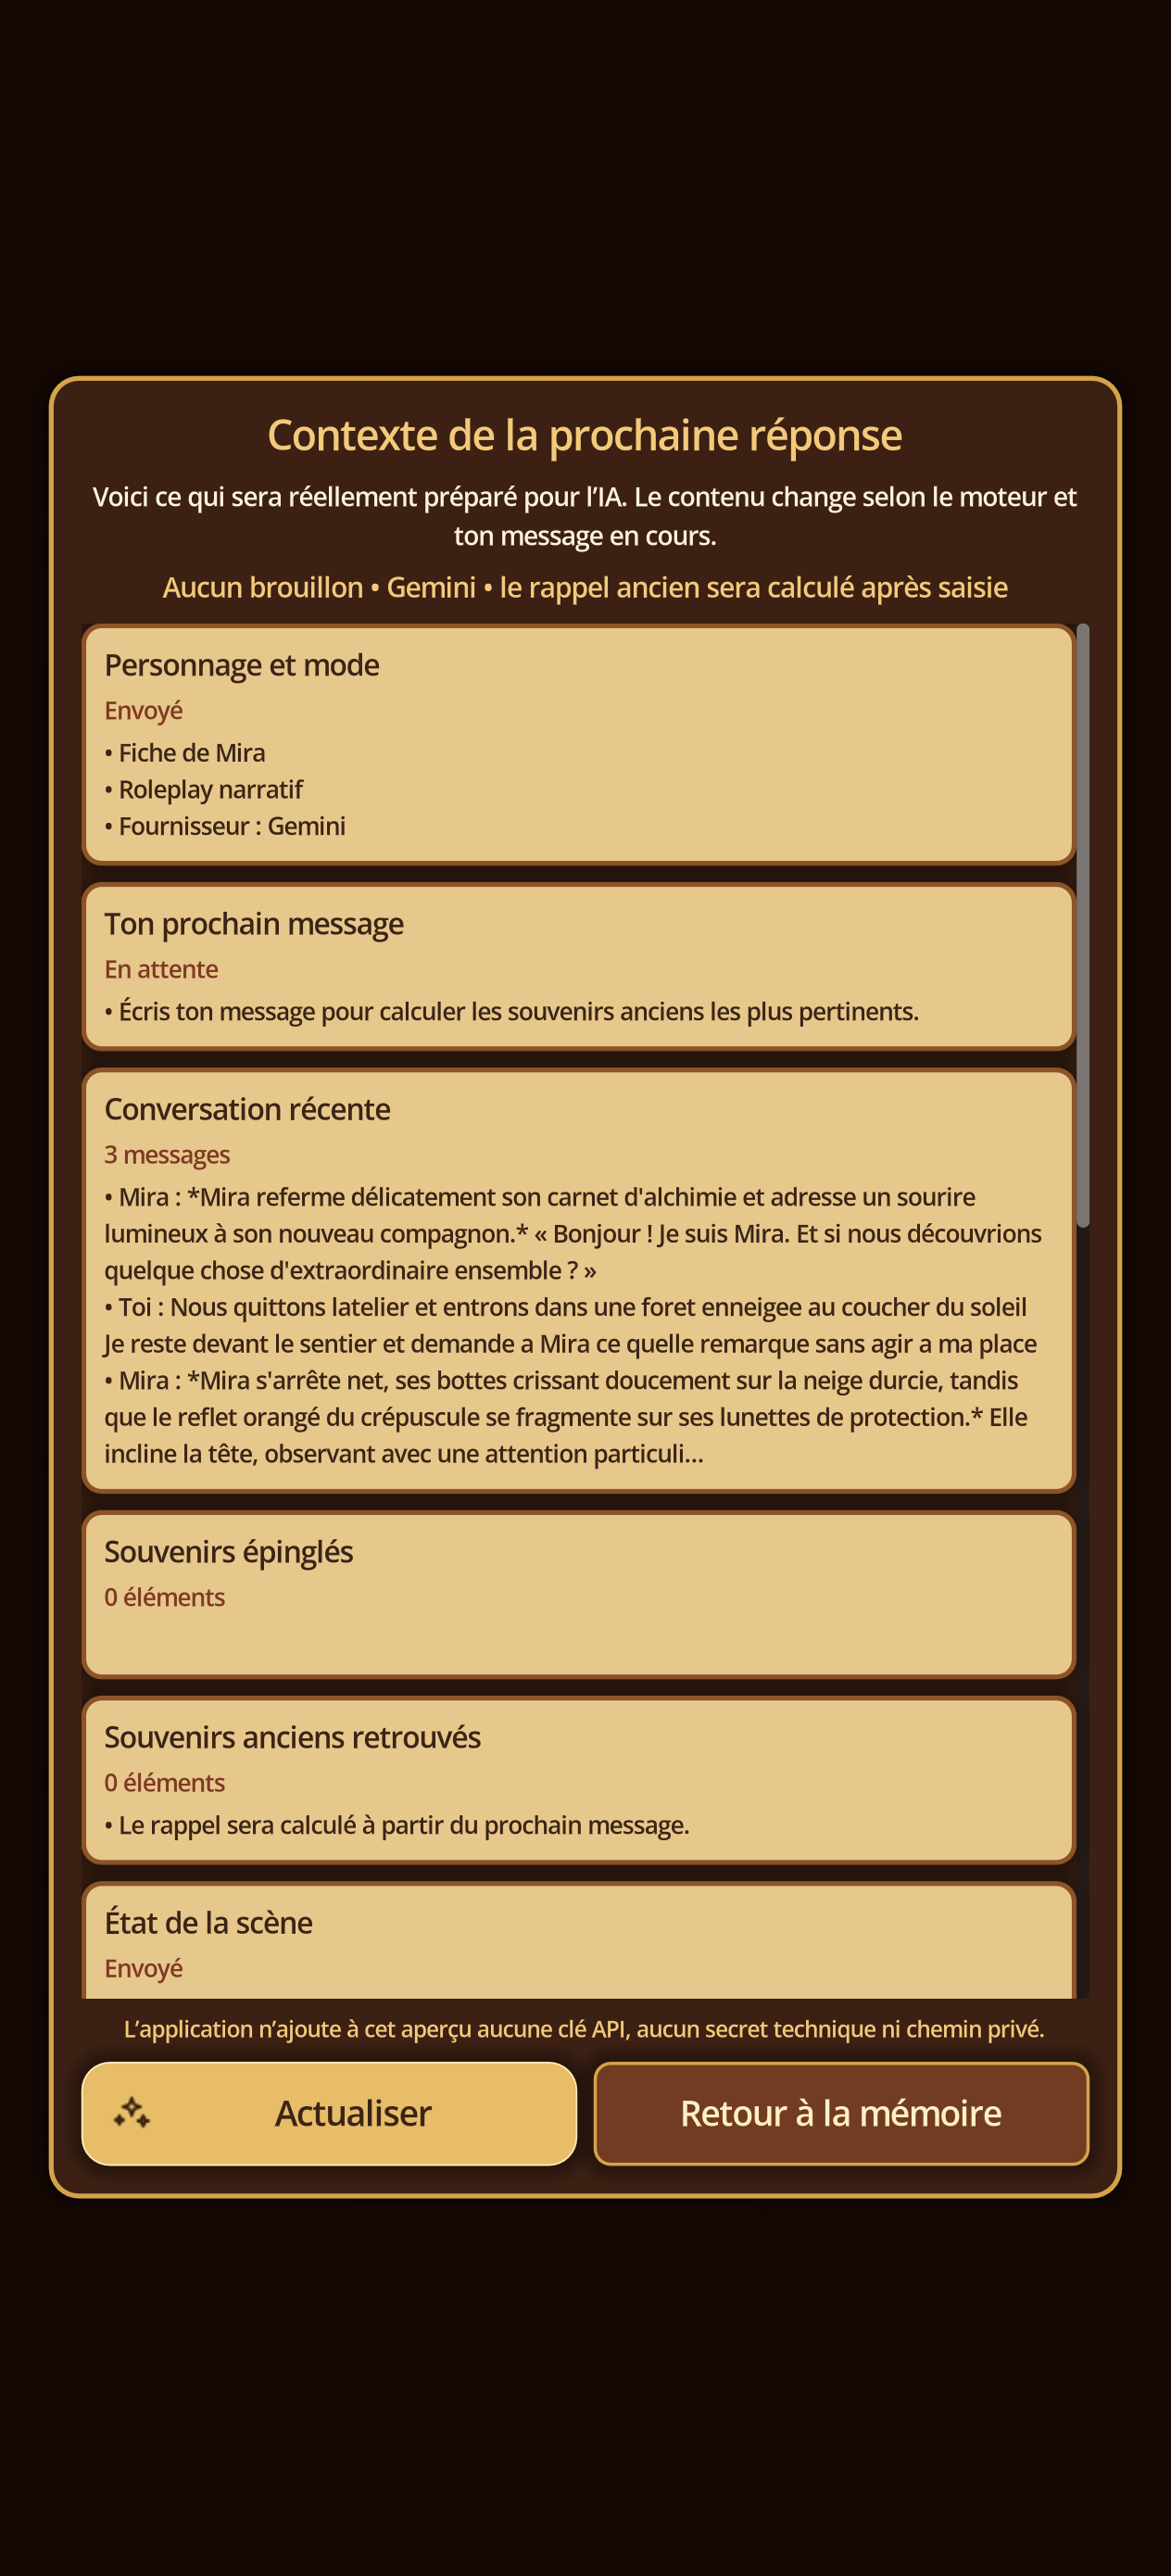
- Open More then Memory to review pinned memories, important events, and scene state.
- Context preview details character, mode, provider, recent conversation, older memories, World, journal, and budget prepared for the AI.
- Refresh recomputes the preview with the current draft without sending a request.
- Relationship adjusts trust, affection, and tension; Journal tracks quests, decisions, encounters, and items; World stores active canonical facts.
- Save each panel after editing. Changes affect subsequent replies.
05 · Cloud LLM
Configure your provider
Steps
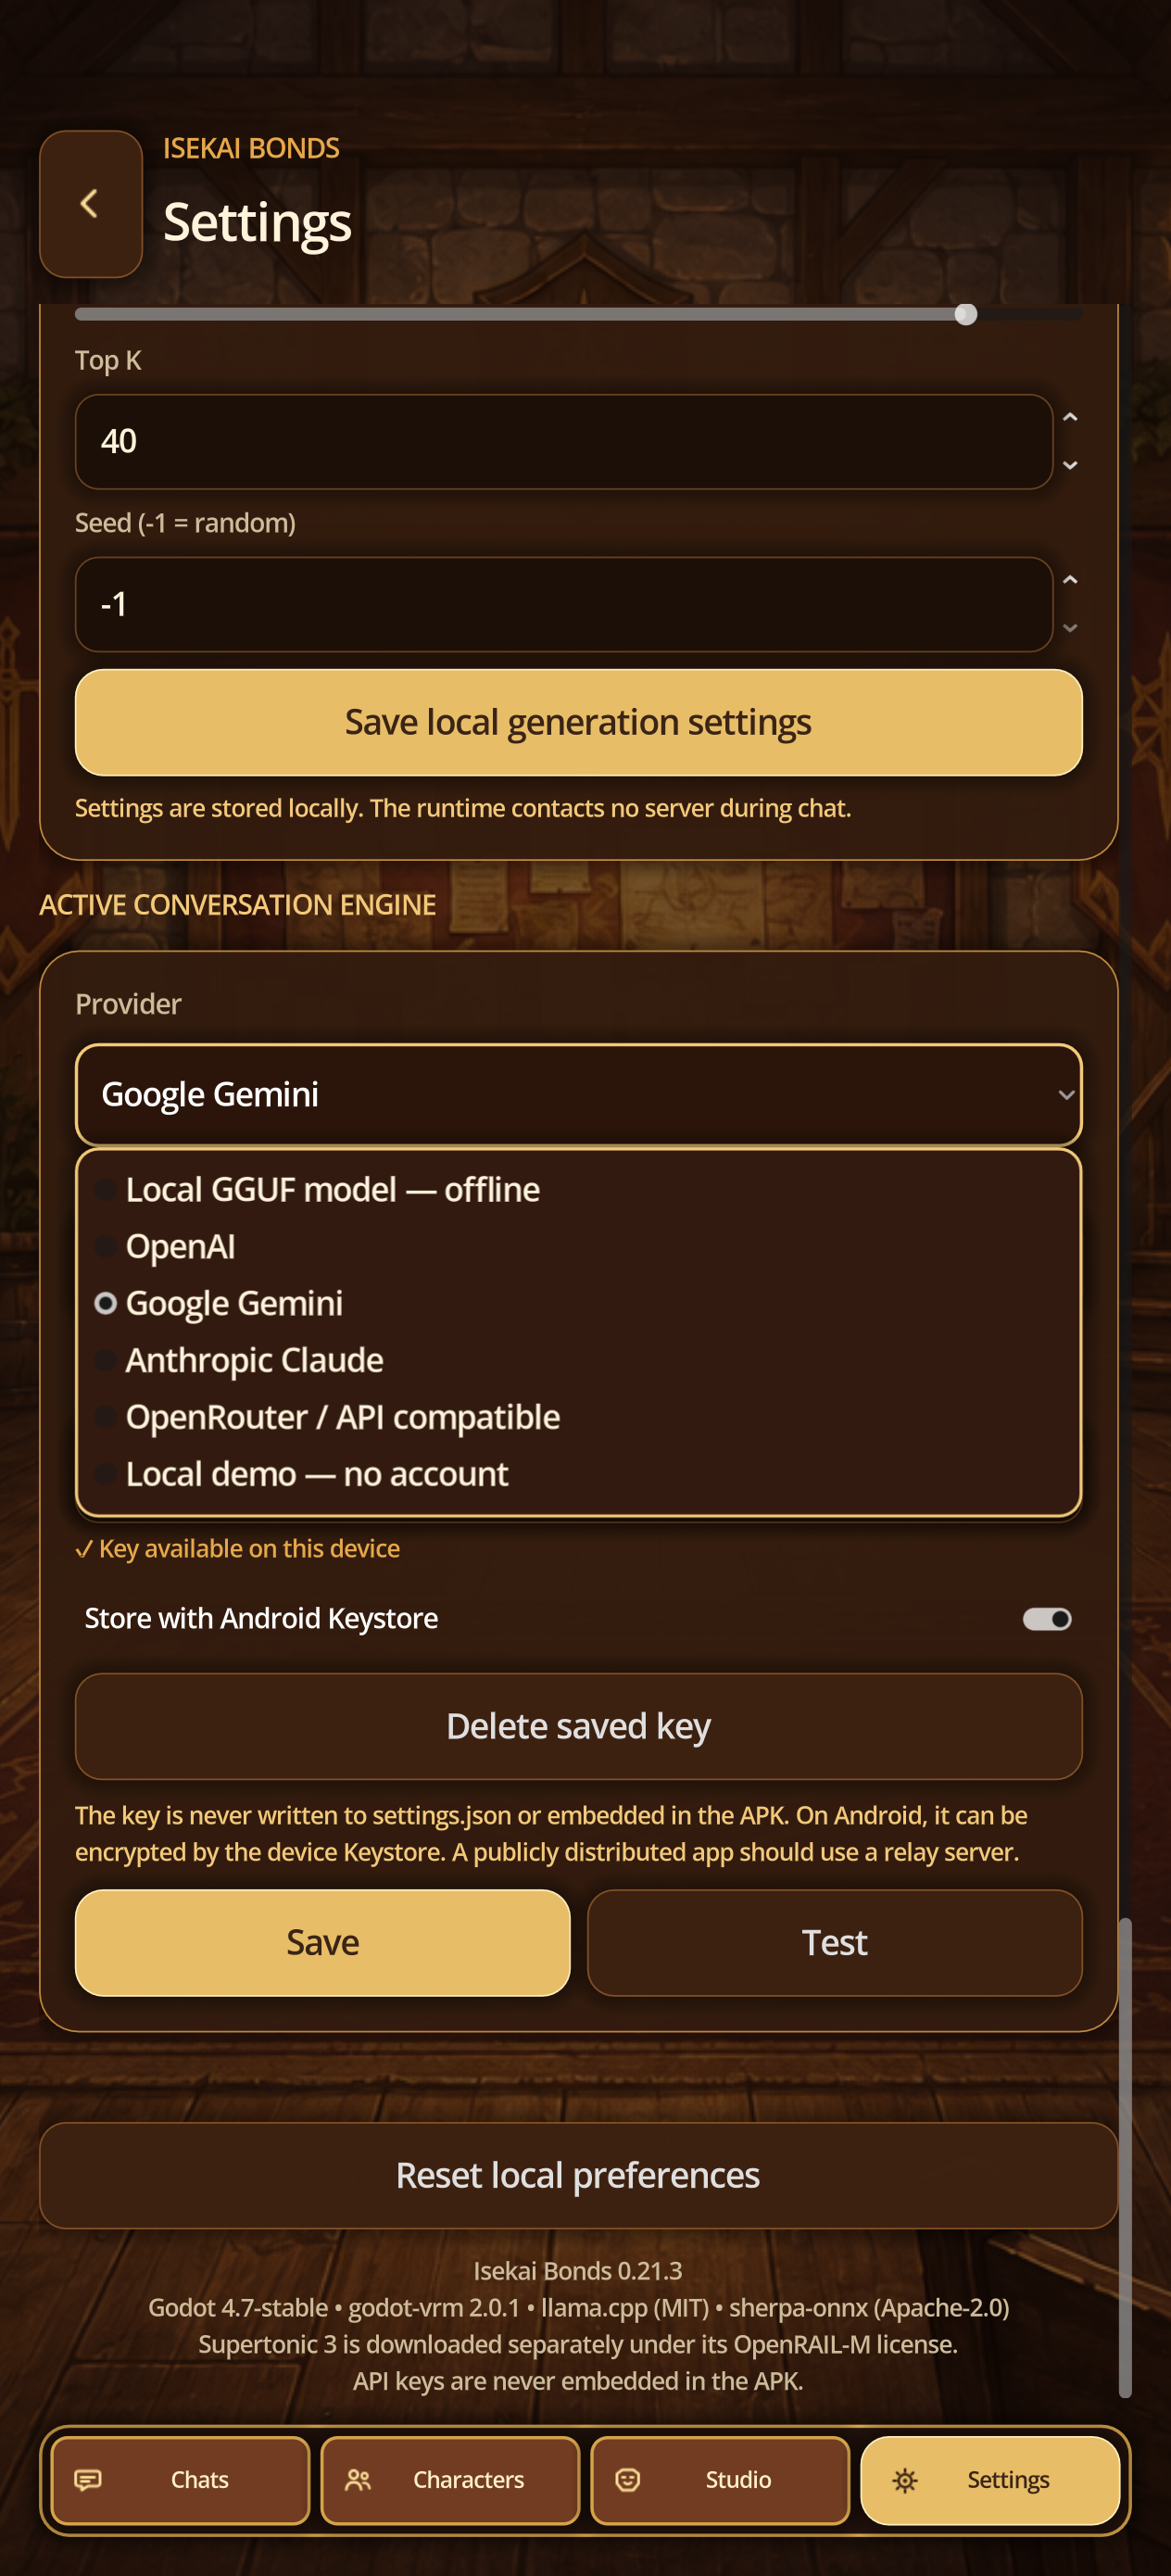
- Open the AI model section in Settings.
- Choose OpenAI, Google Gemini, Anthropic Claude, or an OpenAI/OpenRouter-compatible service from the shown presets.
- Enter your own key, model, and a base URL only when required.
- Enable secure storage if desired, then Save and Test before sending a short message.
12A · Cloud images
Configure the provider without exposing the key
Steps
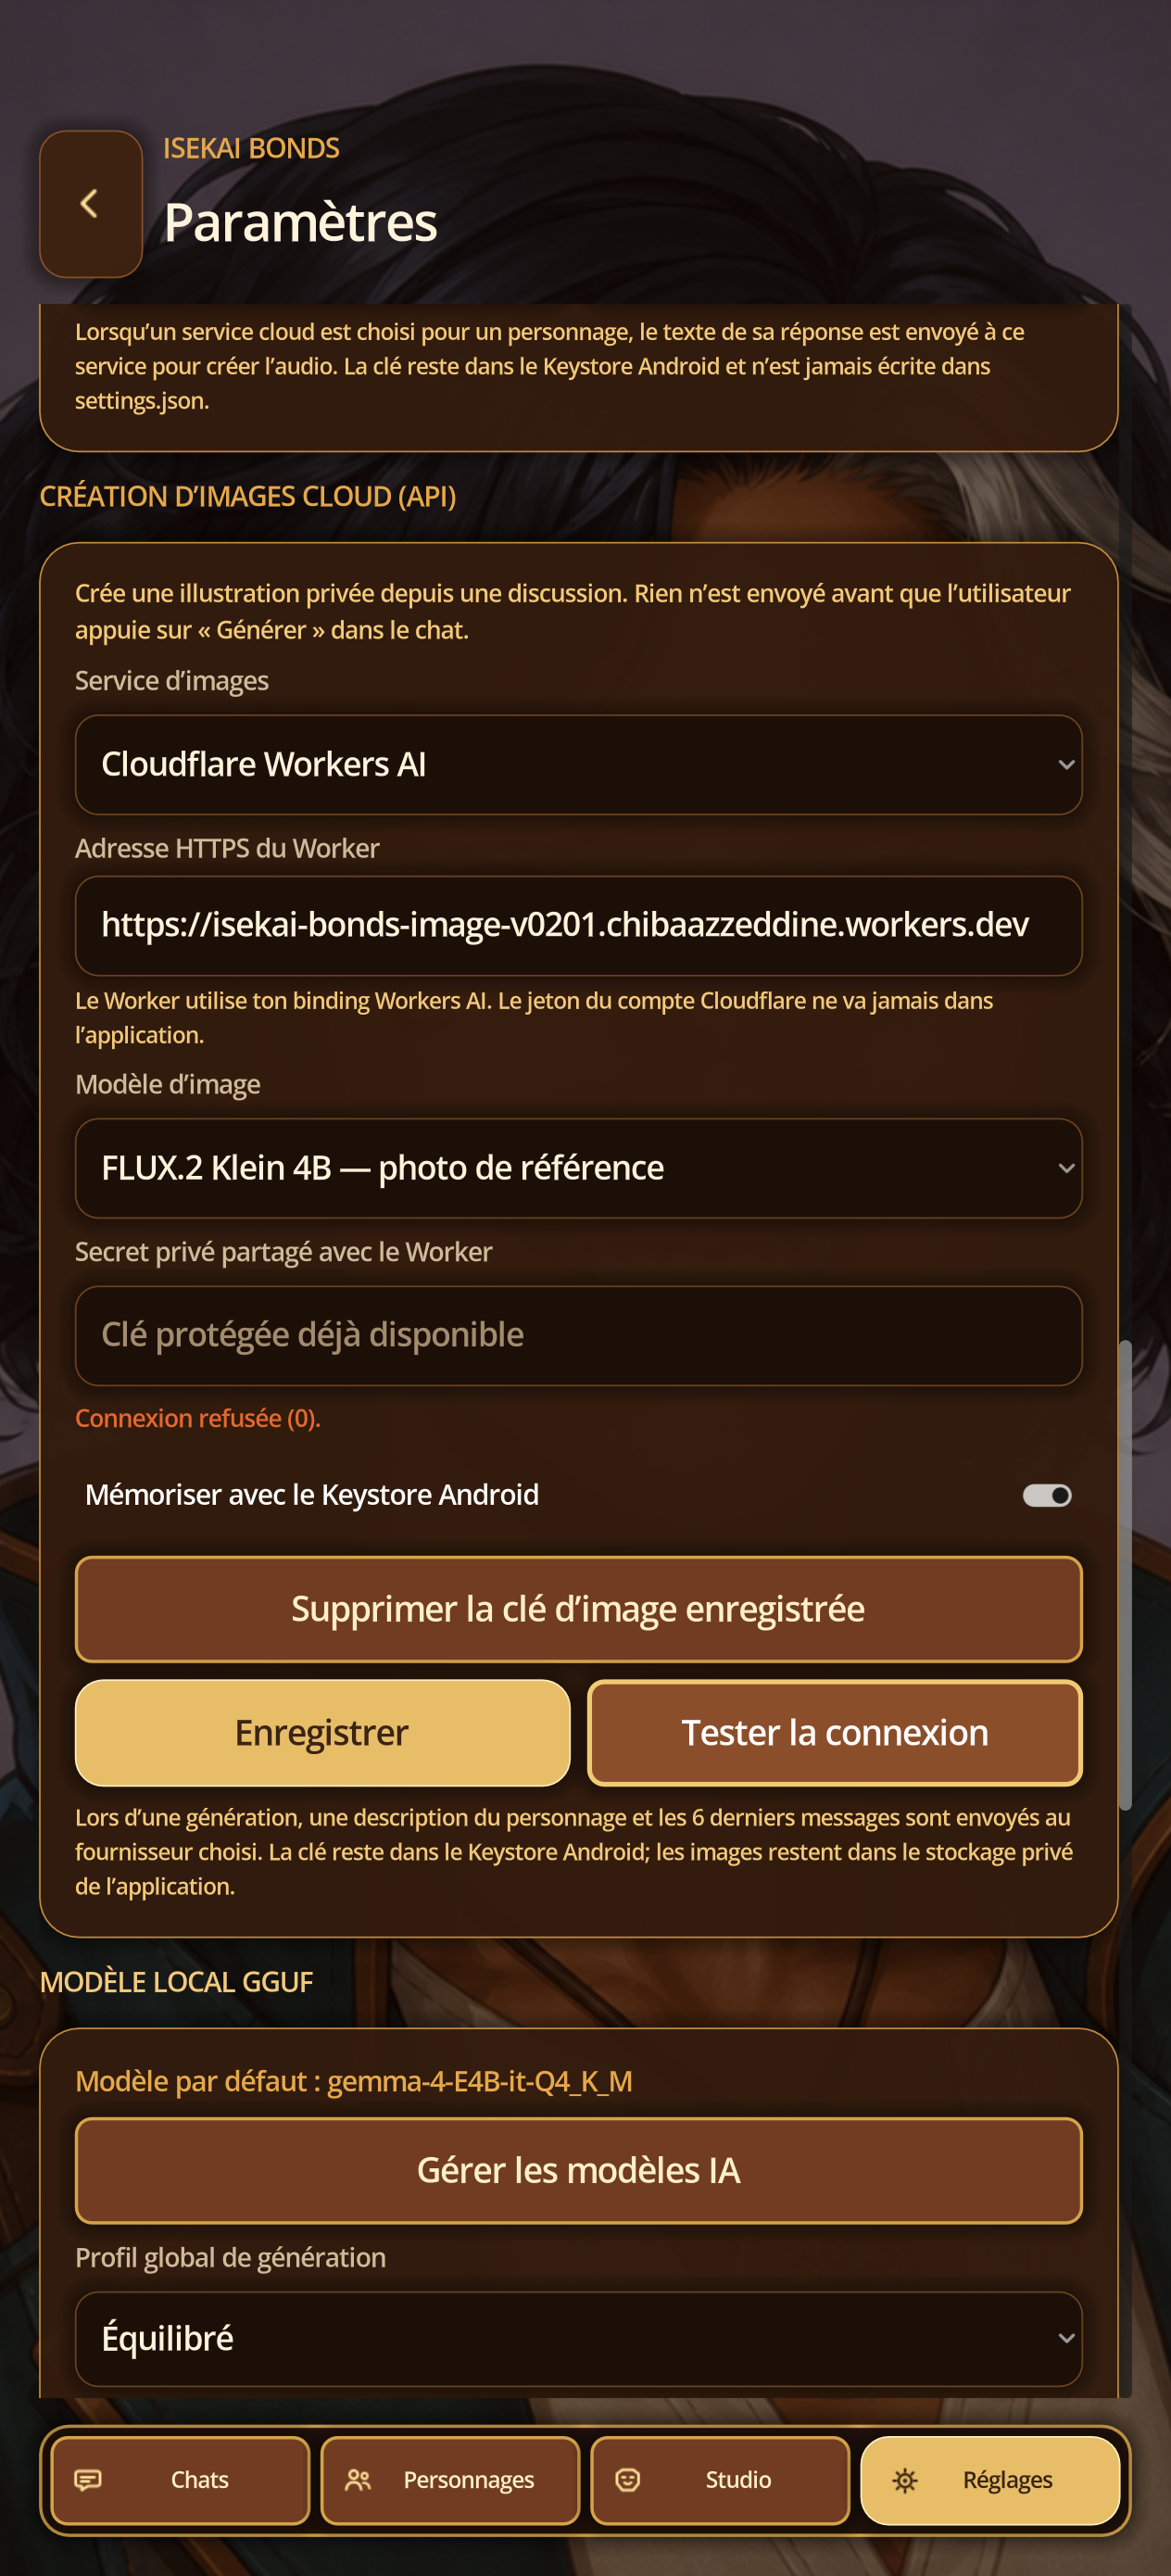
- Open Settings → Create cloud images.
- Choose the proposed provider and model; For Cloudflare, provide the Worker's HTTPS URL, for others the service requests its dedicated key.
- Enable the Android Keystore, save and then tap Test Connection.
- Never capture the key field; The "available protected key" status is sufficient in a report.
12B · Cloud images
Trigger from Scene
Steps
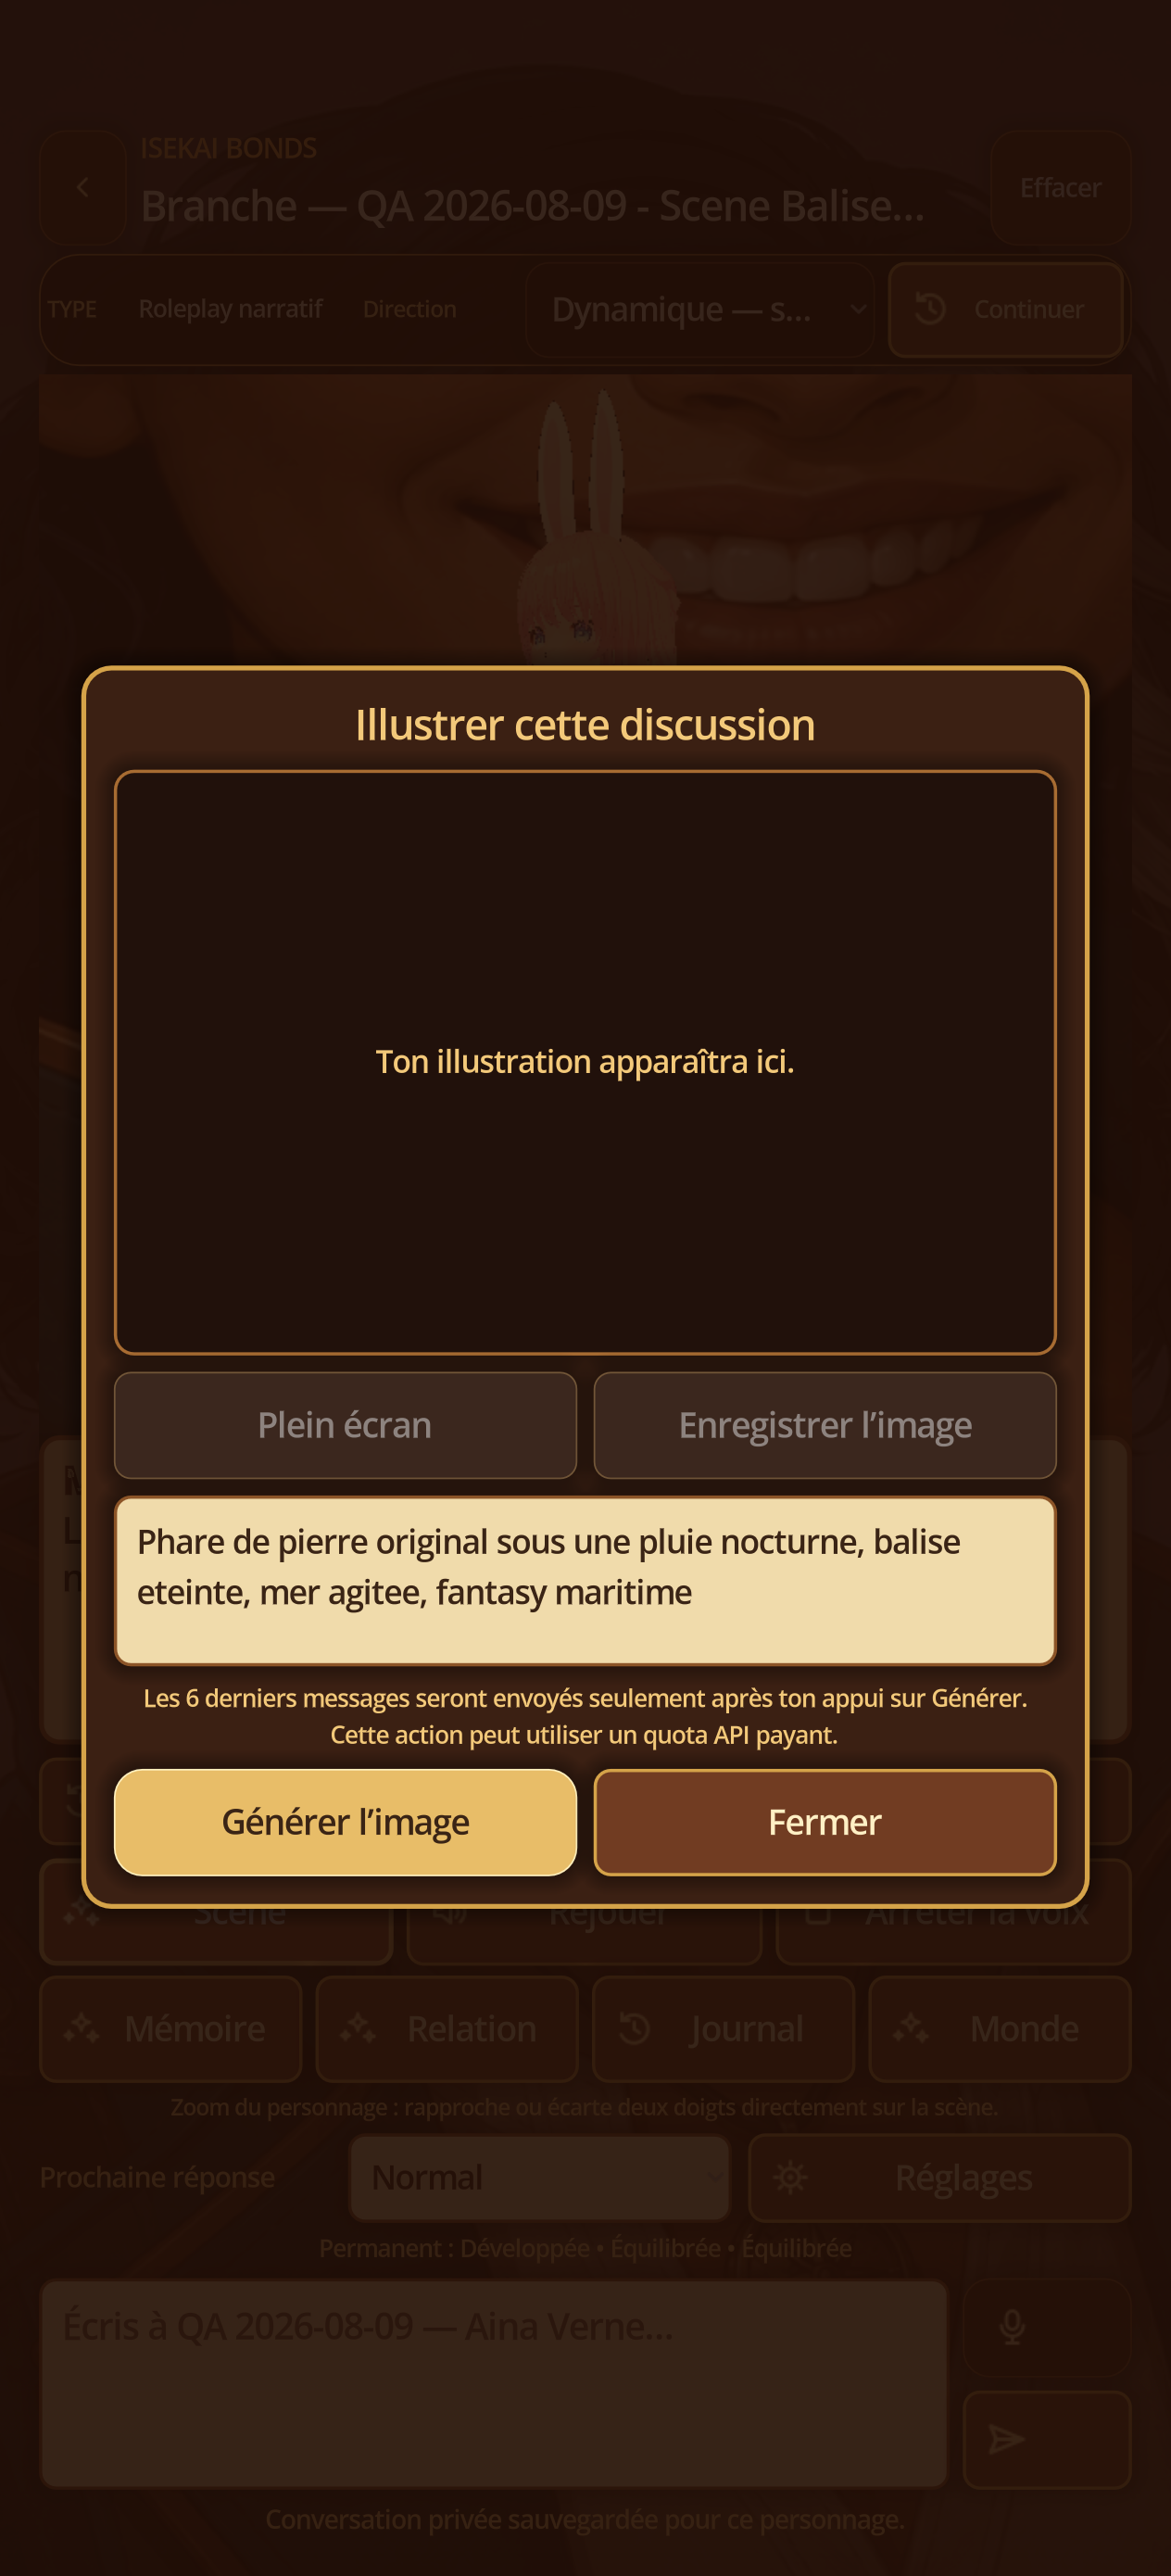
- In an active conversation, touch Scene.
- Describe the setting or timing; check the quota and transmission warning.
- Touch Generate image once and then leave the window open.
12C · Cloud images
Wait for progress
Steps
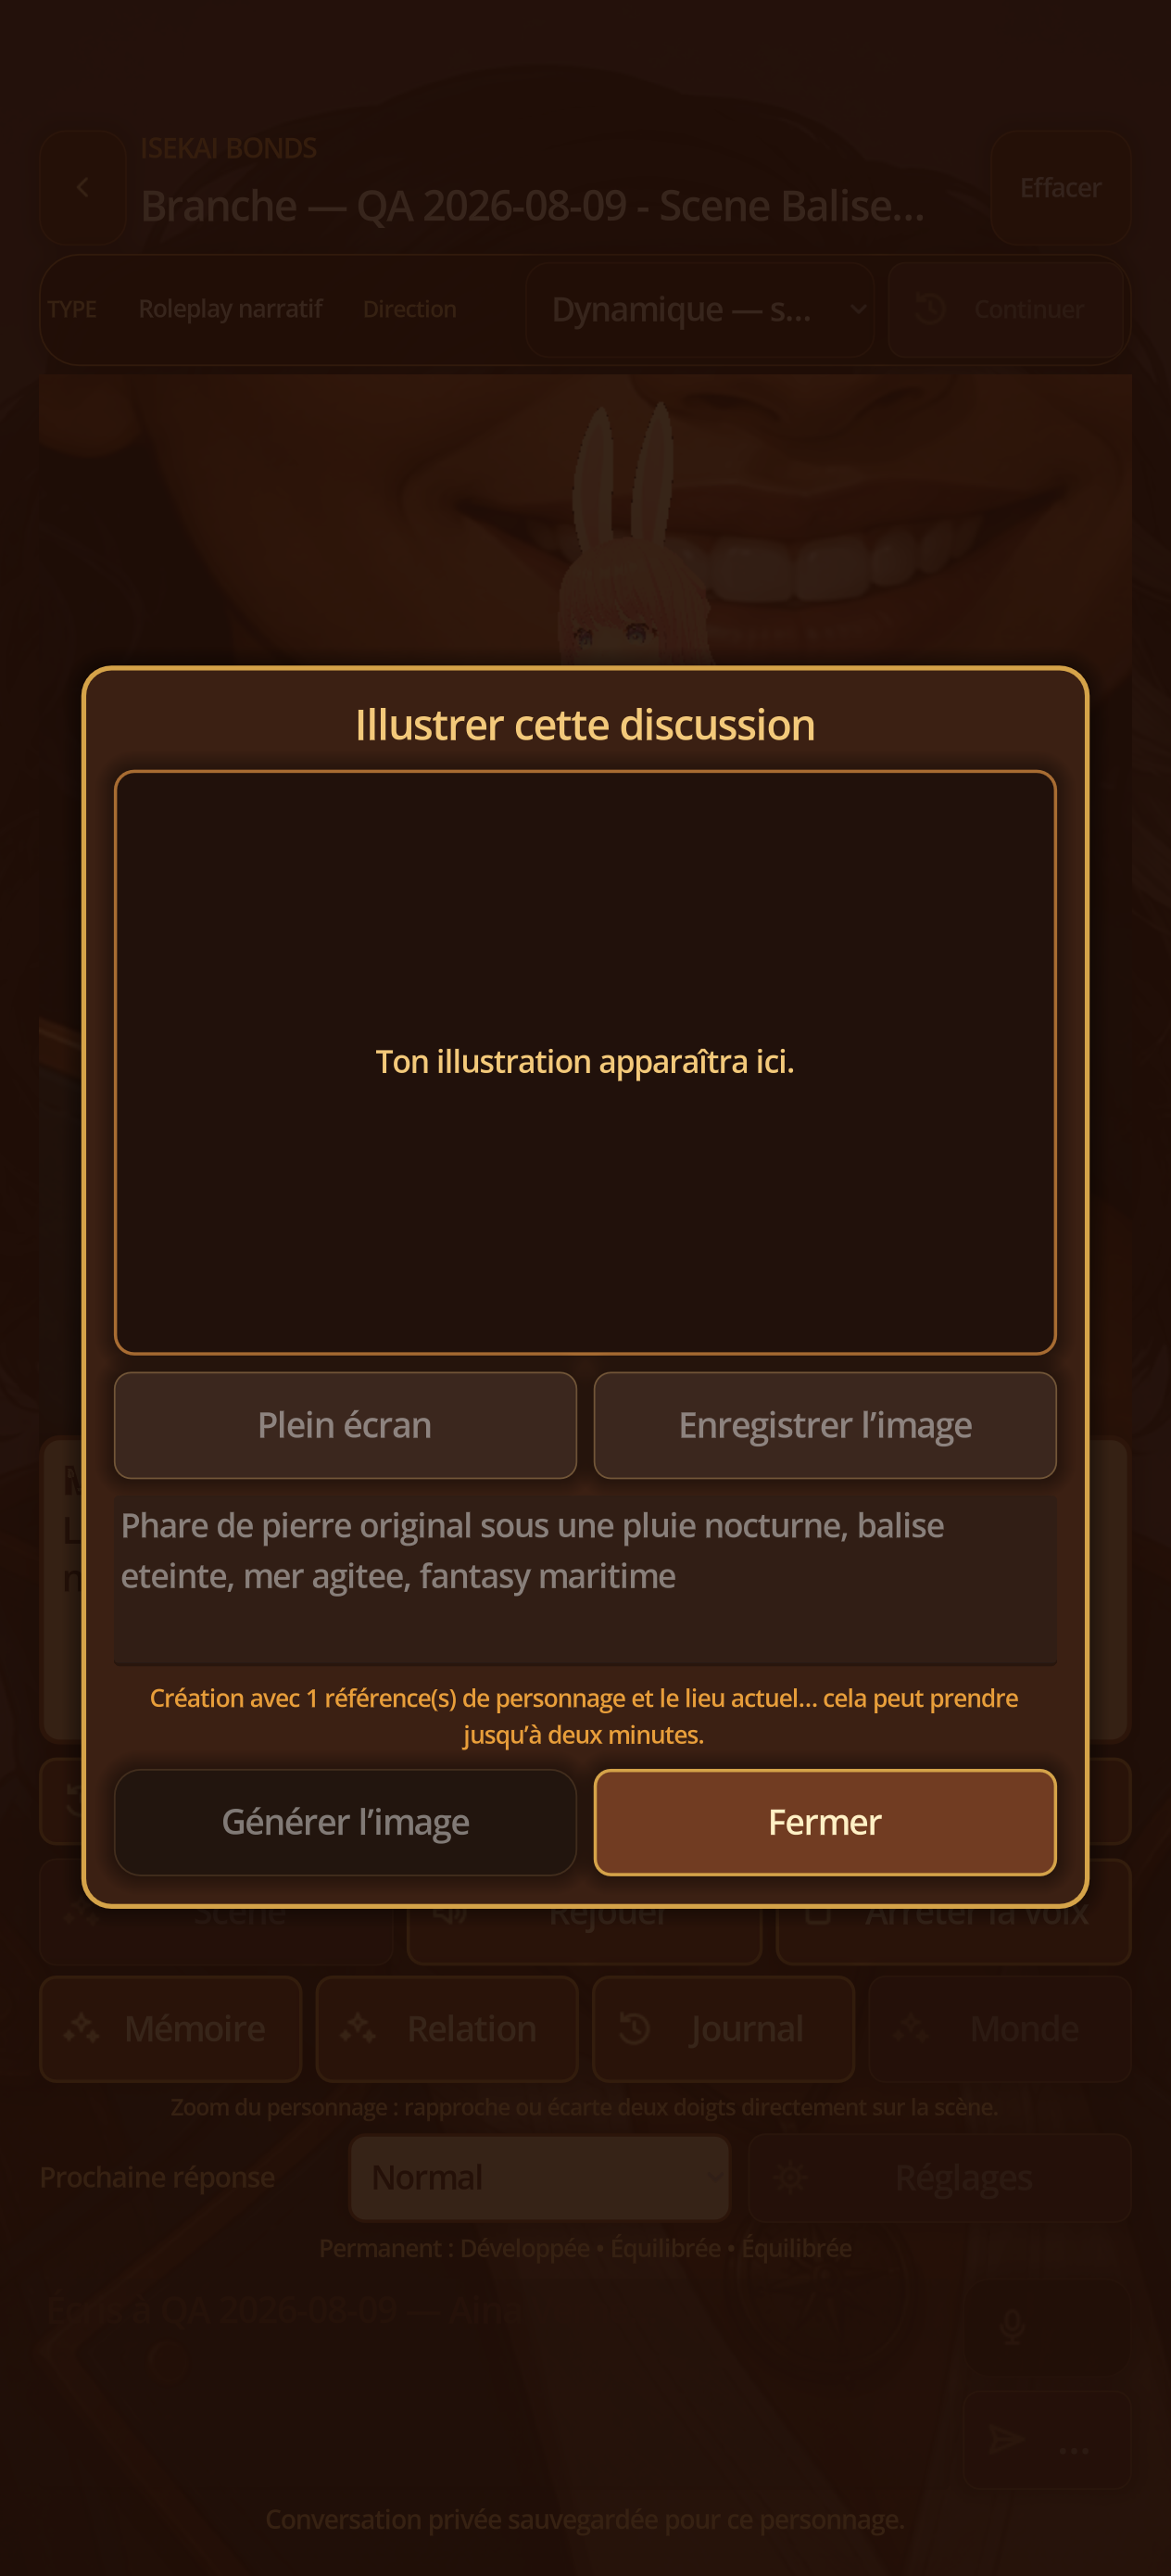
- During generation, observe the progress message and the Generate button disabled.
- Do not send a new message and do not force closure during the query.
- Wait up to two minutes depending on the provider and network.
12D · Cloud images
Review, save, or delete the result
Steps
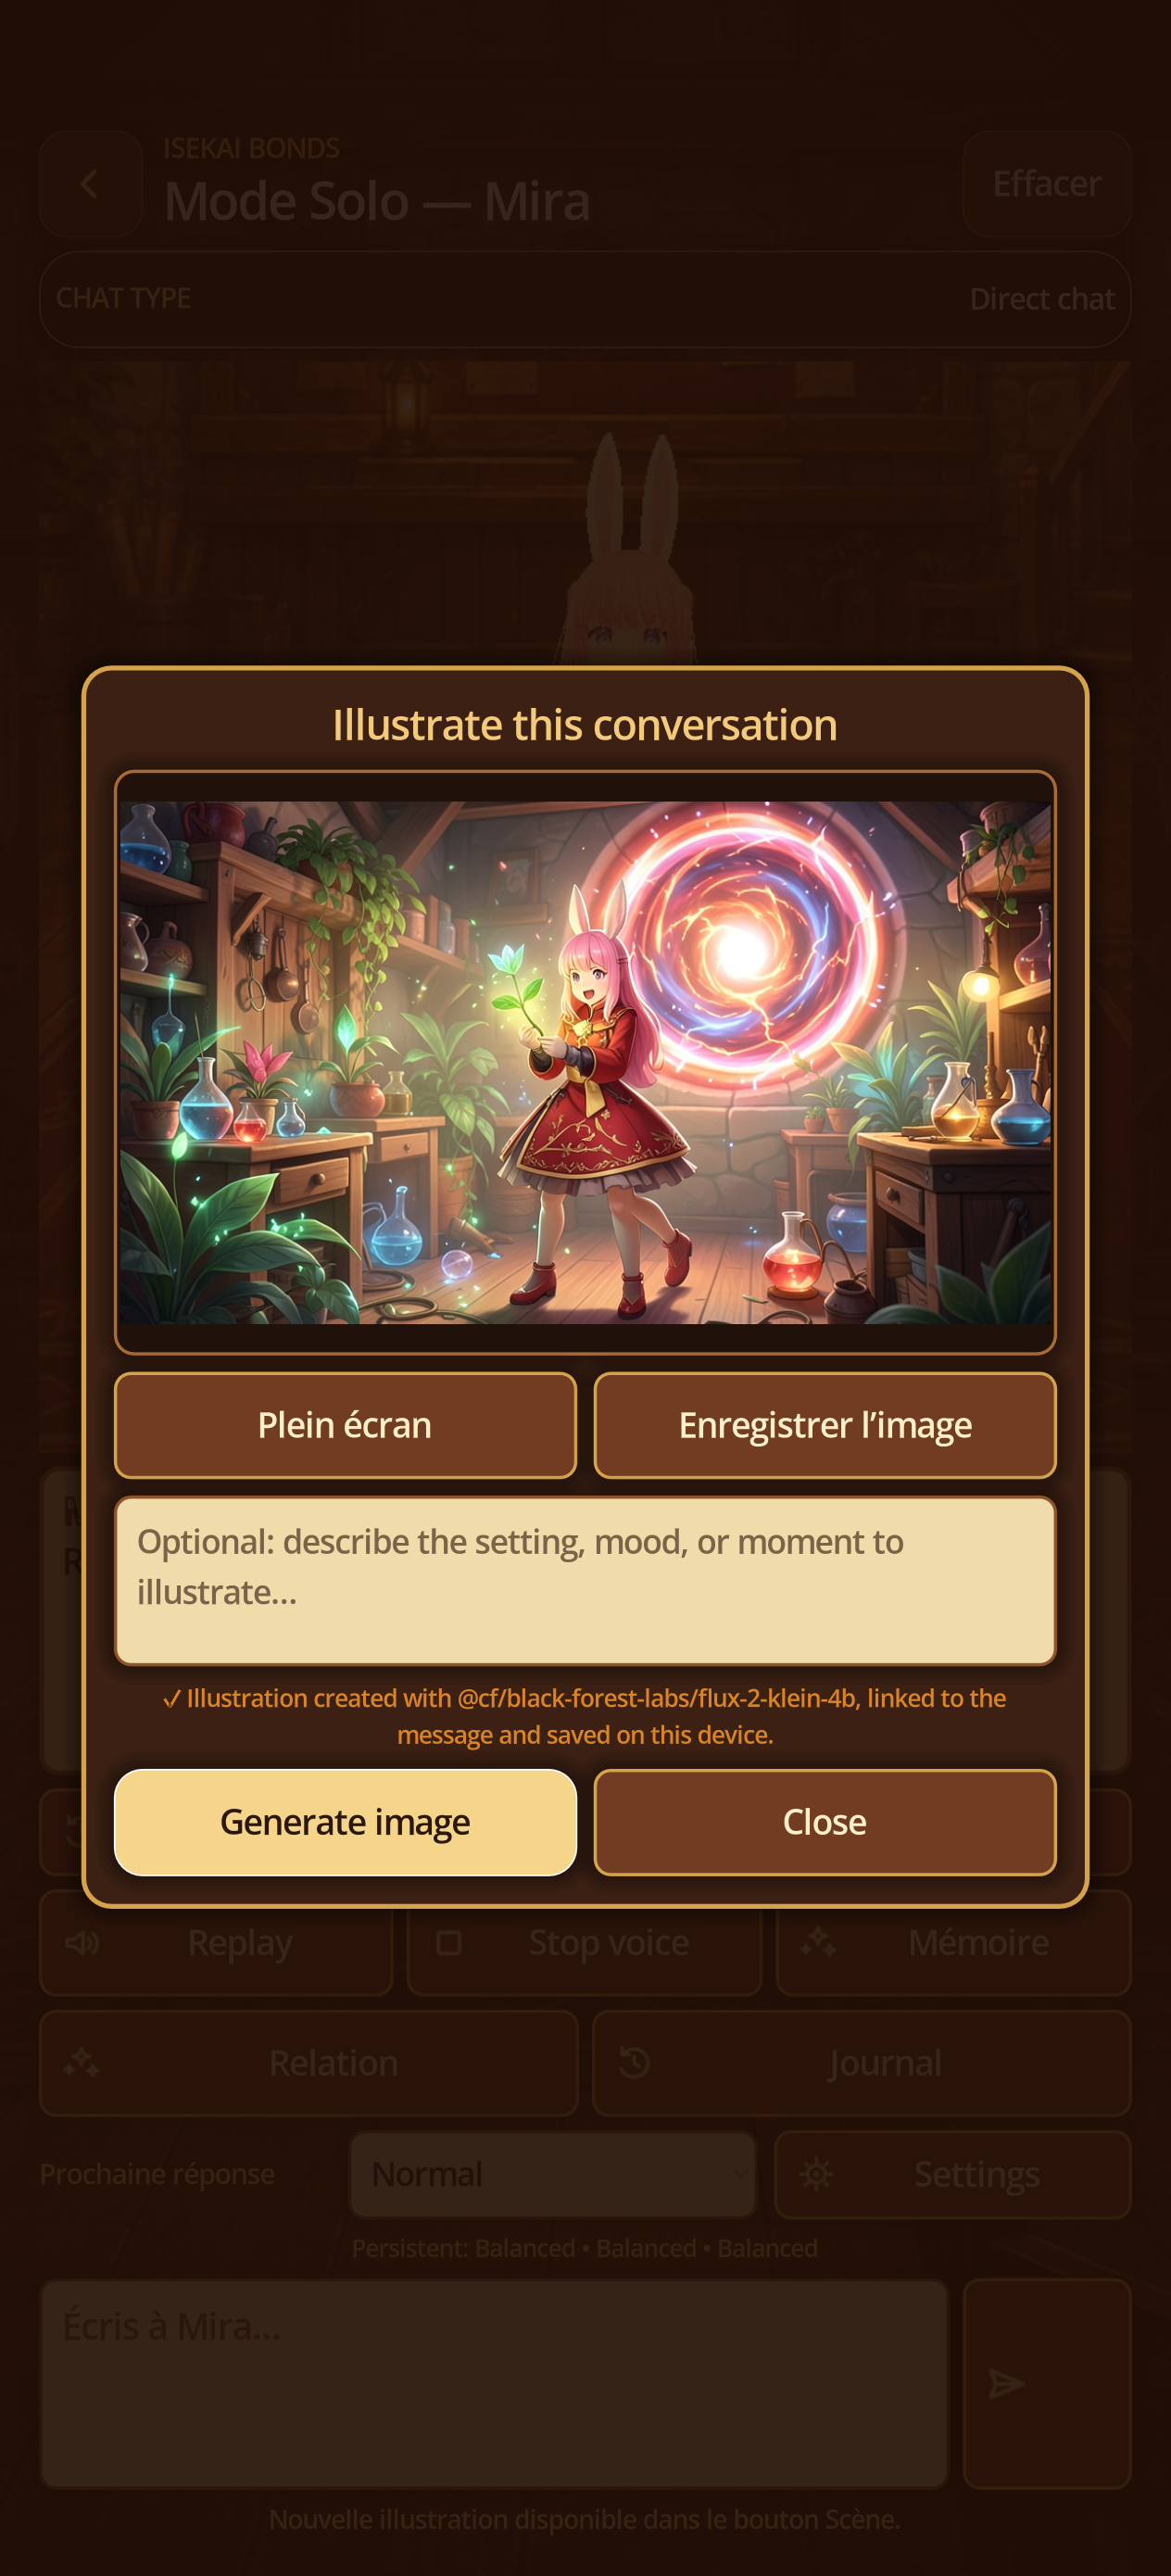
- Check that the illustration corresponds to the moment without unexpected private content.
- Tap Fullscreen to inspect, then Save Image for a selected copy; The original remains in private storage.
- The thumbnail attaches to the message and becomes visible in History and, in Pro, Gallery of Adventures.
- To delete, use the image action or delete the message/conversation after confirmation.
12E · Cloud images
Handle errors without losing the chat
Steps
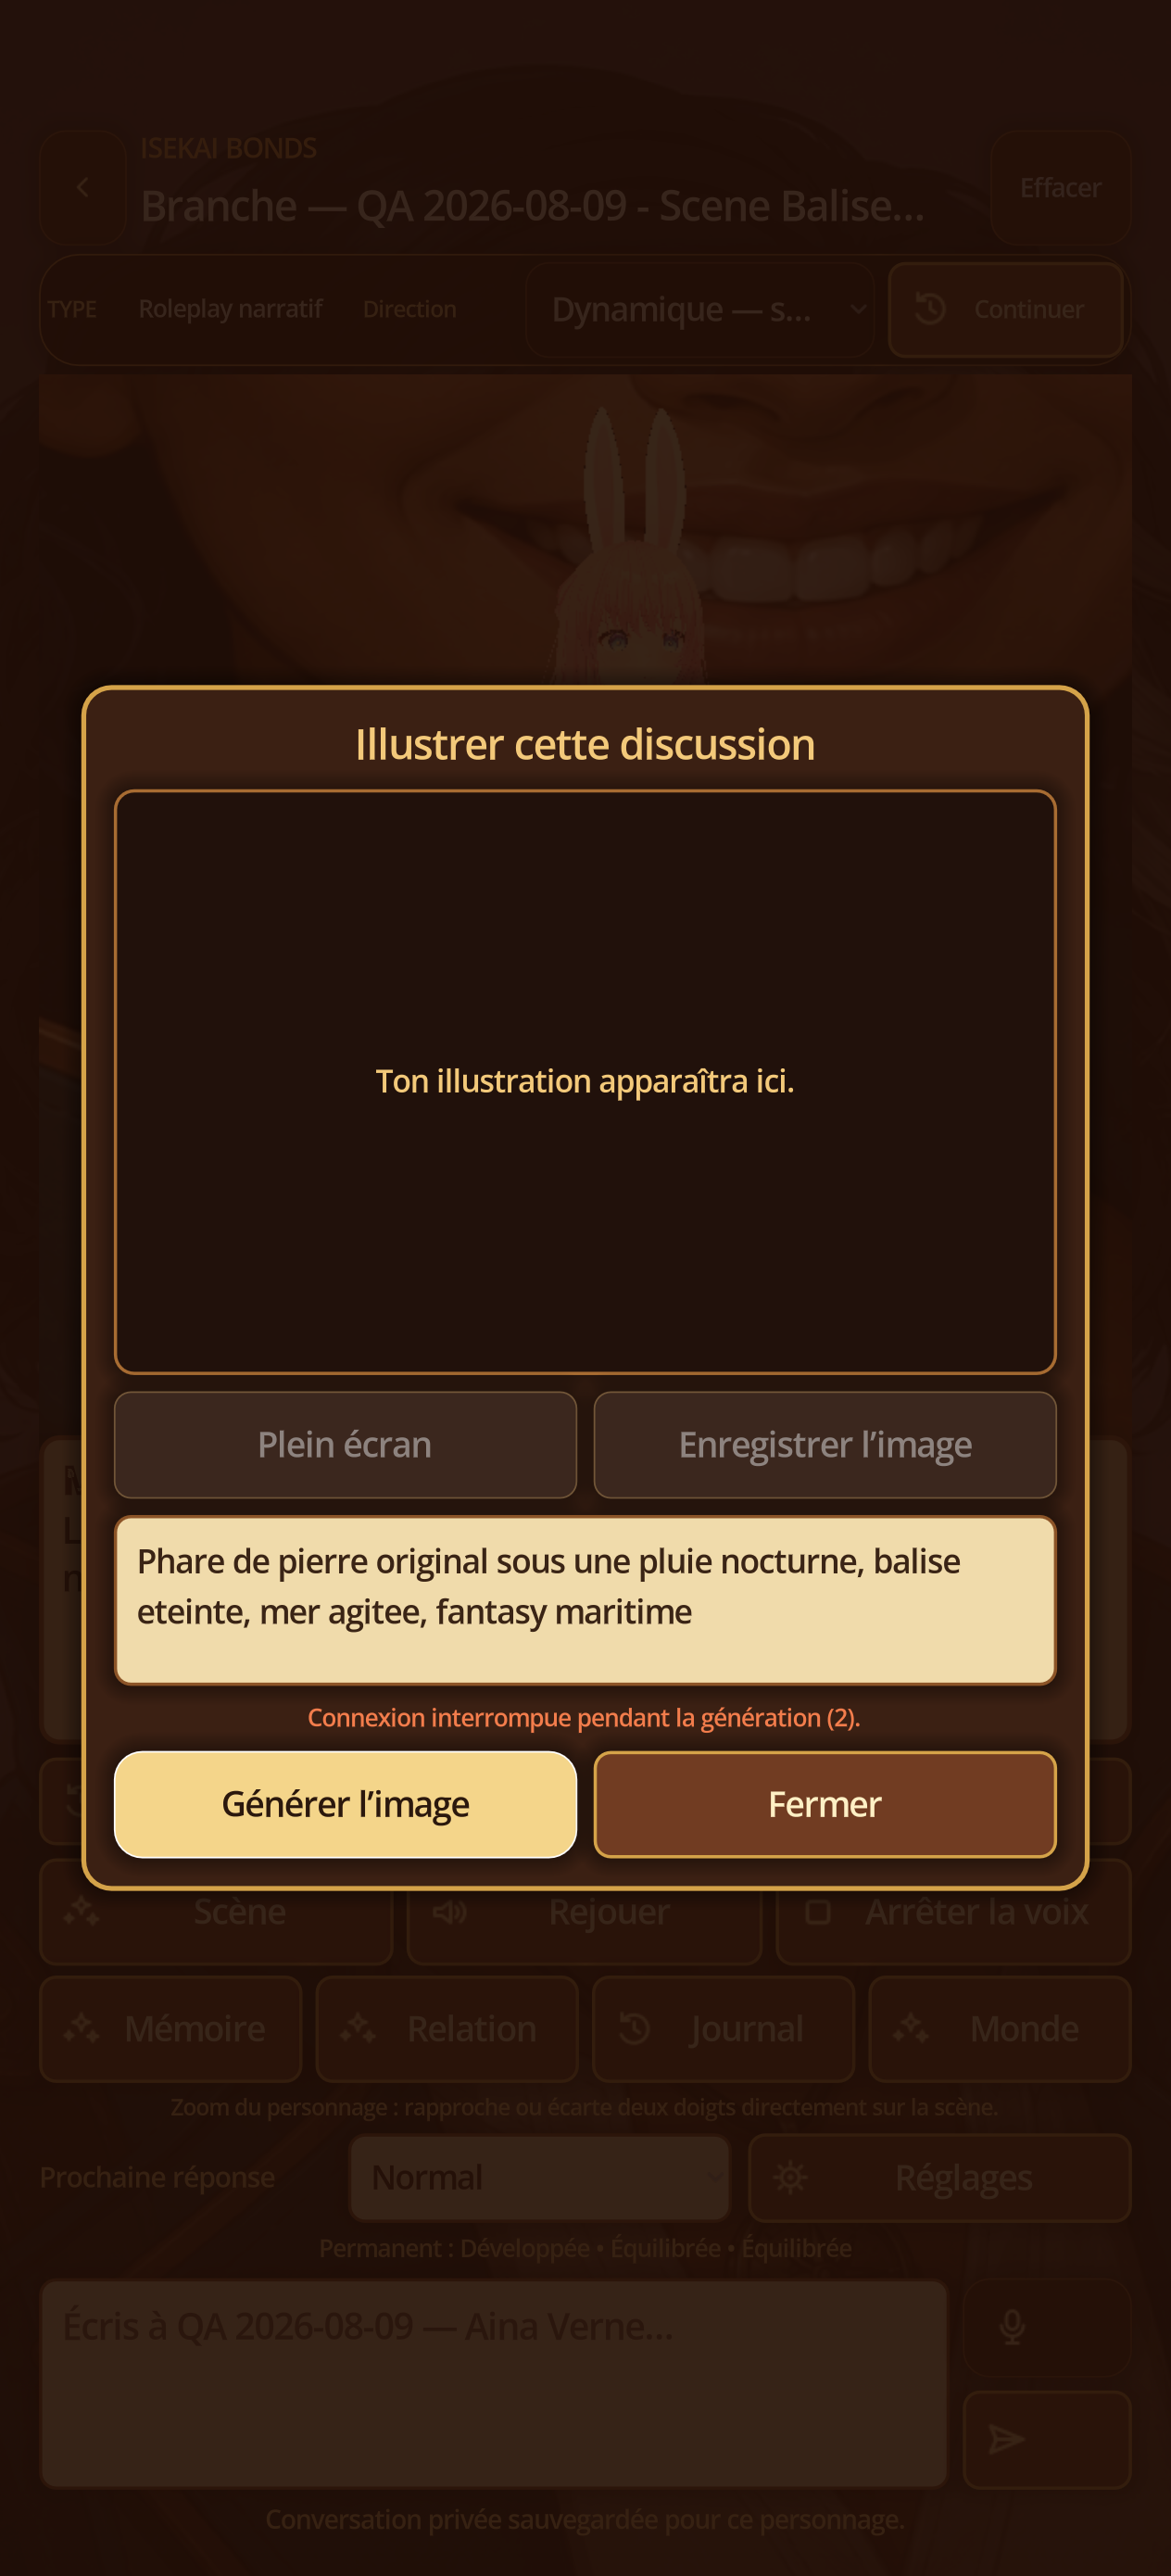
- Read the exact message: network, HTTP, quota, model, key or response format.
- Close the window, correct Settings → Create cloud images and test the connection.
- Open Scene; the draft and historical remain local, then restart once.
12F · Gallery
Recognize the empty state
Steps
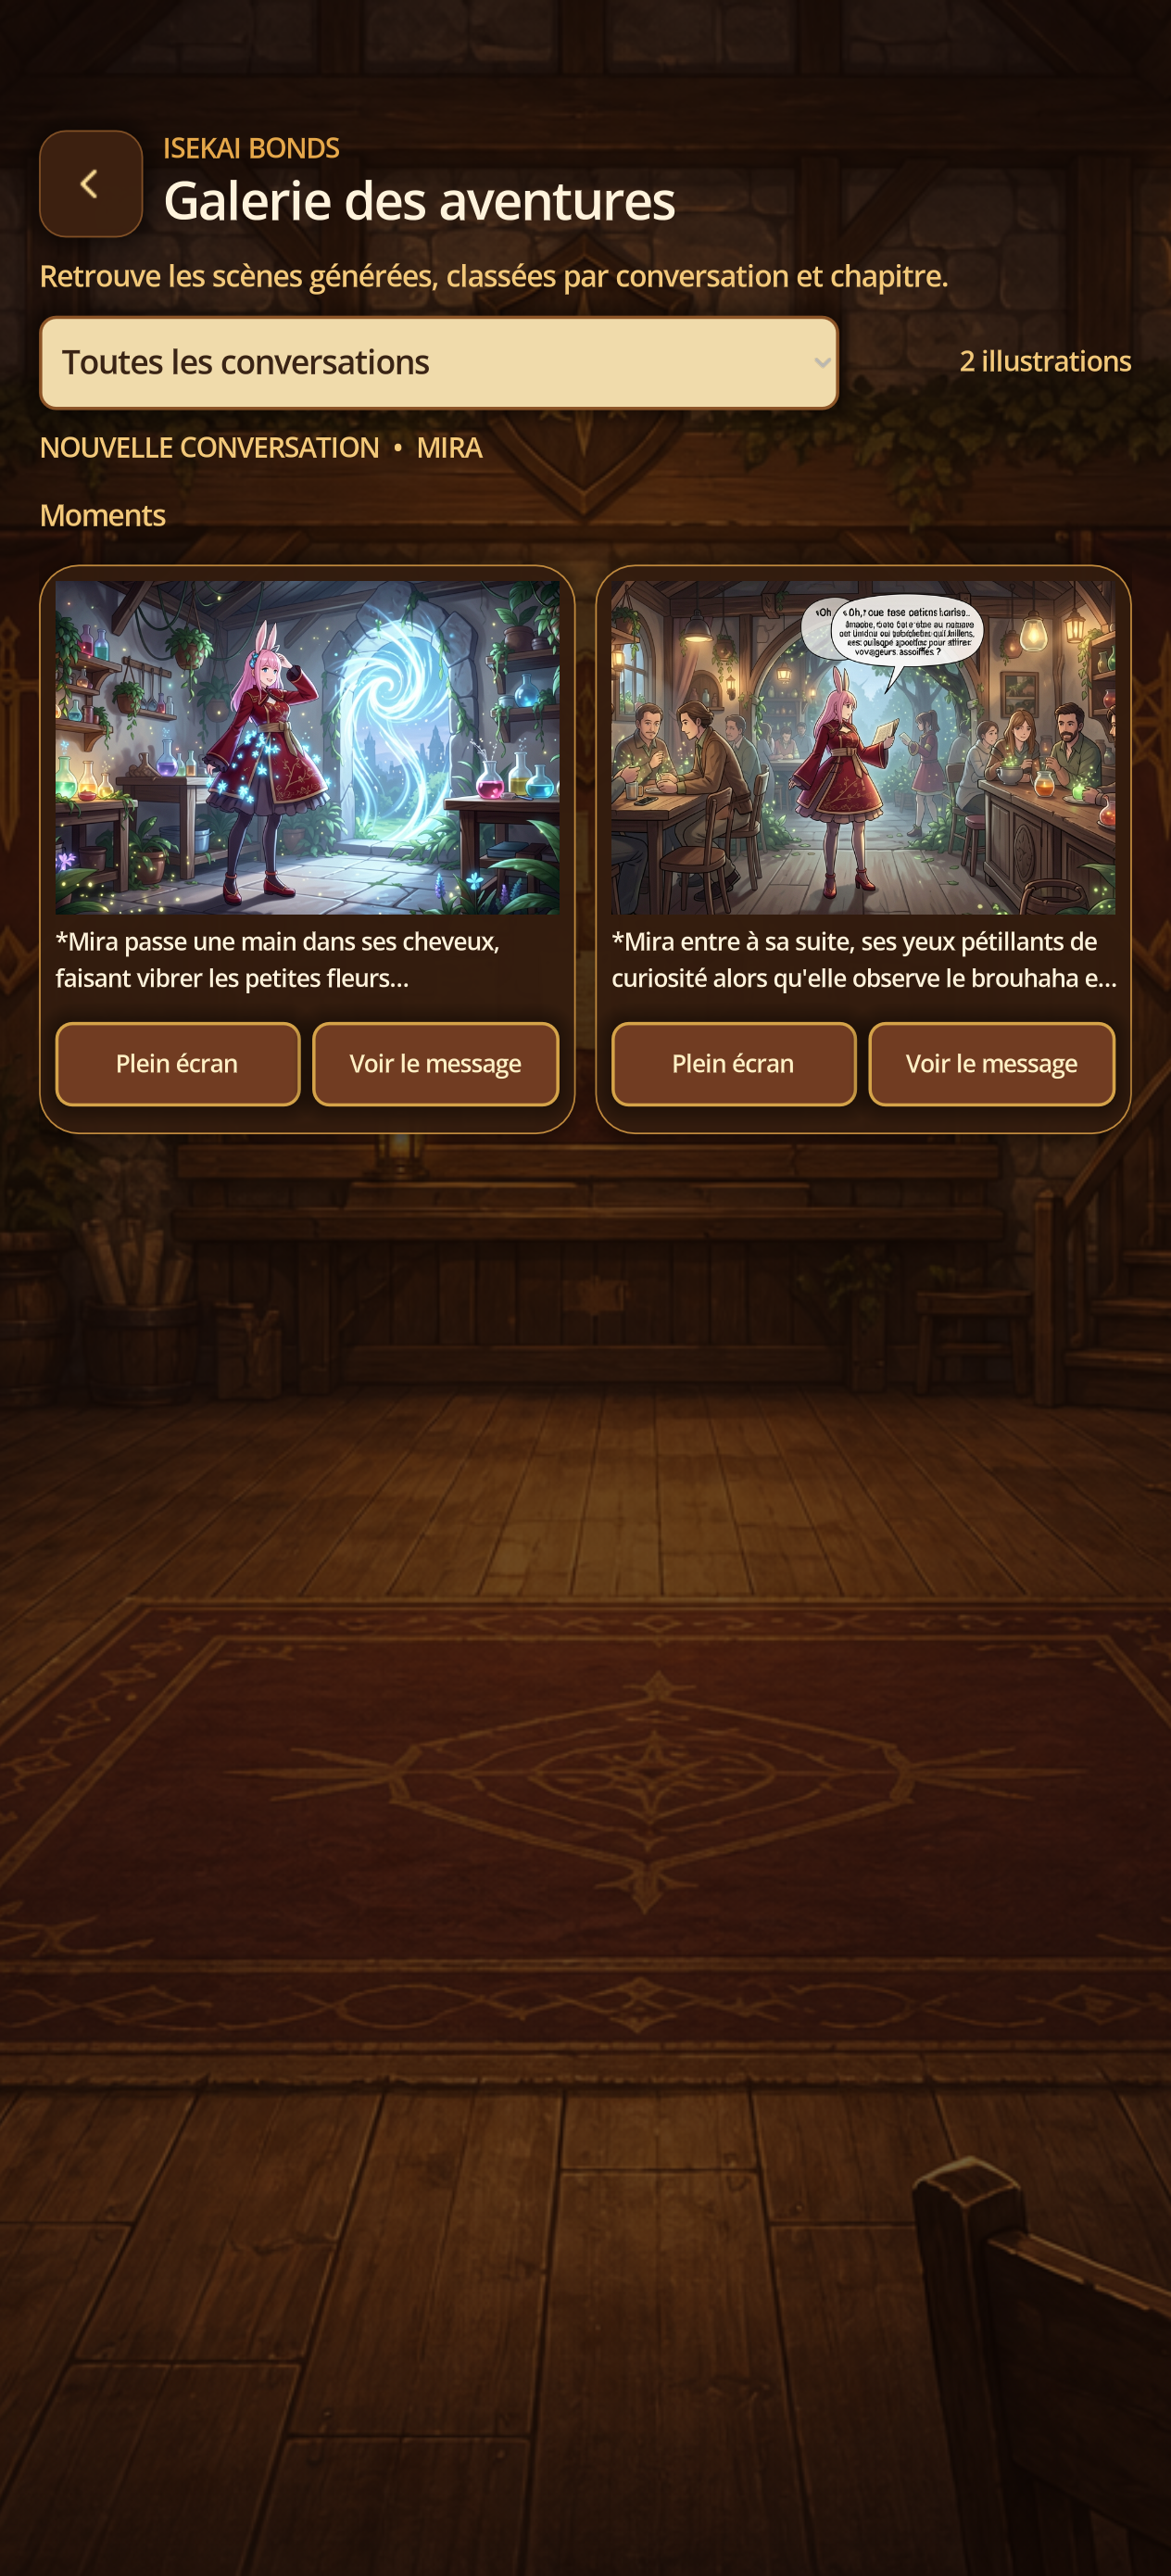
- From Chats, touch Adventure Gallery.
- Choose All conversations or a filter.
- If no private illustration is indexed, check the empty state and return to generate an image from Scene.
12G · Gallery
Find a saved illustration
Steps
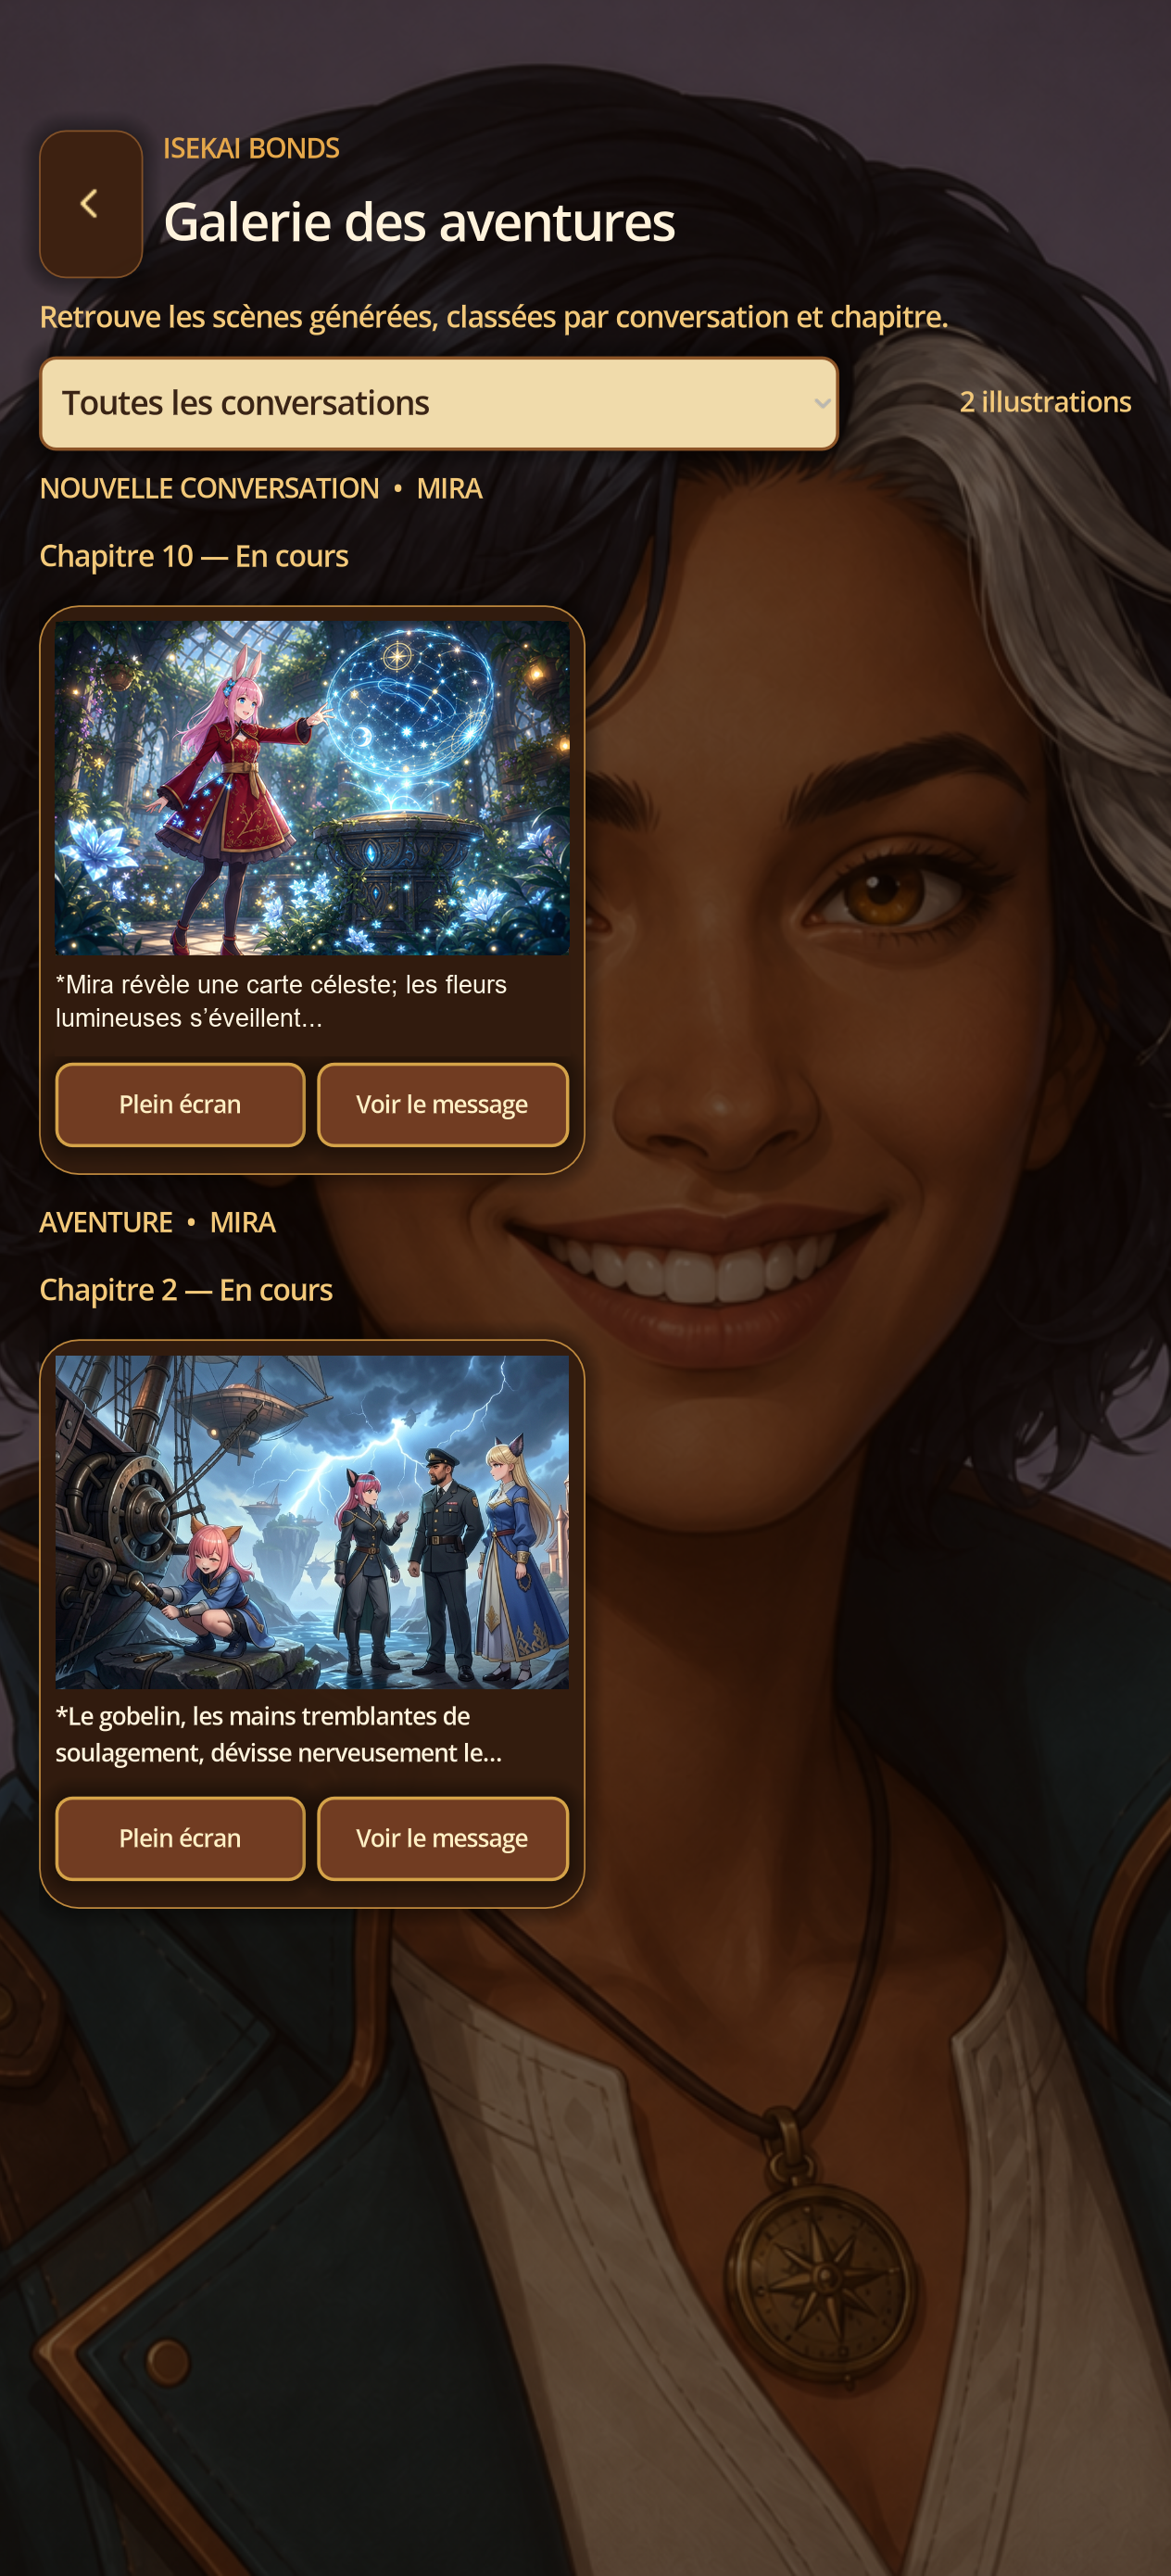
- Open Adventure Gallery after a successful generation.
- Filter by conversation and chapter, then tap Fullscreen or View Message.
- Export only an image that you are allowed to share; Remove it from its message/conversation if necessary.
13A · Local models
Import or search for a GGUF
Steps
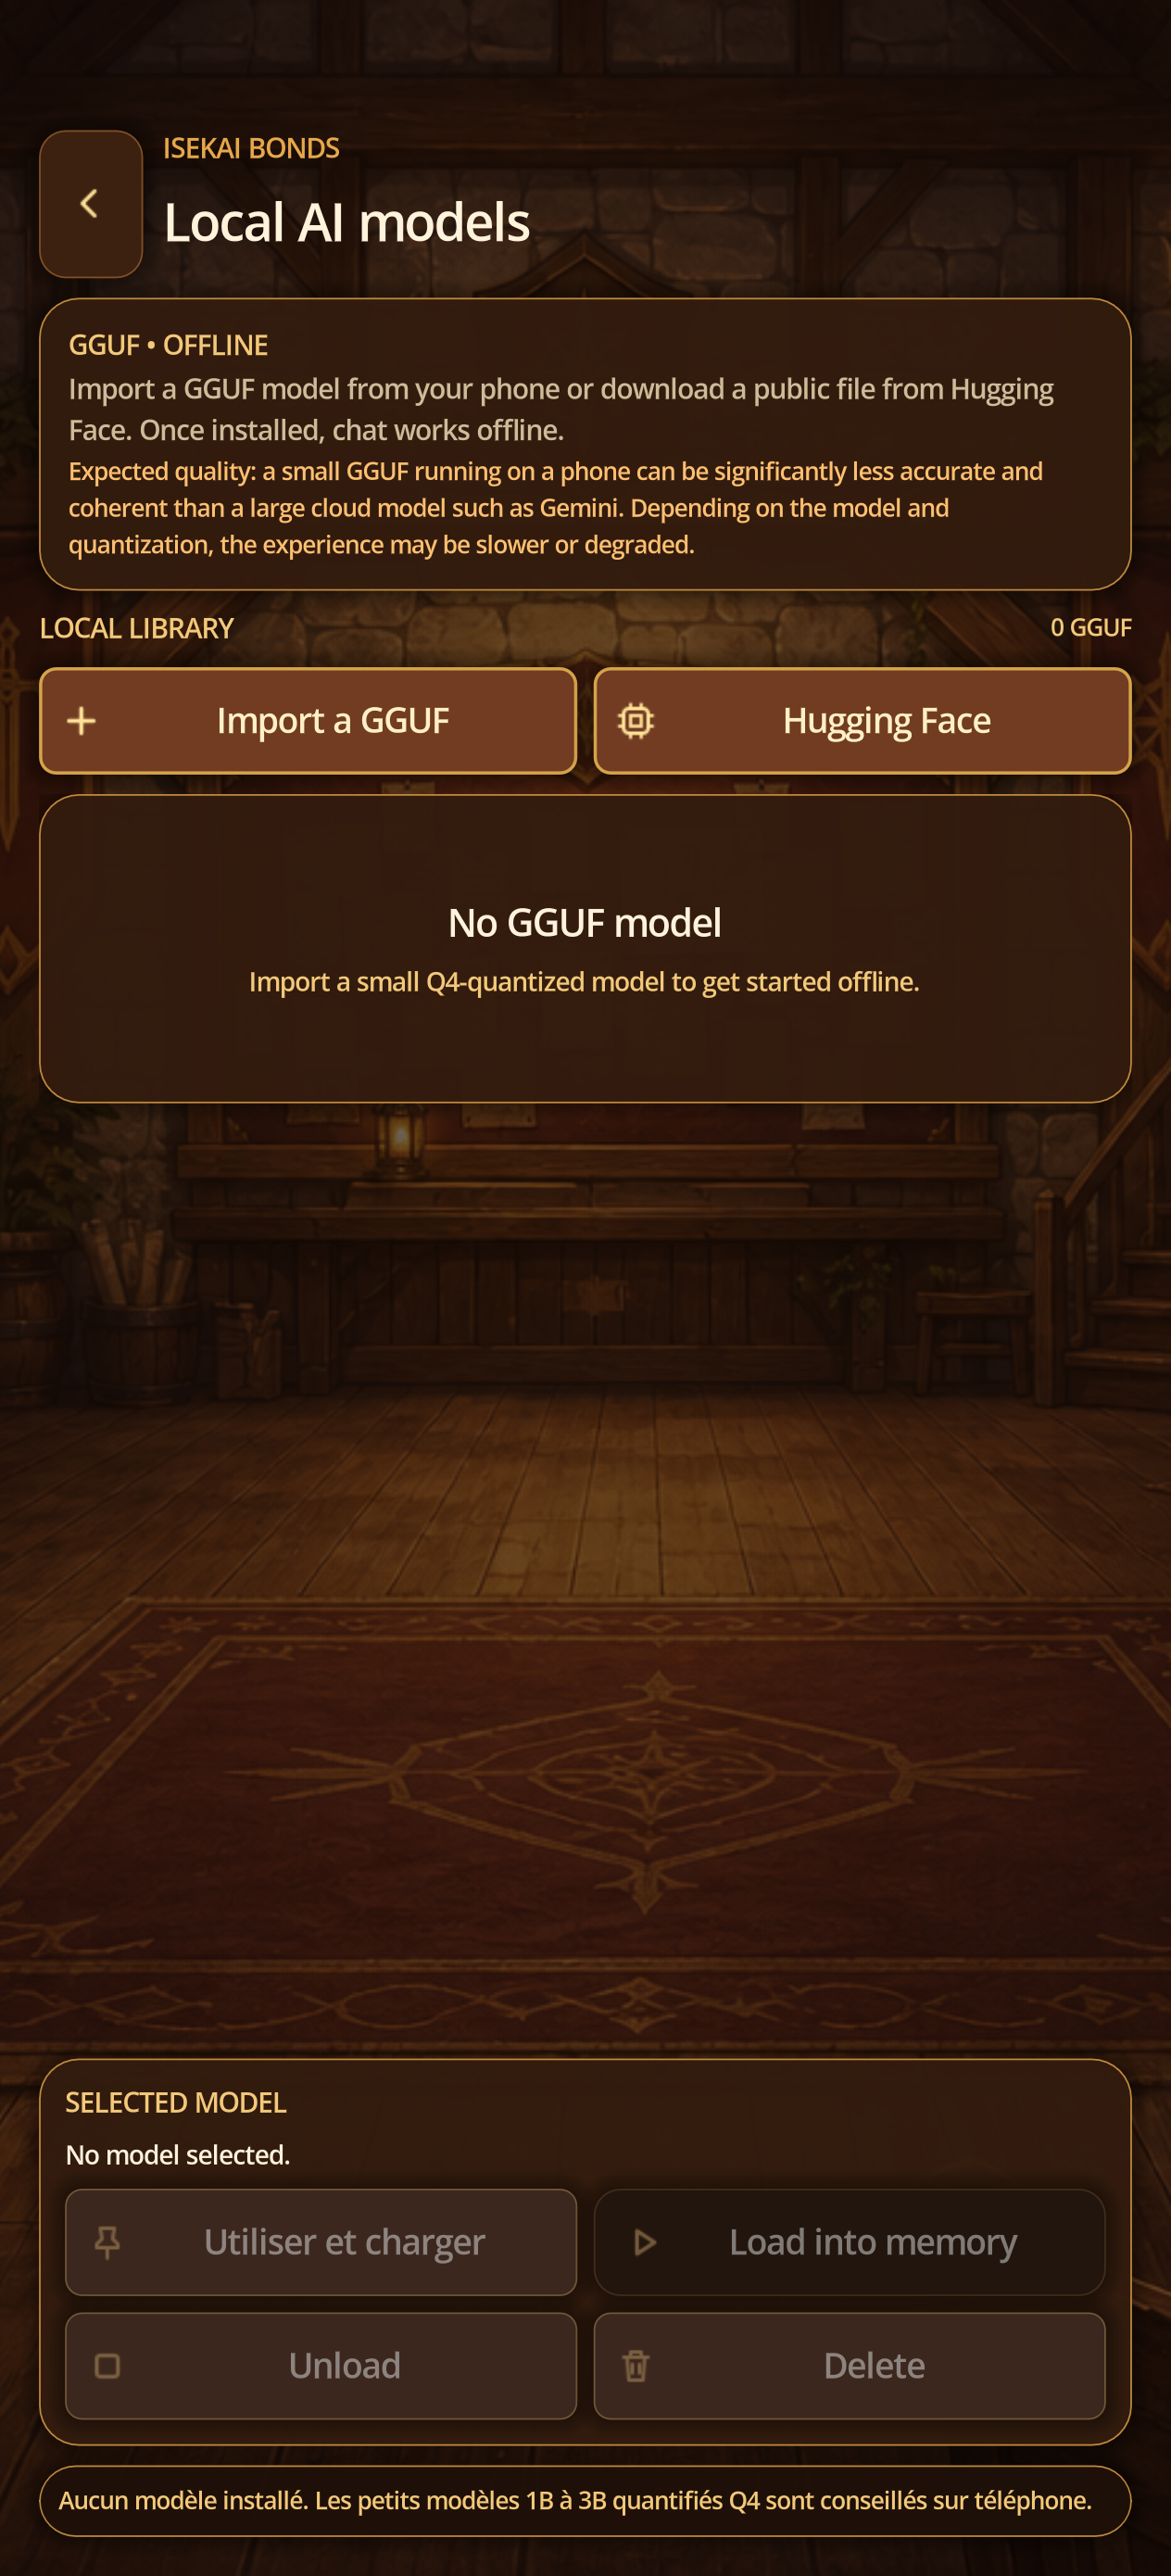
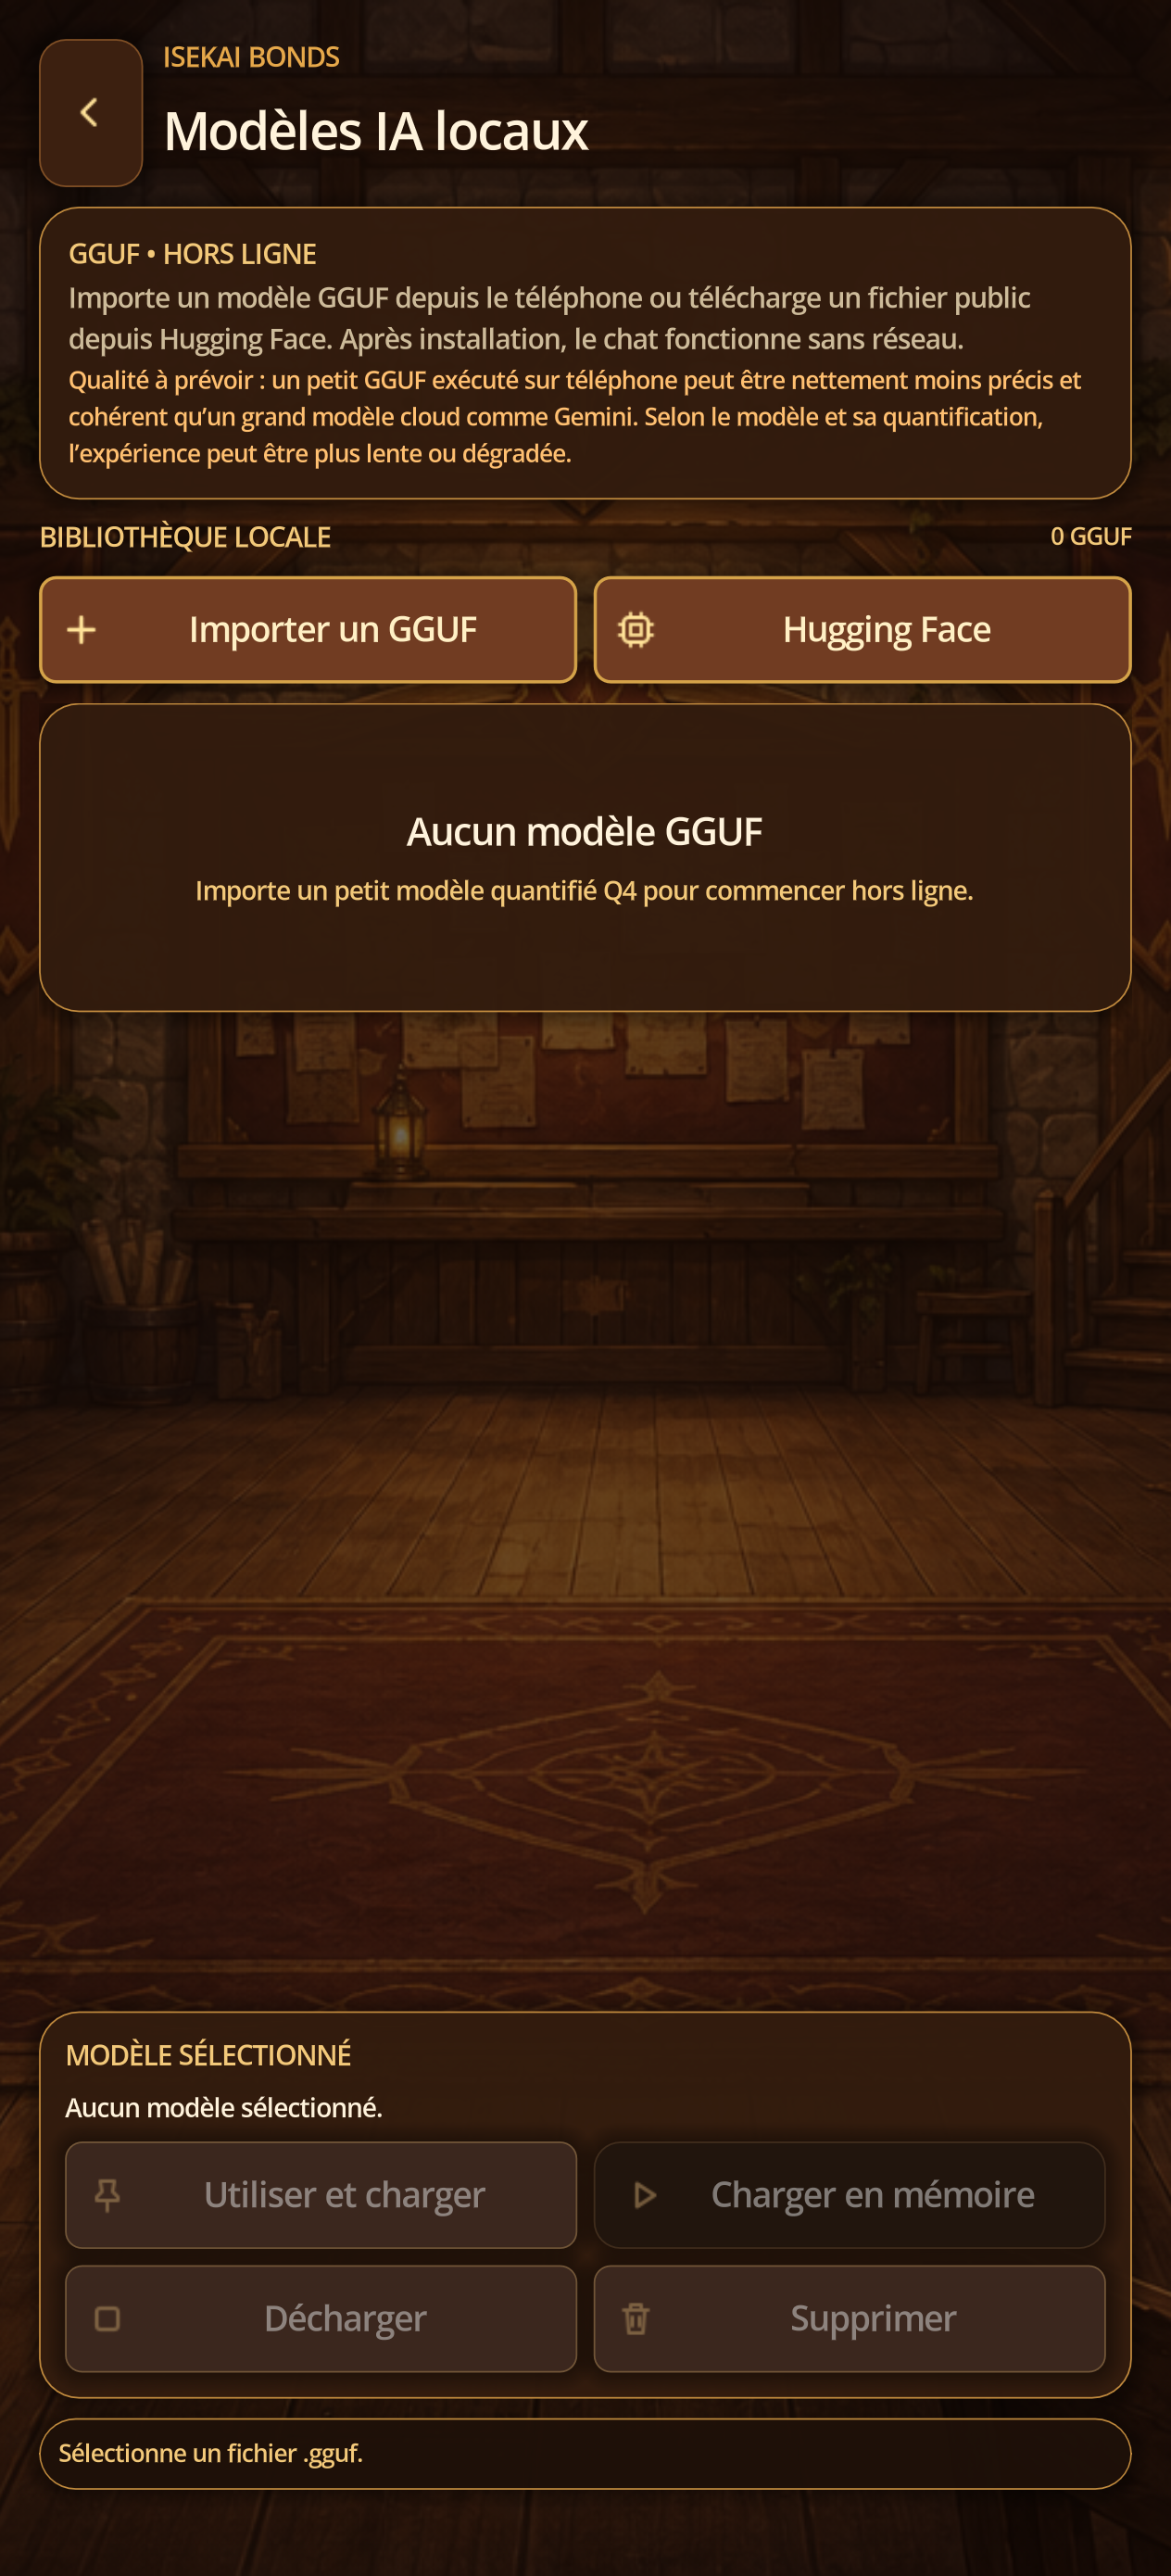
- Open Models IA; The empty state proposes Import a GGUF and Hugging Face.
- For a local file, choose an authorized .gguf: extension, size and signature are validated before private copying.
- For Hugging Face, look for a GGUF public repository, compare size, quantification, estimated RAM and license, and then download the selected file.
13B · Local models
Load, use and unload
Steps
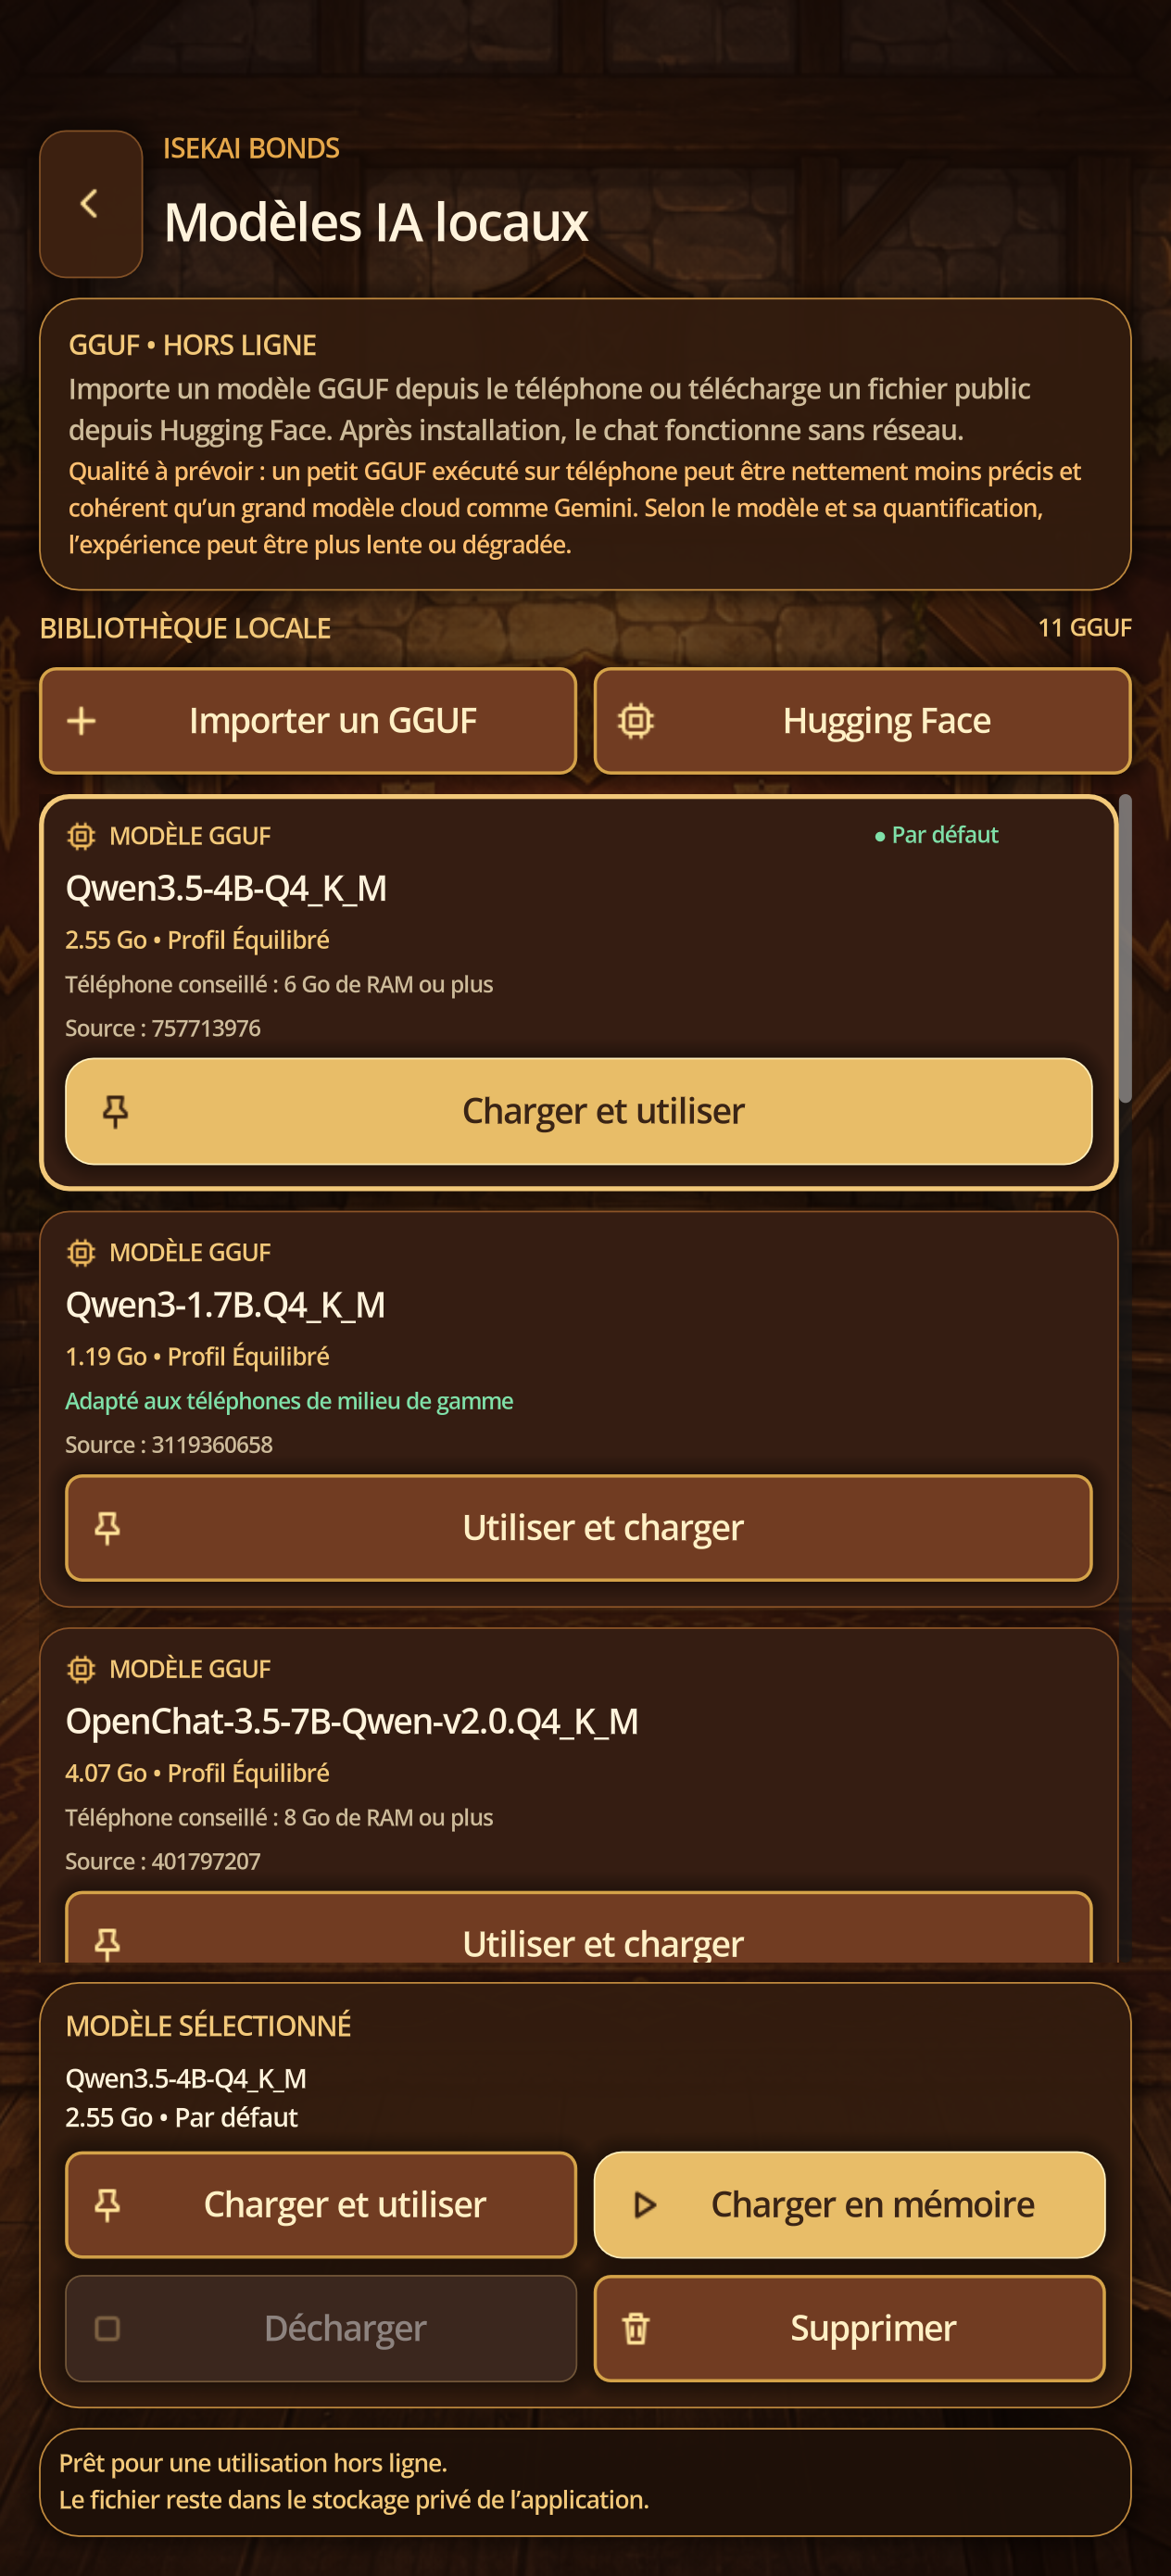
- Select a card and then tap Load and use or Load in Memory.
- On Android, follow Loading → ready; OpenCL is tried if compatible, otherwise the message announces the automatic CPU fold.
- Choose the default or character model, then run a chat and wait for the initial context loading.
- Return here and tap Unload before a heavy local TTS or to release RAM; Delete erases the file after confirmation.
13C · Local models
Understand why a GGUF import was rejected
Steps
- Tap Import a GGUF and choose a file actually carrying the .gguf extension; the native system selector normally filters the other files.
- After selection, wait for "copying and validation of GGUF...": the application checks extension, maximum size of 32 GB and GGUF header before any private copy.
- If the status displays "Select a .gguf file", return to the selector and choose the correct file; for "Unable GGUF header", redownload the model from its official source.
- For a file too large or incomplete, free space, check its published checksum and prefer a Q4 quantification from 1B to 3B adapted to the phone.
06 · Local GGUF
Download, import, and load a model
Steps
- From Home, open AI models and the local/GGUF library.
- Import a legally obtained .gguf file or use public Hugging Face search without a token.
- Start with a small Q4 suited to device memory and wait for the complete download.
- On its card, use Set as default, then Load into memory or Load and use.
08 · Voices
Android, Piper, Supertonic, and cloud
Steps
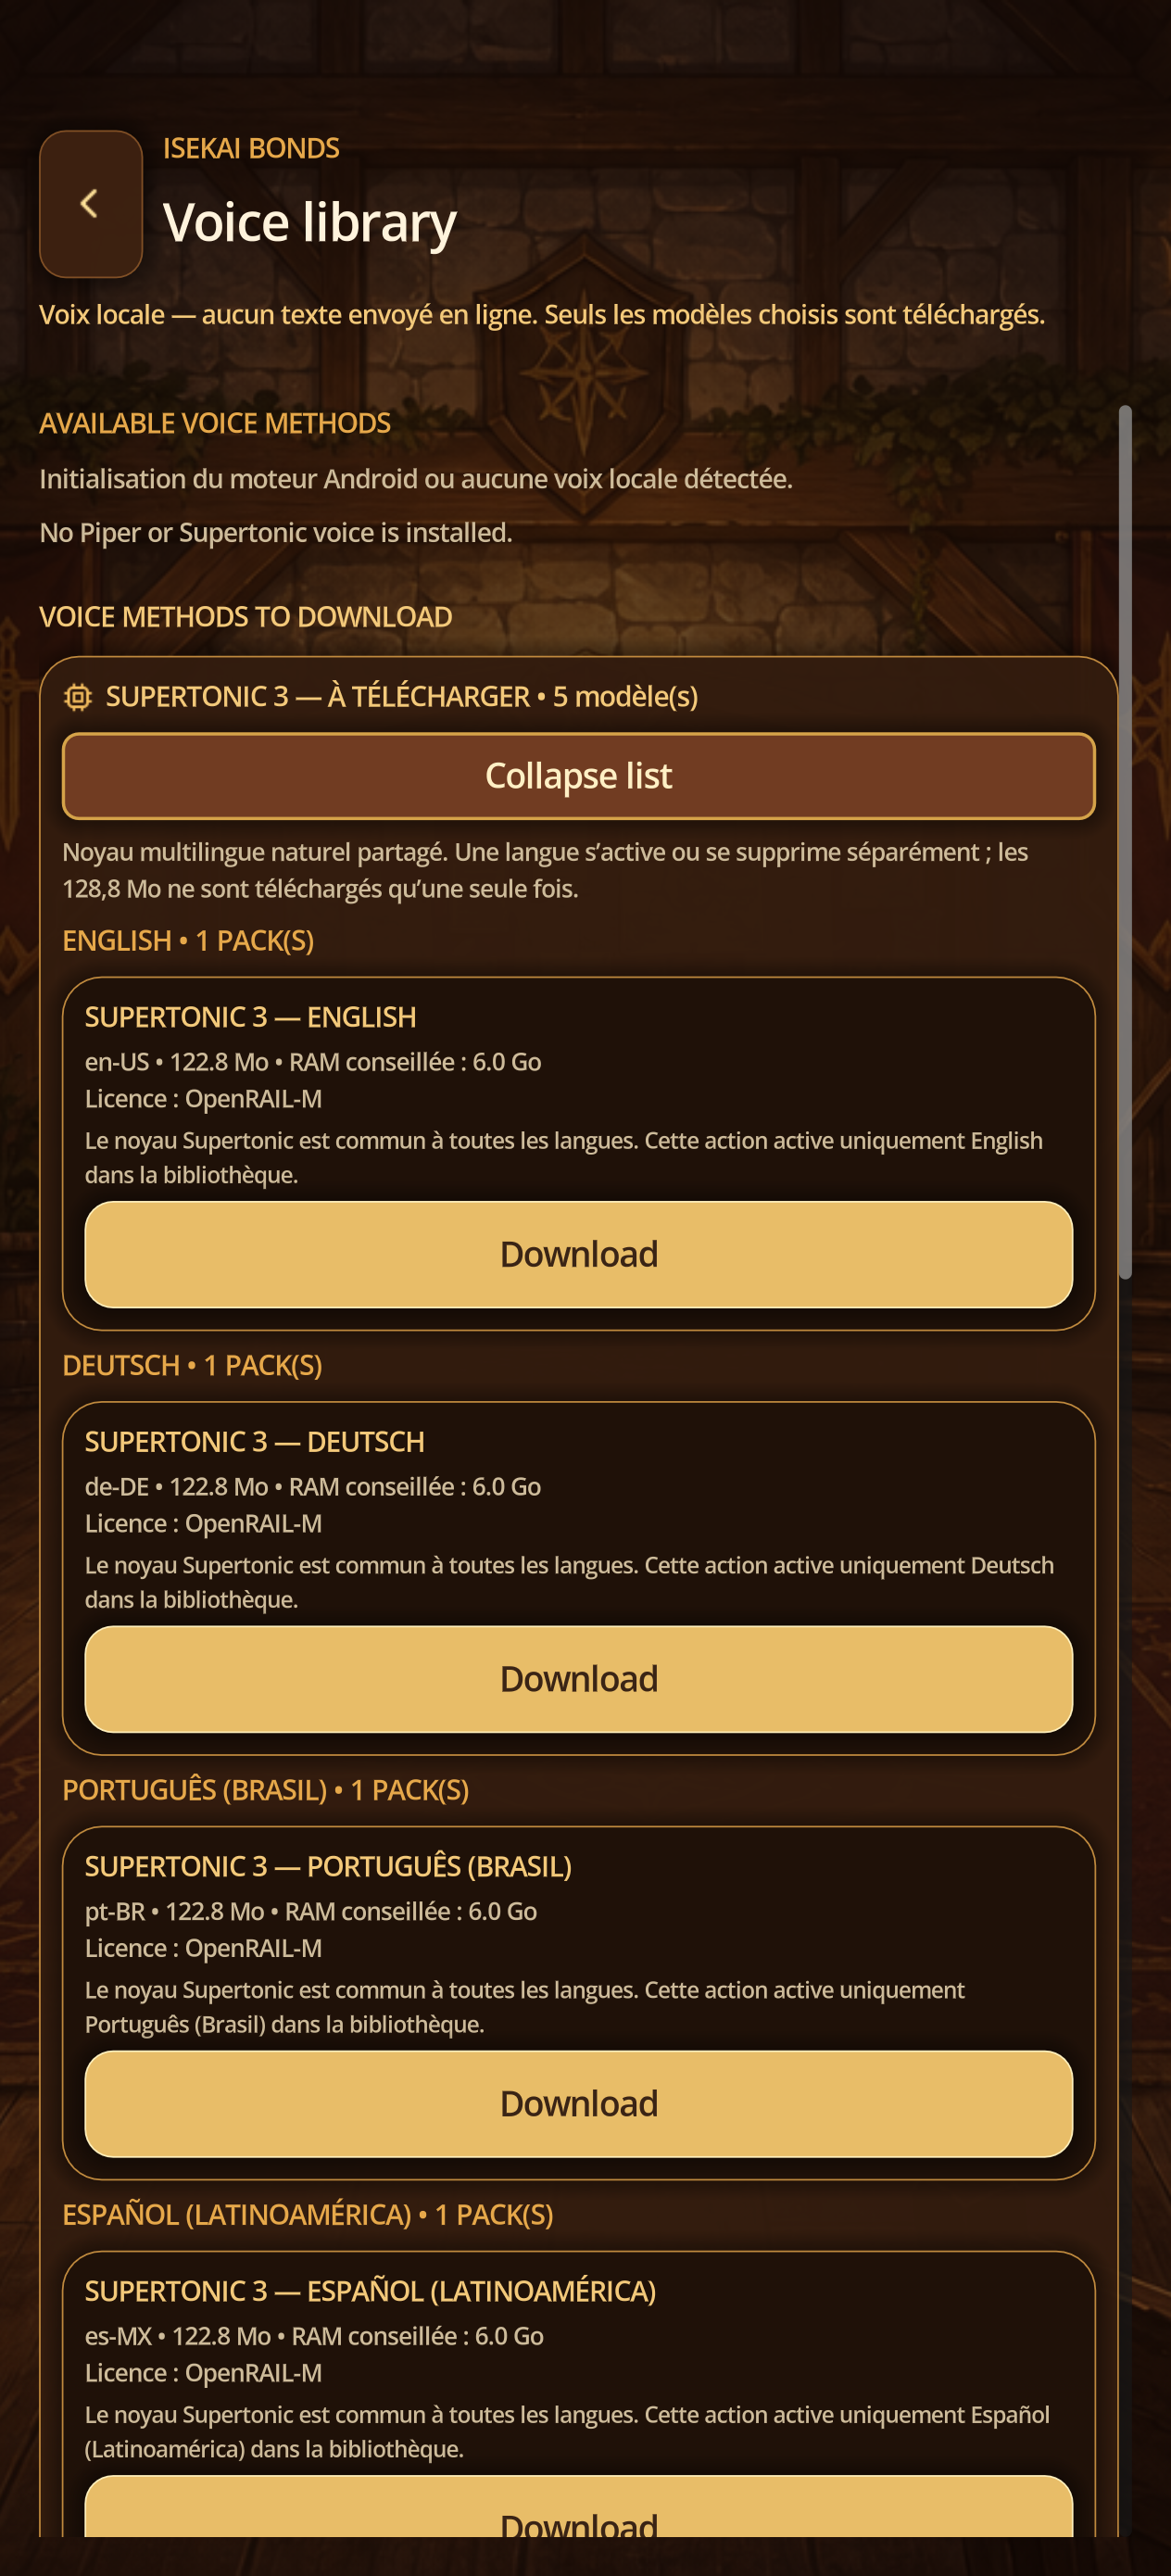
- Enable voice in a character profile, then open Voice library.
- Select a language, download a Piper or Supertonic voice, and play its preview.
- For Supertonic, read and accept the OpenRAIL-M license before downloading.
- Assign the voice, return to the profile, and use Test voice.
14A · TTS
Activate voice on character profile
Steps
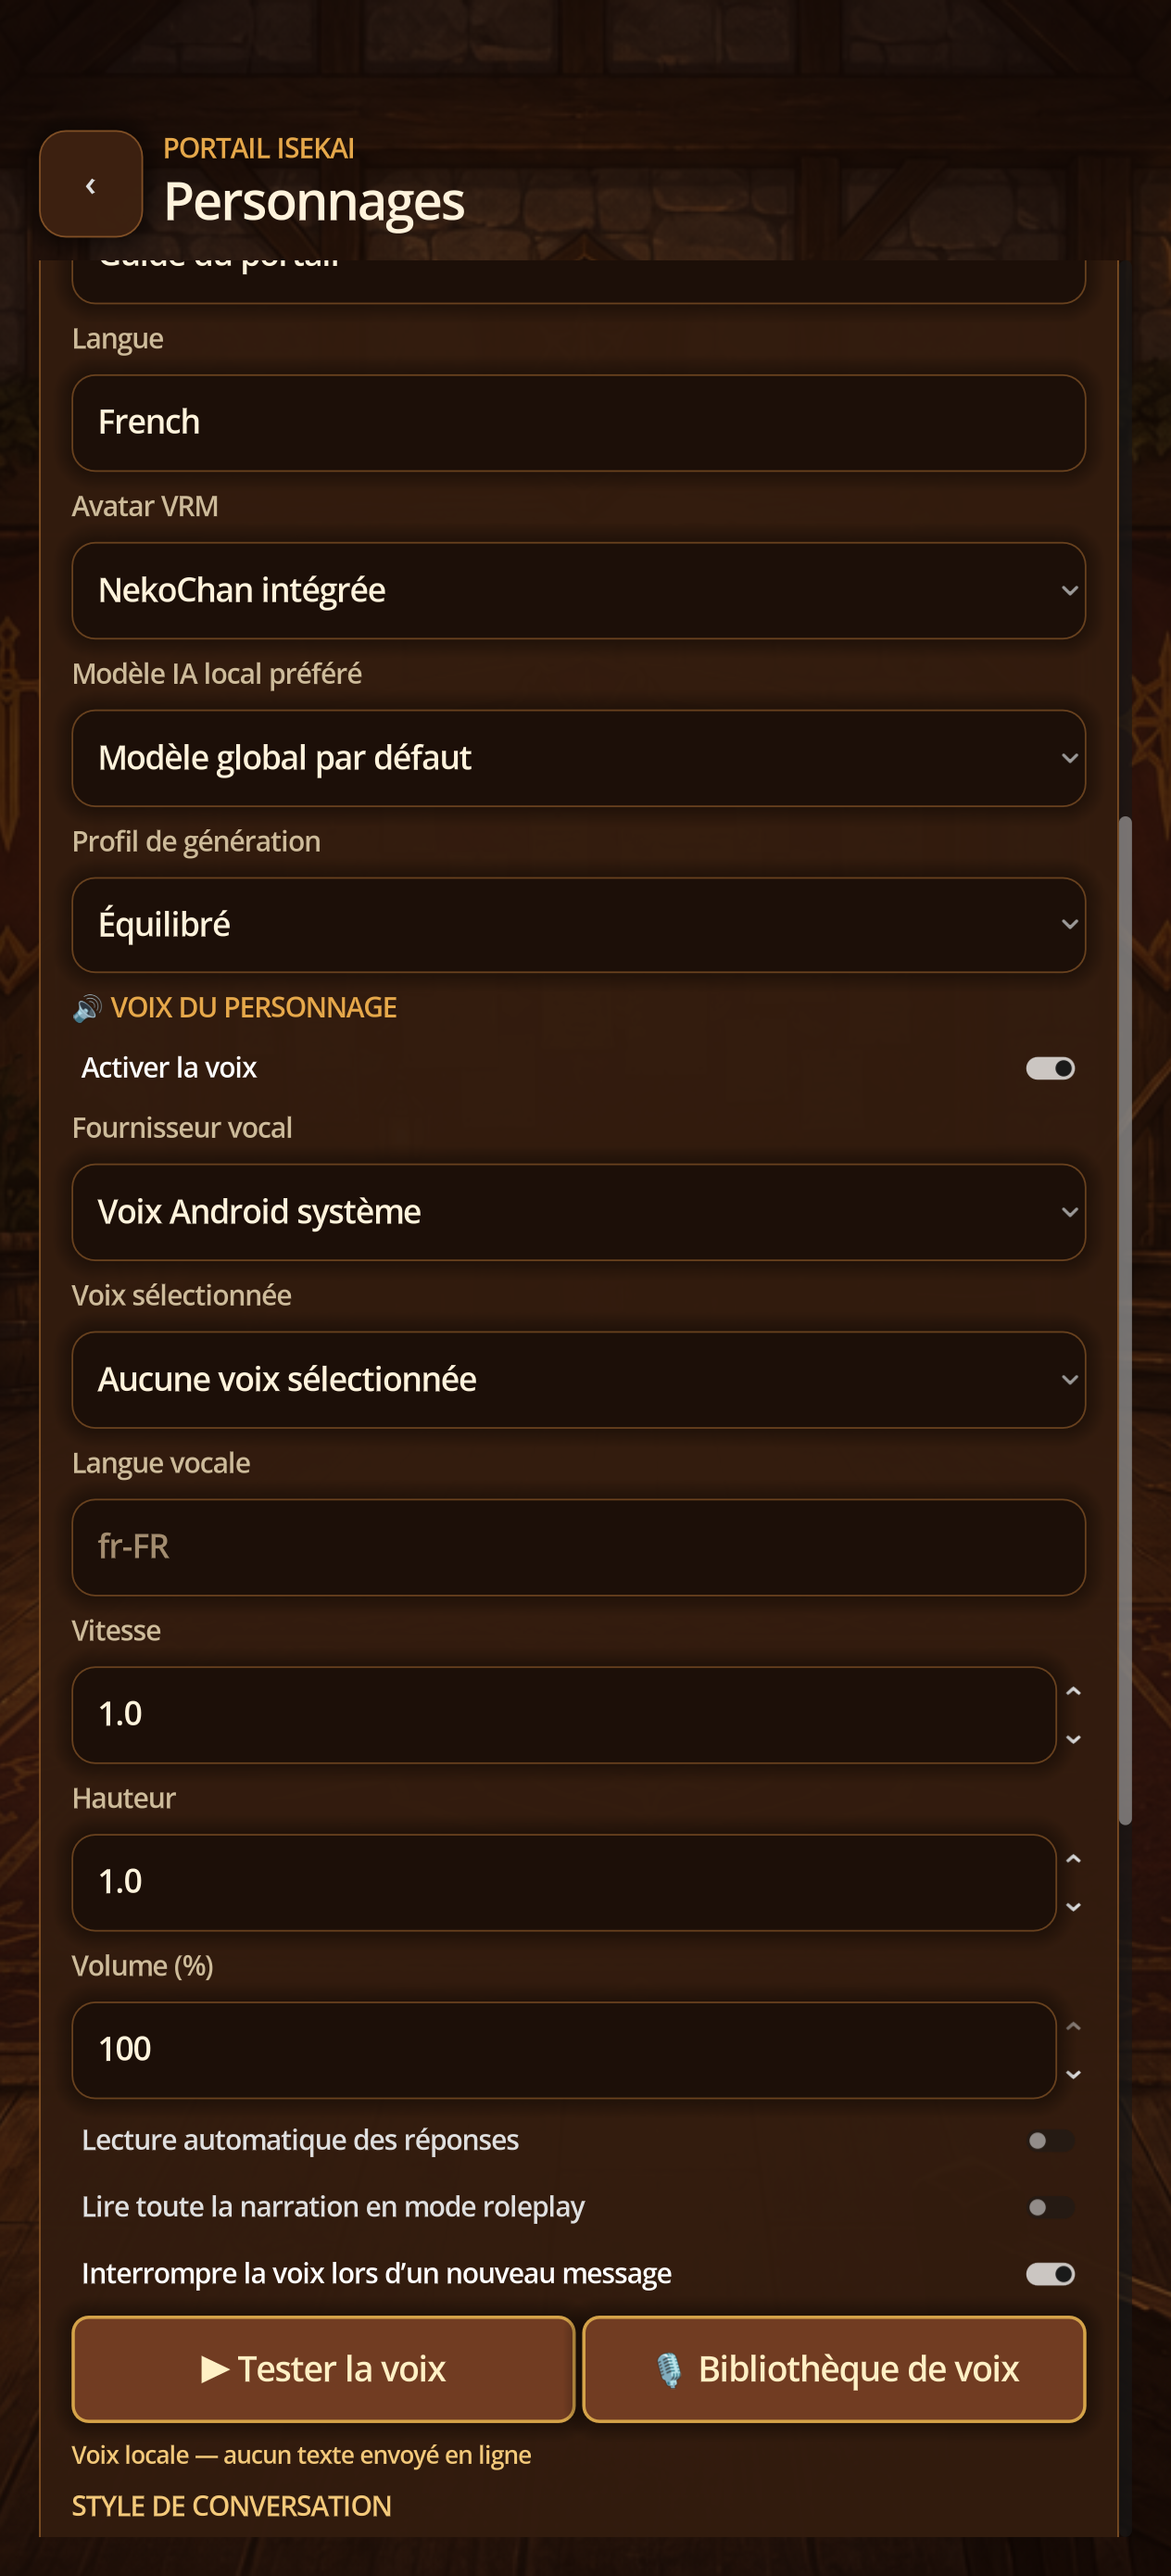
- Open Characters → Edit and descend to Voice of Character.
- Activate voice, choose Android, Piper, Supertonic 3 or a cloud provider actually configured.
- Select voice and language, set speed, height if the engine supports it, volume, auto playback, narration and interruption.
- Touch Test Voice; correct the selection if no sound starts.
14B · Local TTS
Read license, language and memory before Piper
Steps
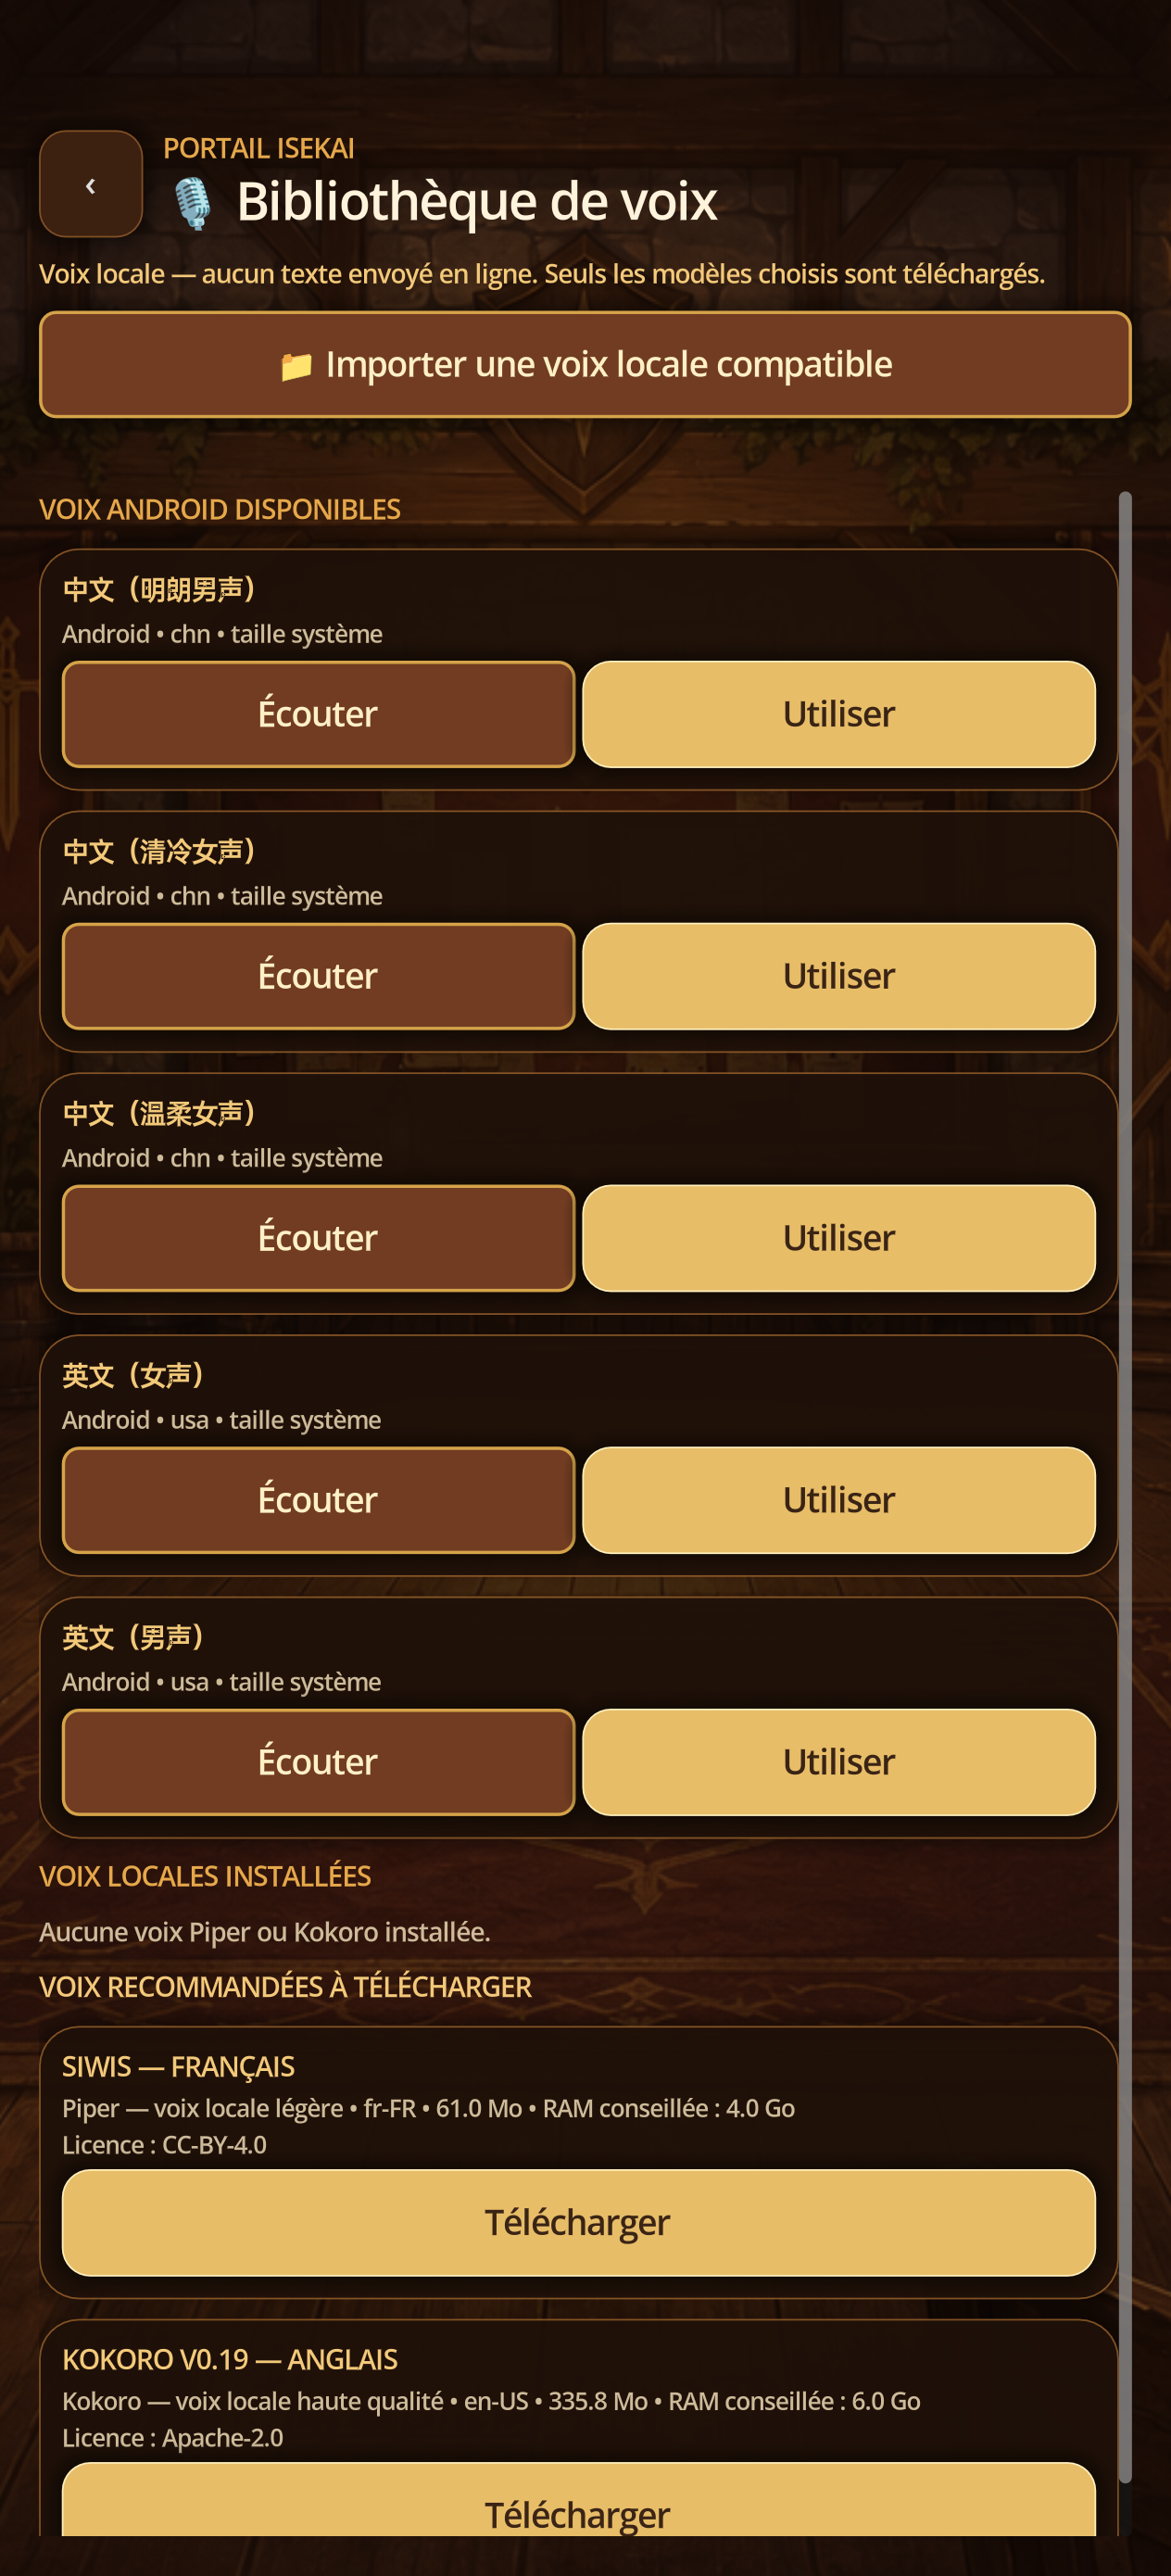
- Touch Voice Library.
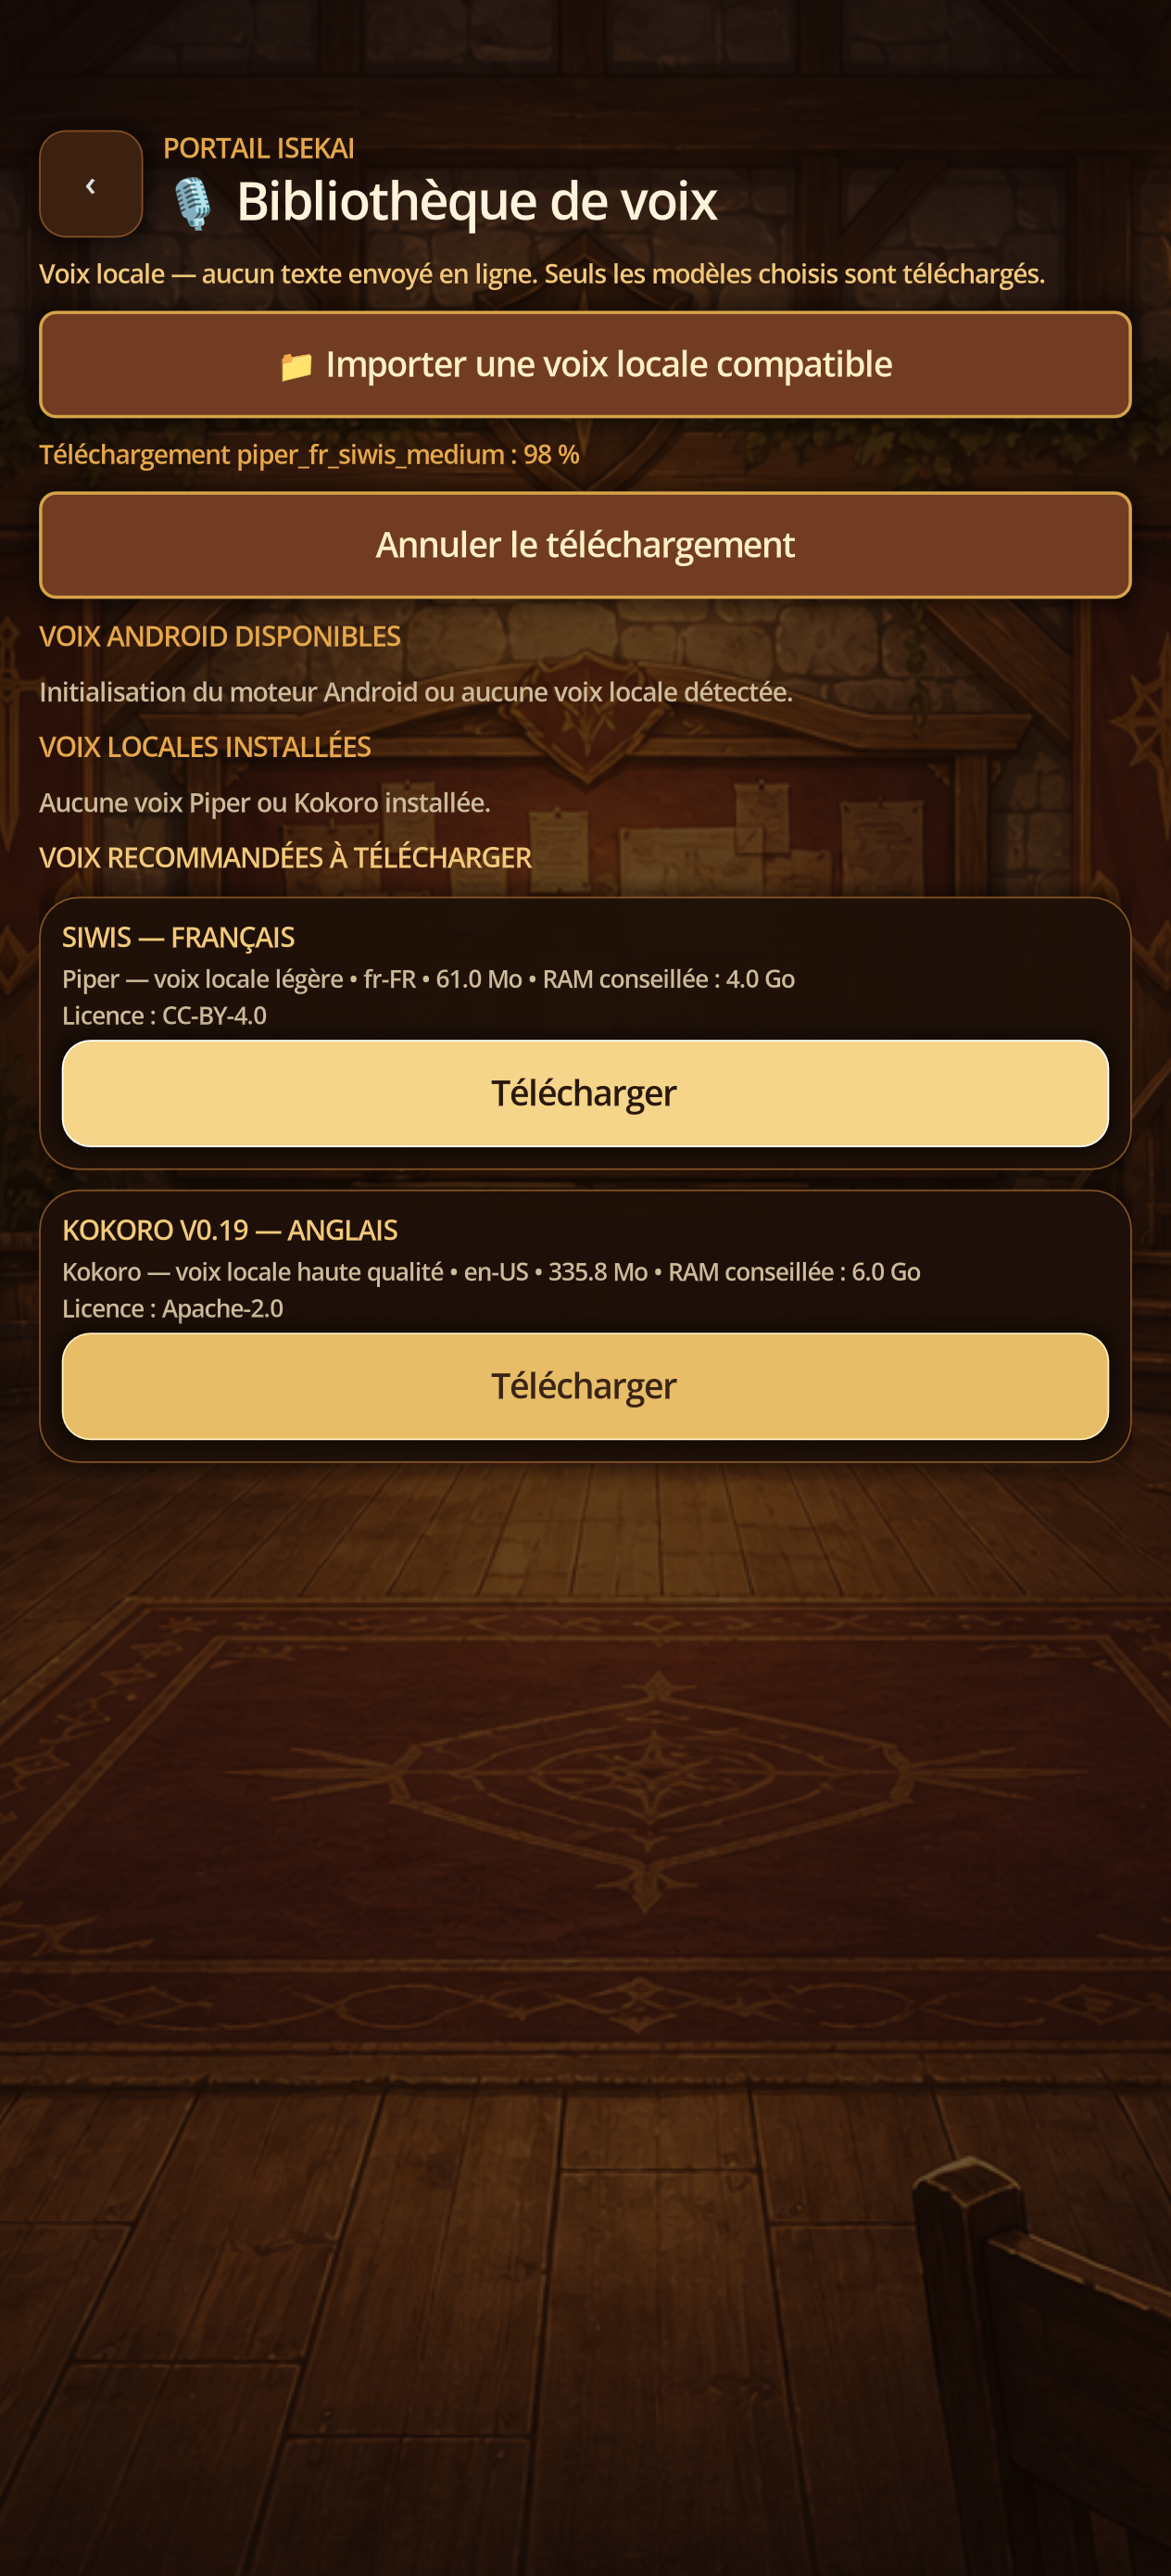
- Find SIWIS - English, en-FR, recommended size, RAM and CC-BY-4.0 license.
- Touch Download only after checking the license and free space.
14C · Local TTS
Follow or cancel Piper download
Steps
- During download, check the percentage.
- Use Cancel download if network becomes unstable.
- After 100%, wait for the check sum validation and installation.
14D · Local TTS
Assign and preview Piper
Steps
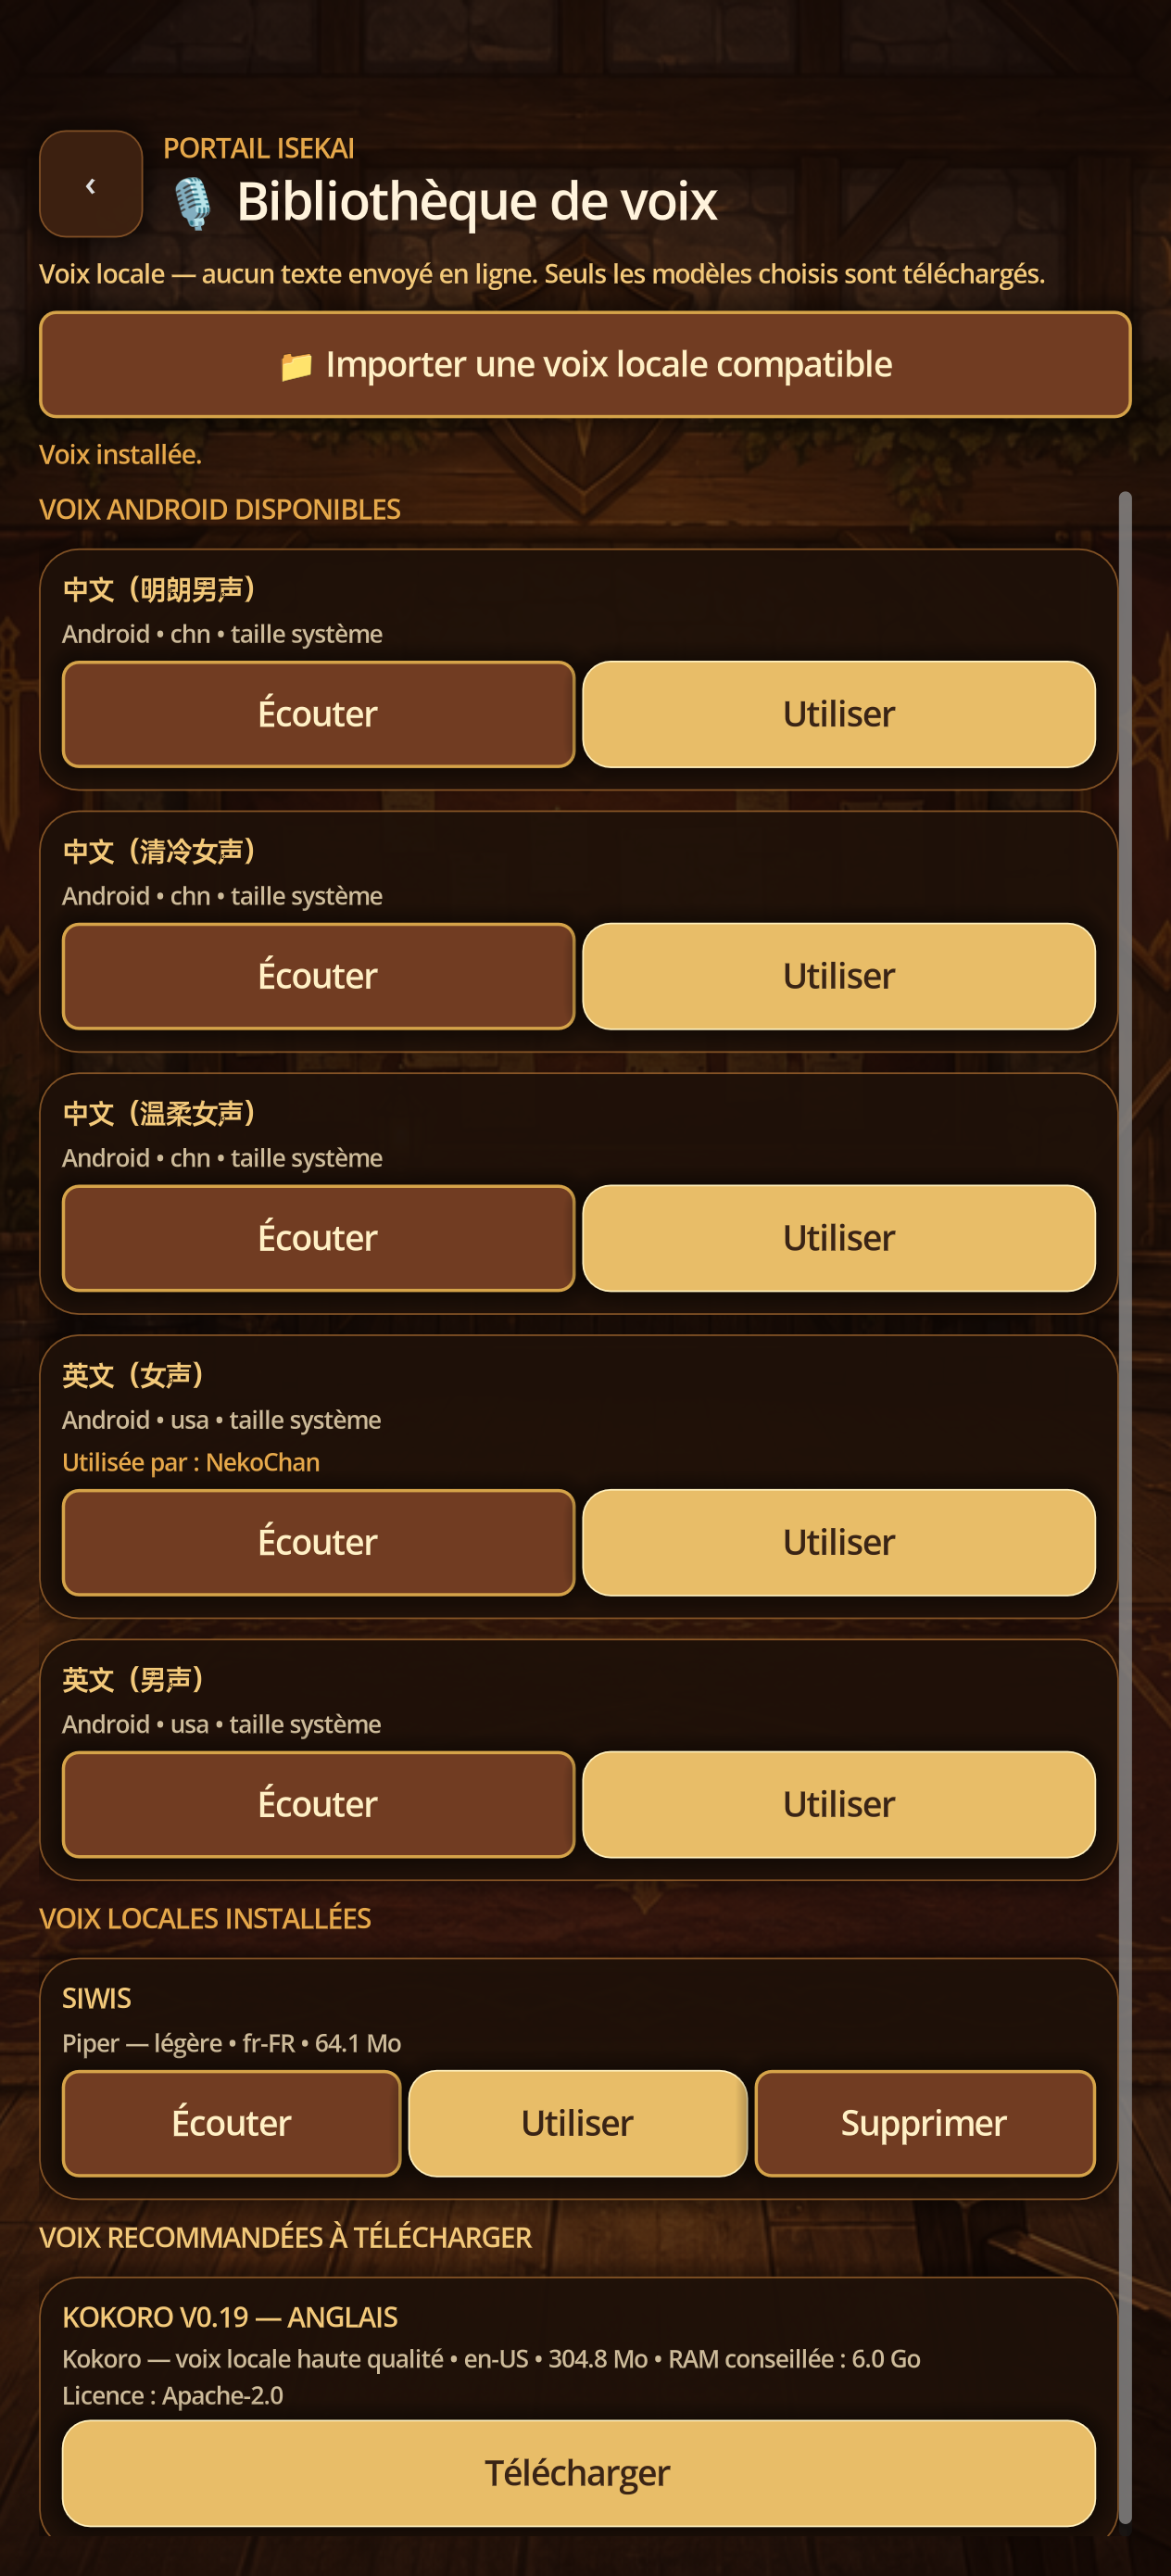
- In Local Voice installed, tap Listen for an overview.
- Tap Use to assign to the current character.
- Go back to the file, check Piper/SIWIS and then test the voice.
- Use Delete only if no character has yet to use this voice.
14E · Local TTS
Install Supertonic 3 and accept OpenRAIL-M
Steps
- In Voice Library, develop Supertonic 3.
- Choose the language; The shared multilingual heart is downloaded once.
- Read the OpenRAIL-M package leaflet and explicitly accept its restrictions before downloading.
- After installation, assign a Supertonic voice to the character and test it.
14F · Local TTS
Explicitly validate the Supertonic license
Steps
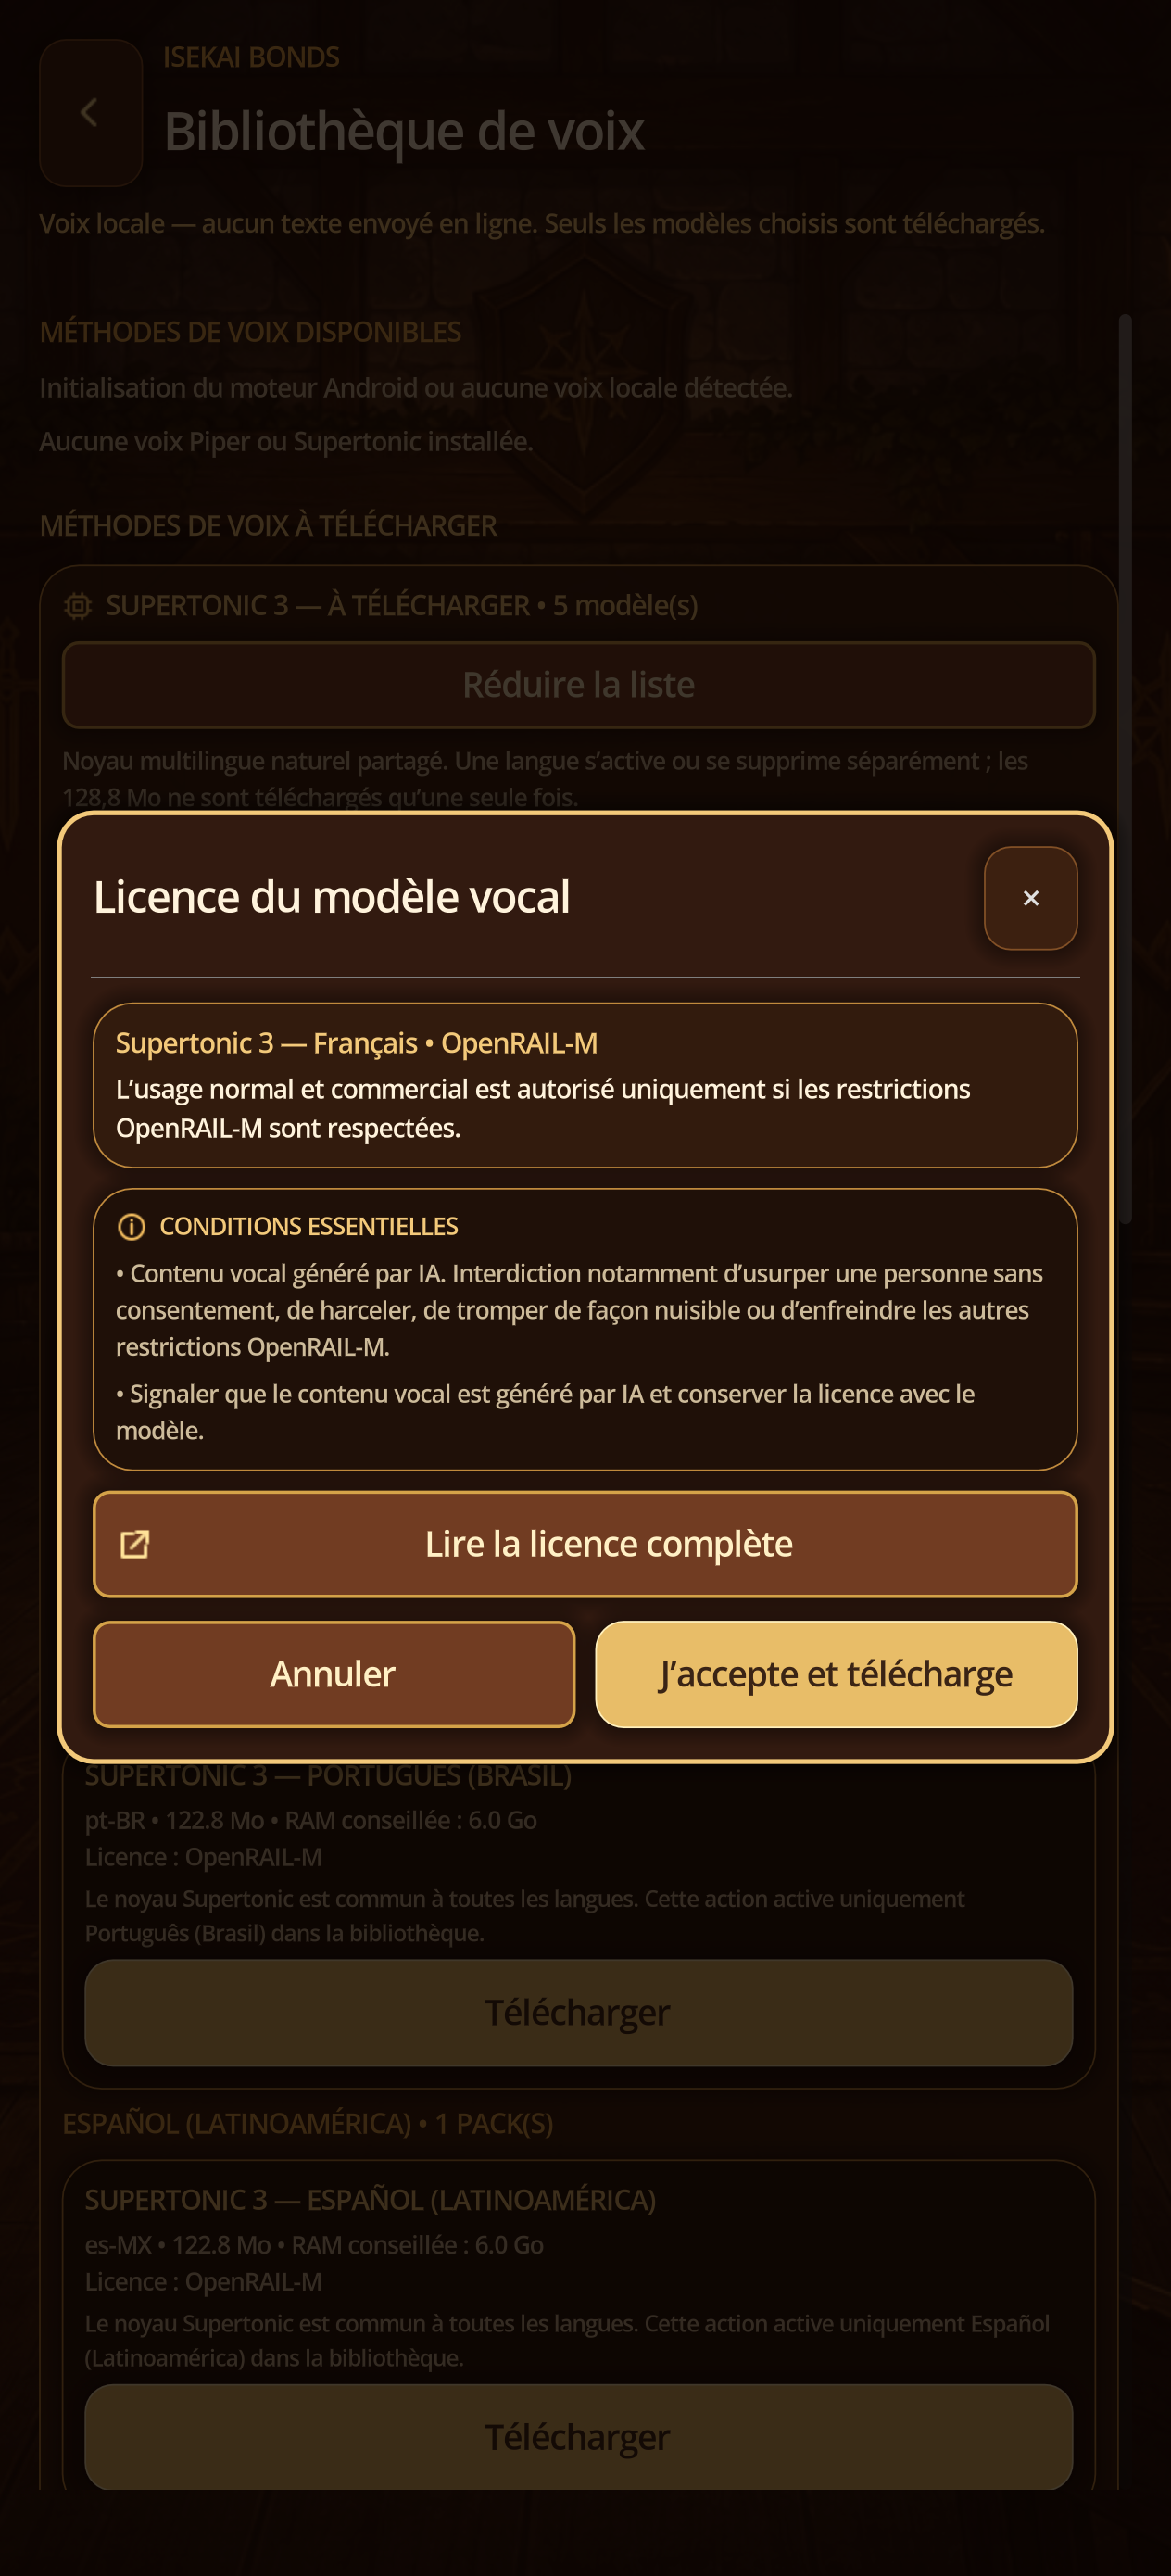
- In Voice Library, tap Download on a Supertonic 3 voice corresponding to the character's language.
- In Voice Model License, read the OpenRAIL-M conditions and tap Read the full license to view the text distributed with the template.
- Touch J Cancel close the window without downloading.
- After acceptance, follow the shared heart and then the voice pack to the installed state, use Listen, then assign the voice from the character file.
14G · TTS
Play, stop, and combine with streaming
Steps
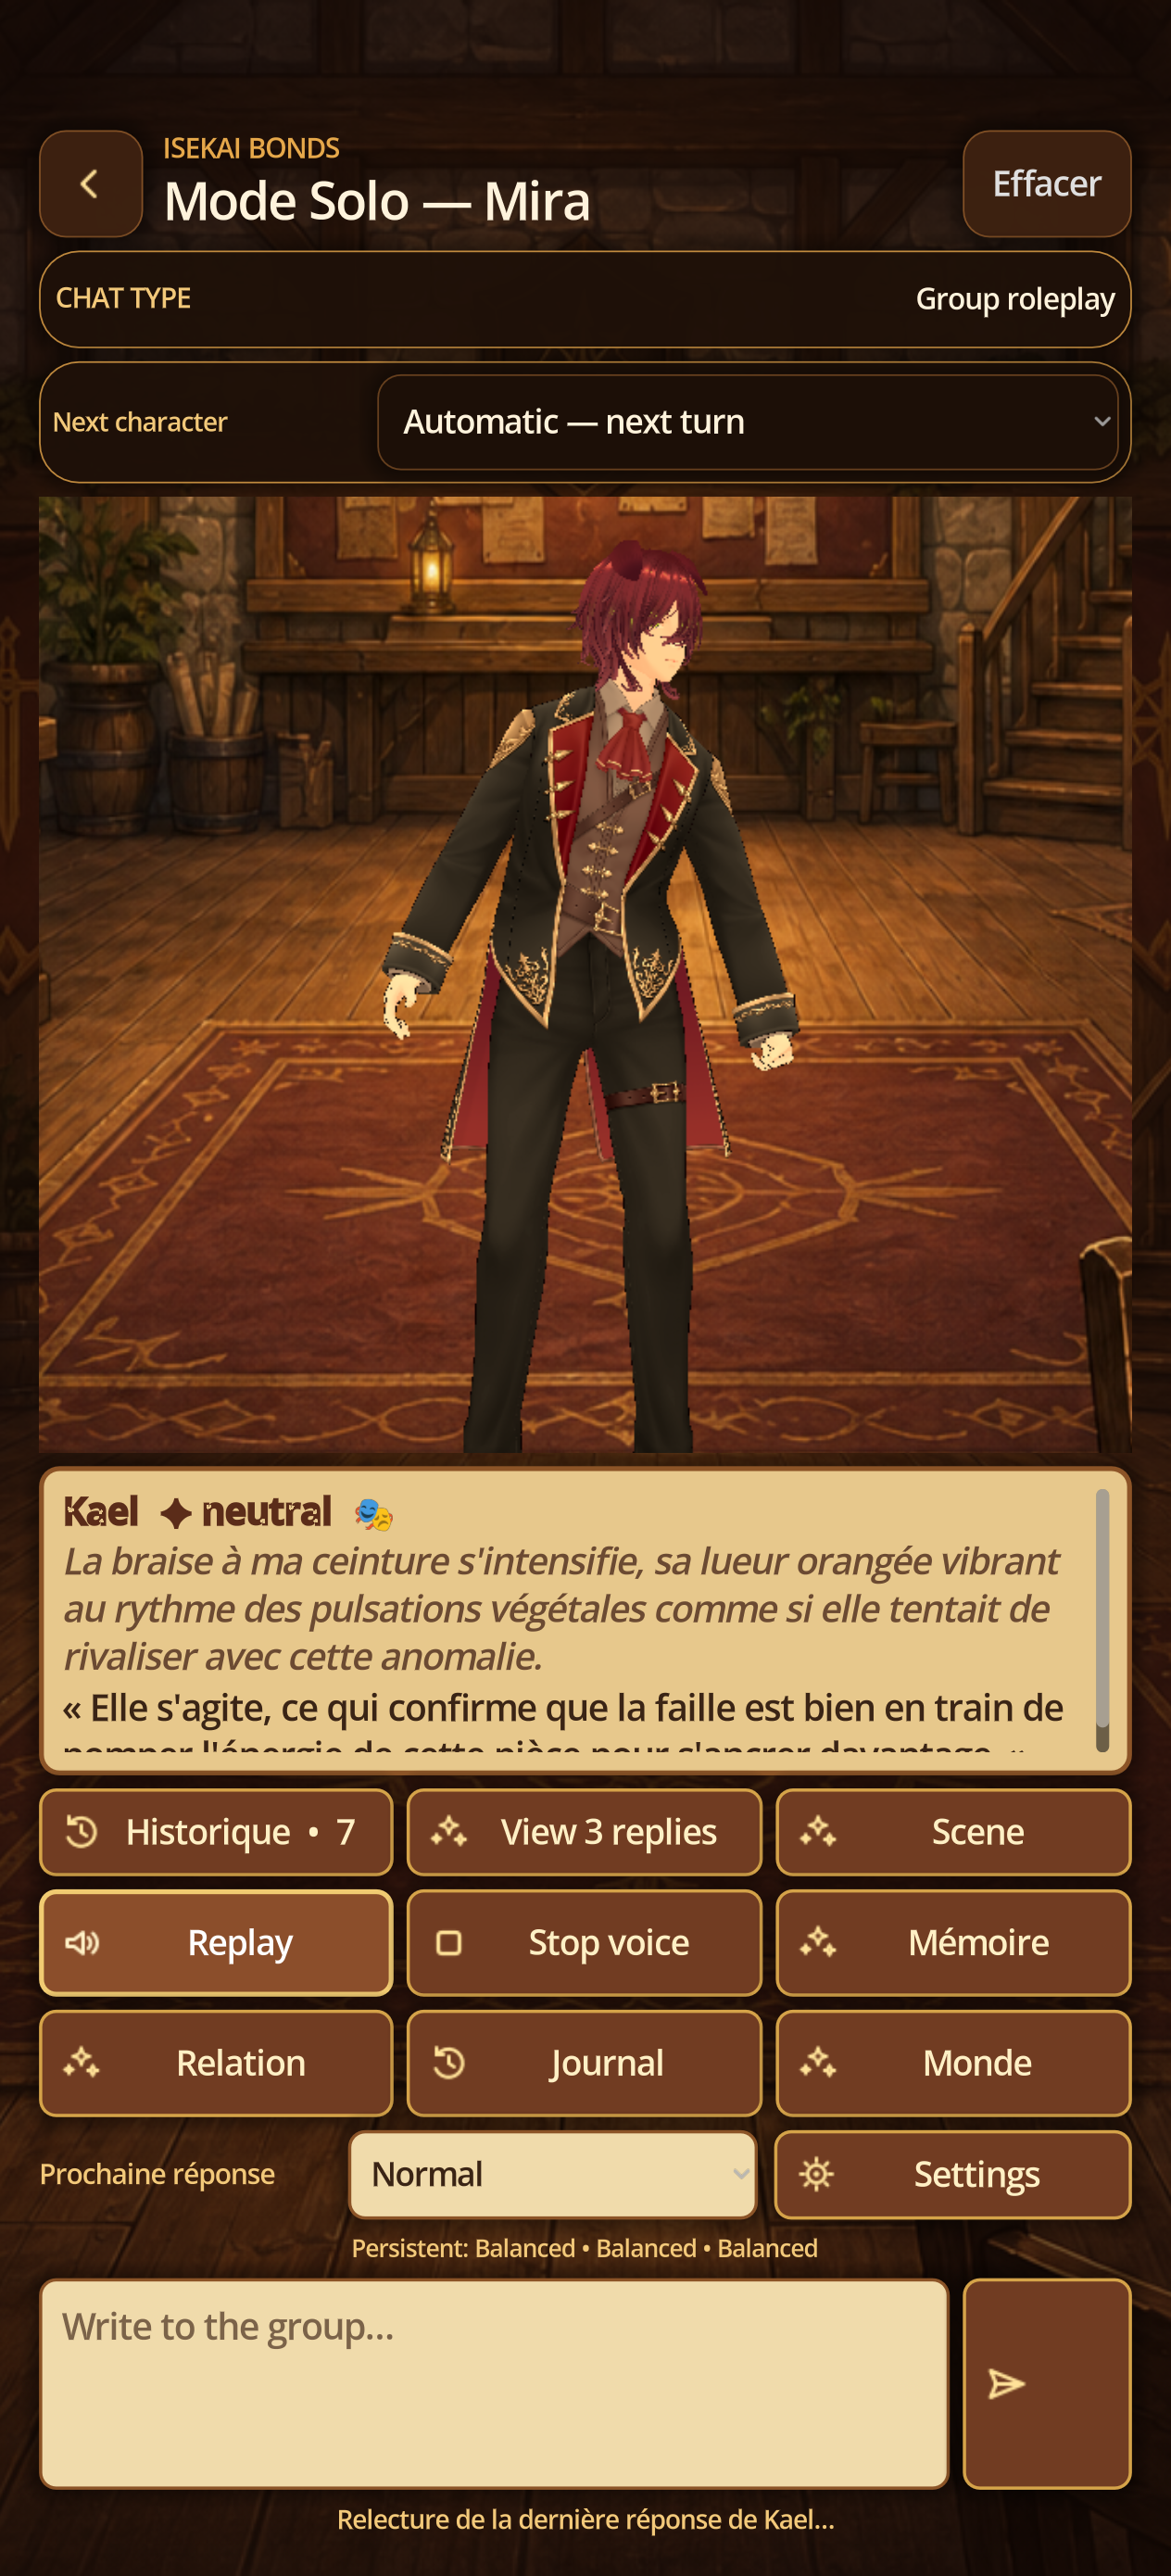
- After a complete answer, tap Replay.
- During synthesis/reading, observe the status and use Stop Voice to interrupt.
- With Autoplay, the TTS starts after exploitable streaming fragments; a new message may interrupt the voice depending on the setting.
- With a local GGUF, the application serializes heavy engines; wait until the TTS is released before a competing local load.
17 · Voice playback and streaming
Play, stop, and continue without blocking chat
Steps
- Enable voice in the profile and choose Automatically play replies if every reply should be spoken.
- Text may finish streaming before speech synthesis completes; Preparing indicates background work.
- Replay speaks the latest available reply. Stop voice immediately interrupts playback and clears that queue item.
- With Interrupt voice on a new message, the next send cuts current playback.
- In groups, voice follows the active speaker; World Master may use a separate voice in roleplay.
09 · Avatar and VRM
Test Studio and an authorized file
Steps
- In Avatar Studio, try a built-in avatar, emotions, animations, and lip sync.
- VRM import is Pro. Open the library, tap Import VRM, and select an authorized file.
- Provide the requested author, source, and license; a file found online is not automatically free.
- Select the VRM, tap Activate, then Test avatar before assigning it to a character.
15A · VRM
Import with license and provenance
Steps
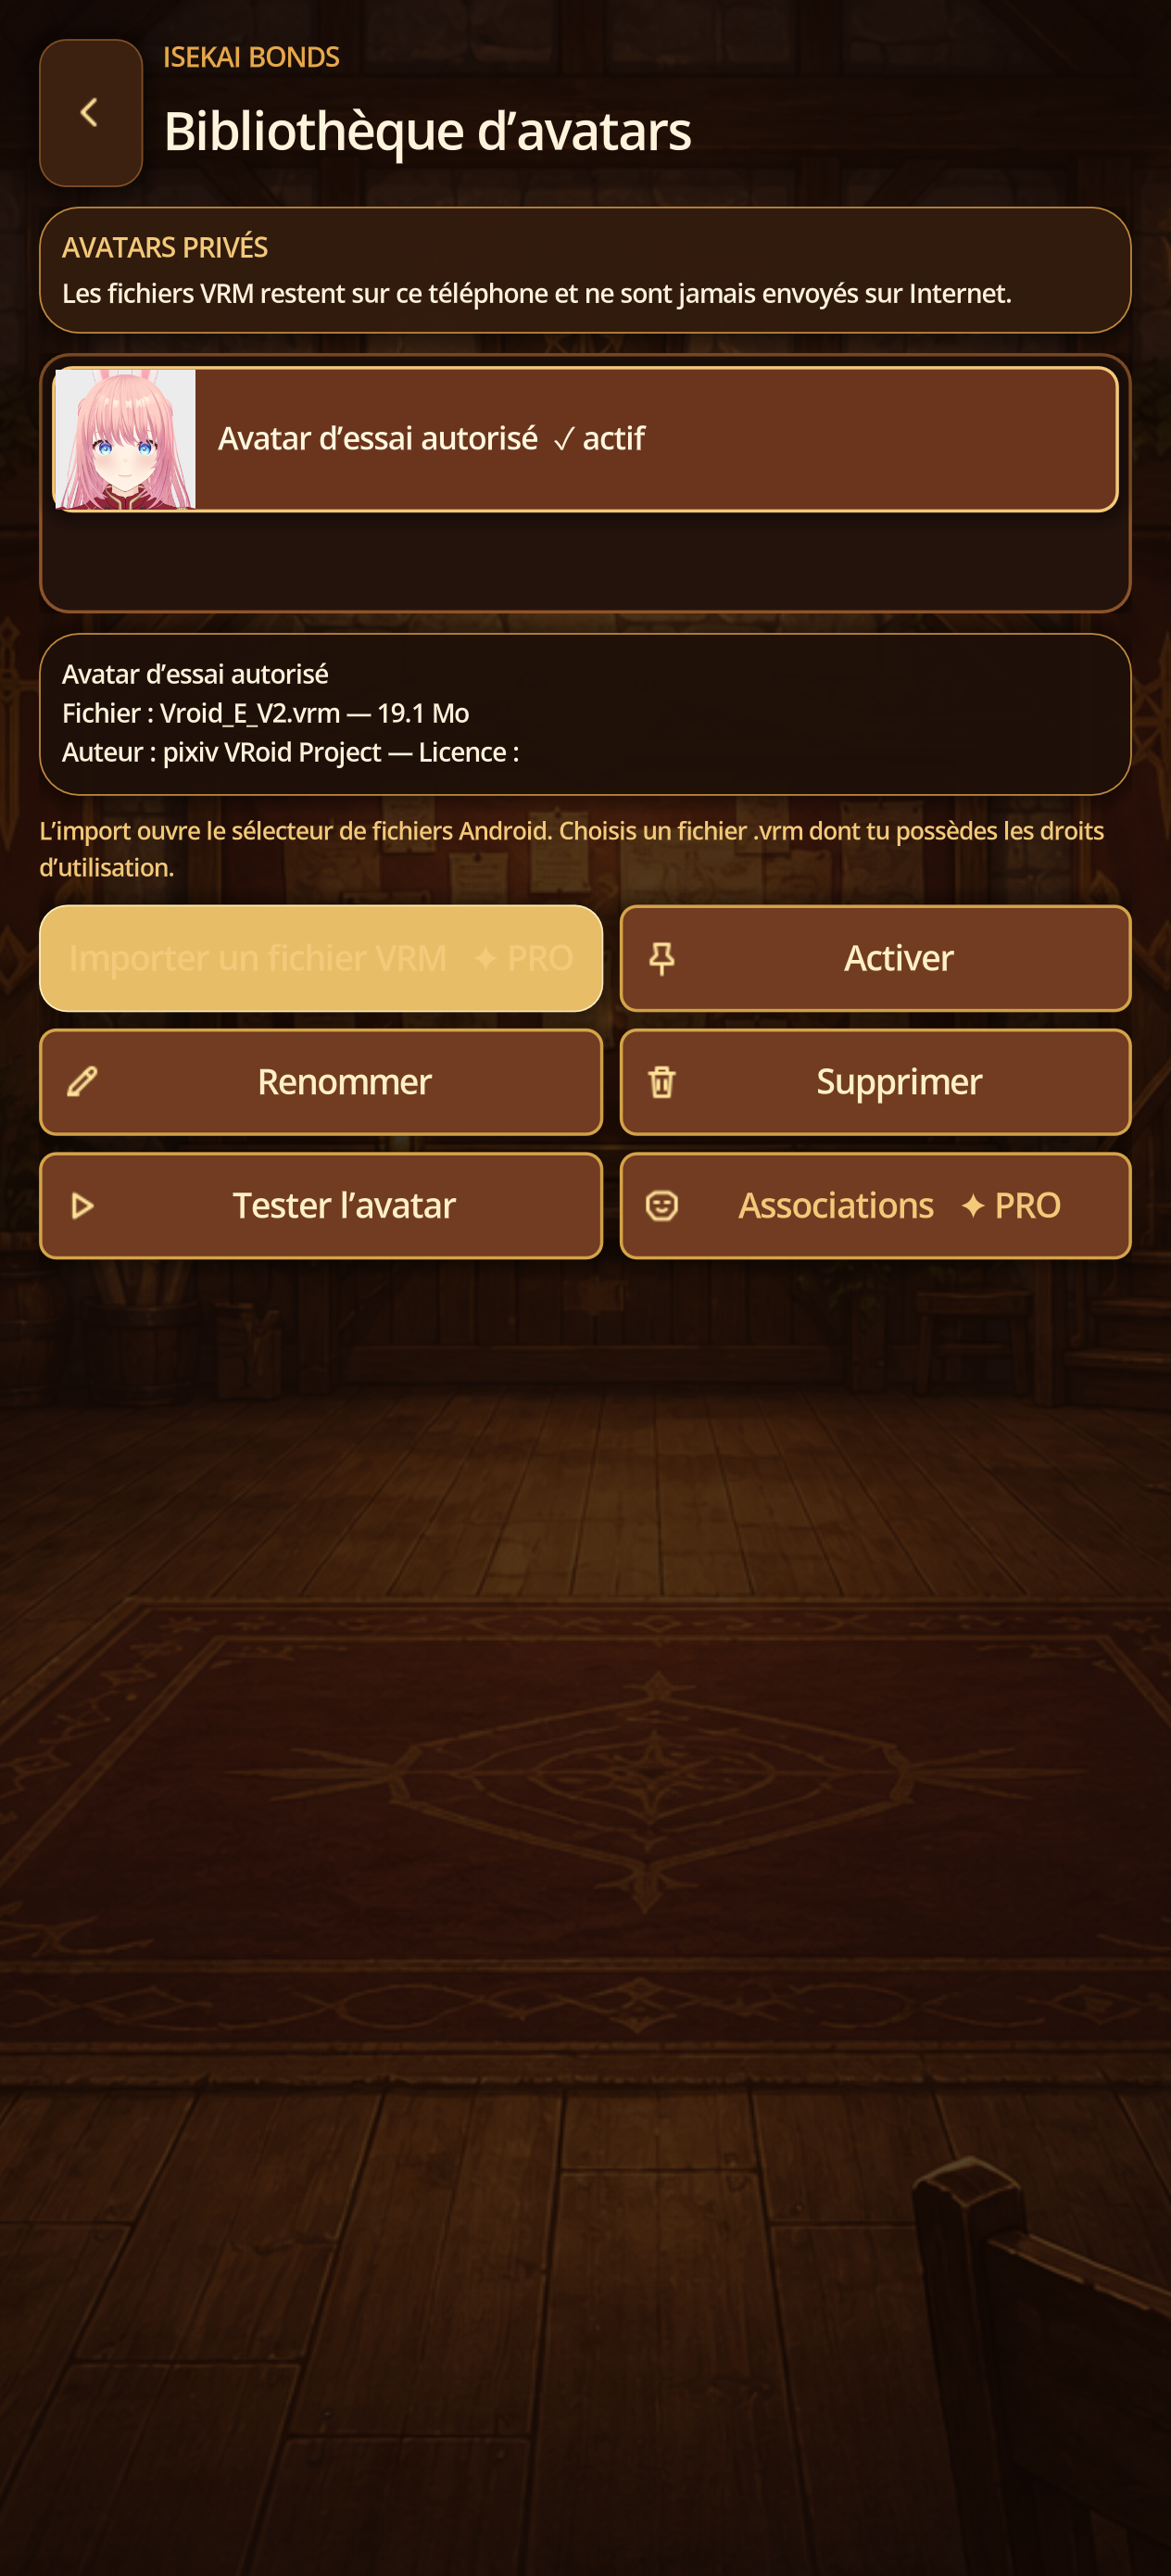
- Open Studio → Library of d
- Choose an authorized .vrm file; The application reads the integrated metadata (title, author and usage rules) instead of requesting a separate form.
- After validation, the application copies the VRM to its private storage, creates a thumbnail and displays the available metadata.
- If the author or license is empty, keep proof of provenance outside the app and do not use the file until your rights are established; in case of refusal, check format, size, commercial rights and redistribution.
15B · VRM
Enable, rename and associate
Steps
- Select the imported l的avatar in the library.
- Touch Enable, then Rename if necessary.
- Open Associations to link emotions, lips and movements/BVH to the character.
- Check the author and license displayed before any capture use or export.
15C · VRM
Test rendering, emotions, and lip sync
Steps
- Touch Test the avatar.
- Try several emotions and movements allowed; Check face, eyes, bones and framing.
- Run a vocal test and observe the labial synchronization.
- Return to correct Associations or Animations and emotions if an expression is missing.
15D · VRM
Delete with confirmation
Steps
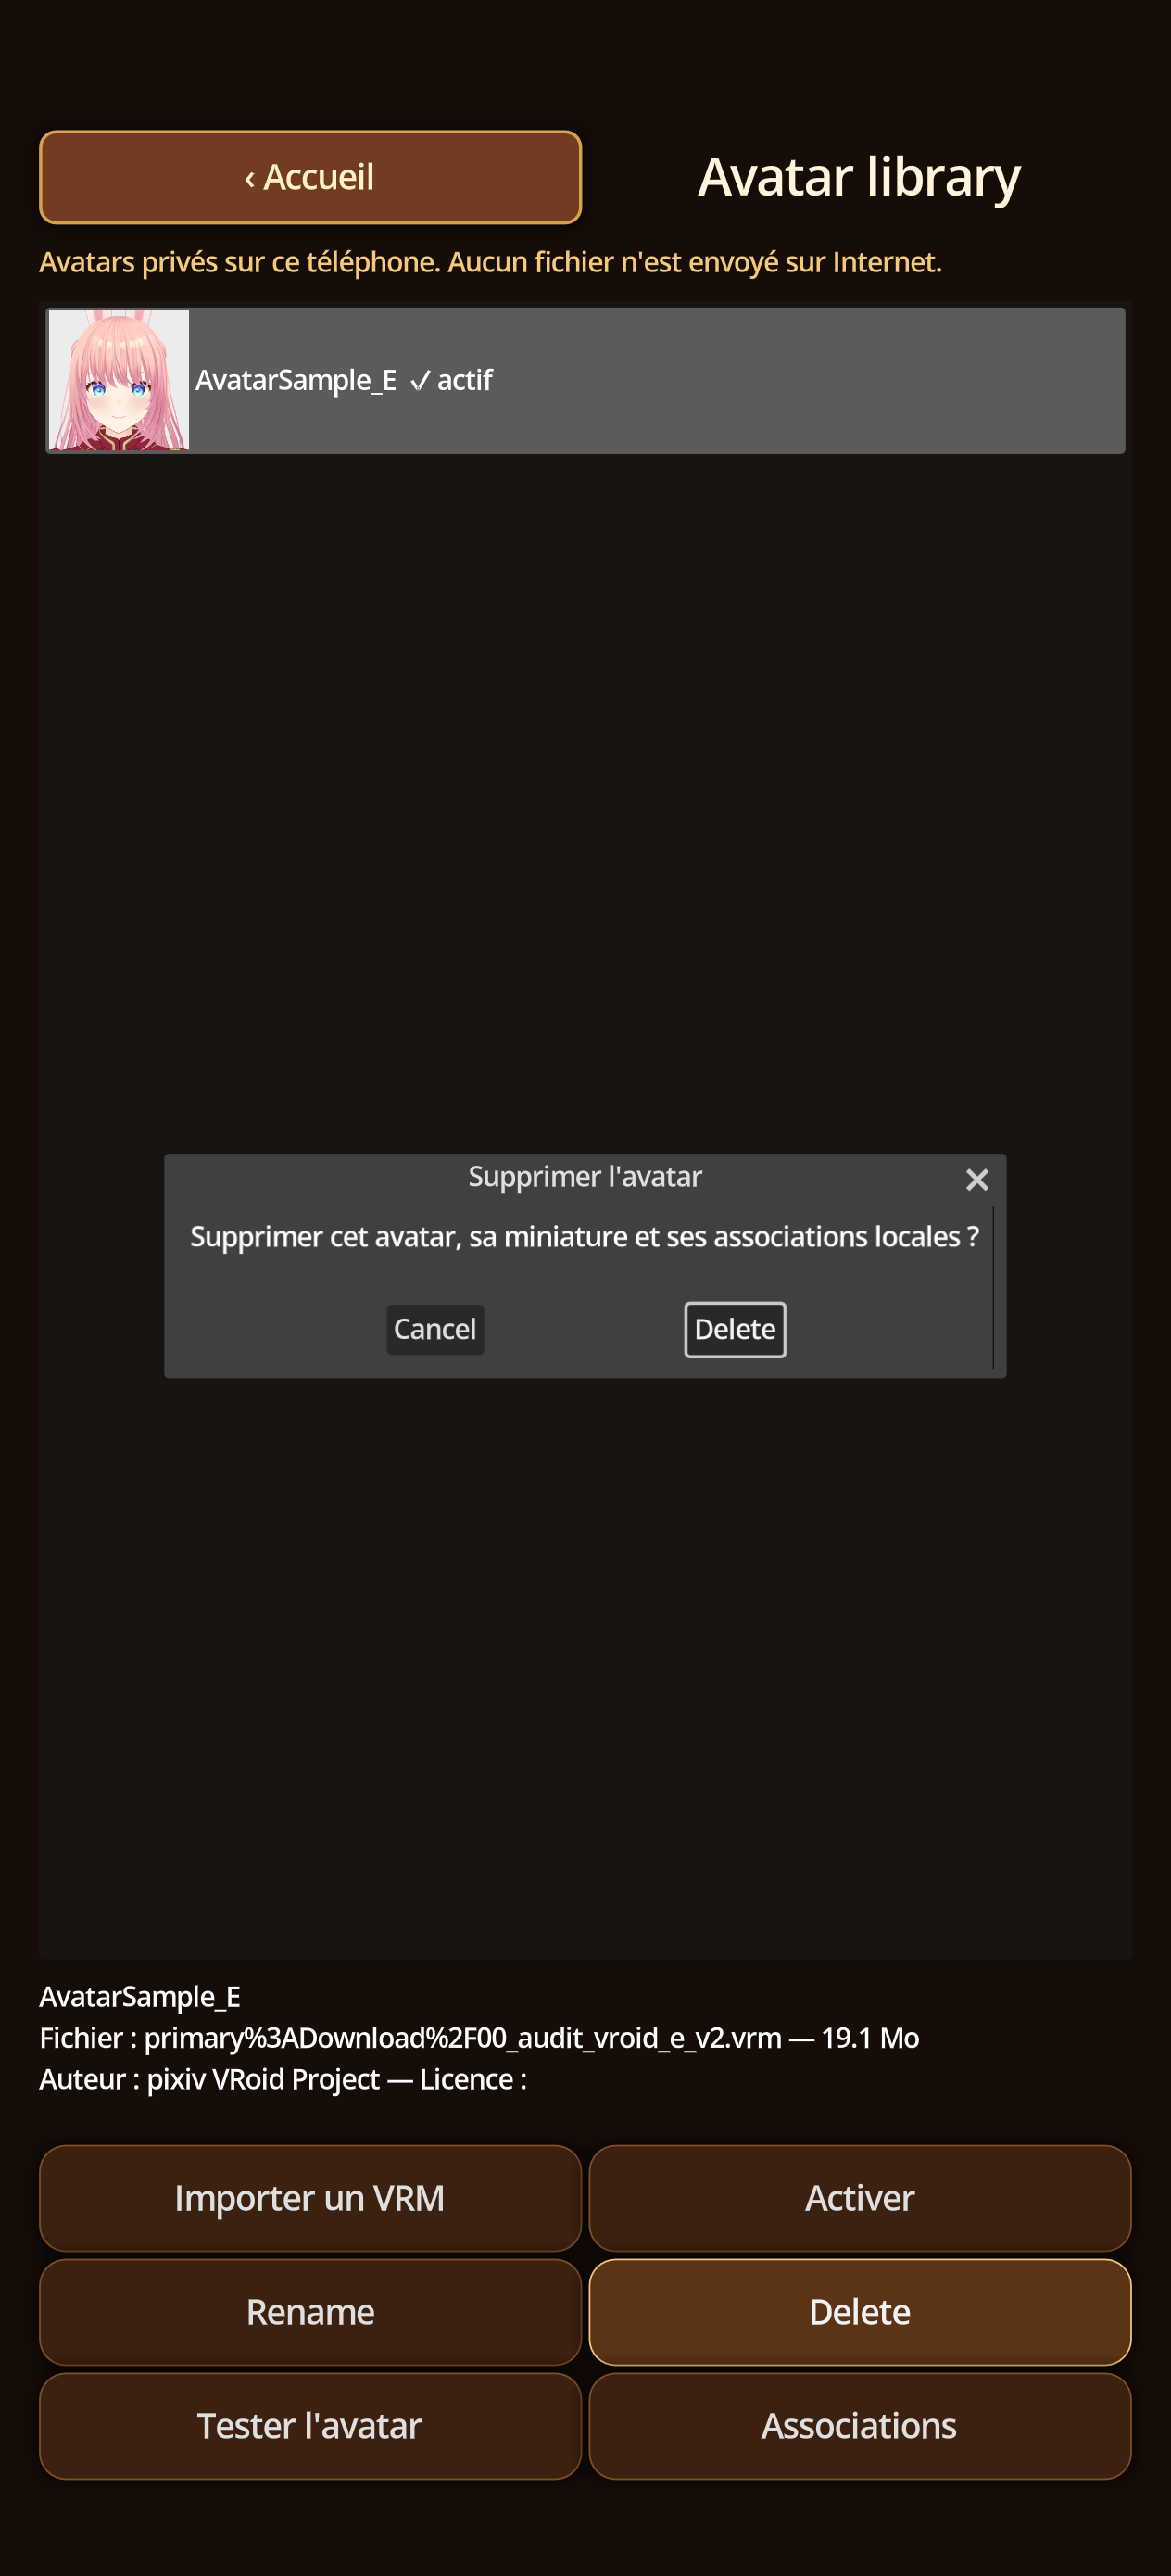
- In the library, select an unintegrated avatar.
- Tap Delete and read the confirmation on file, thumbnail and associations.
- Confirm and check that the associated characters return to an available avatar.
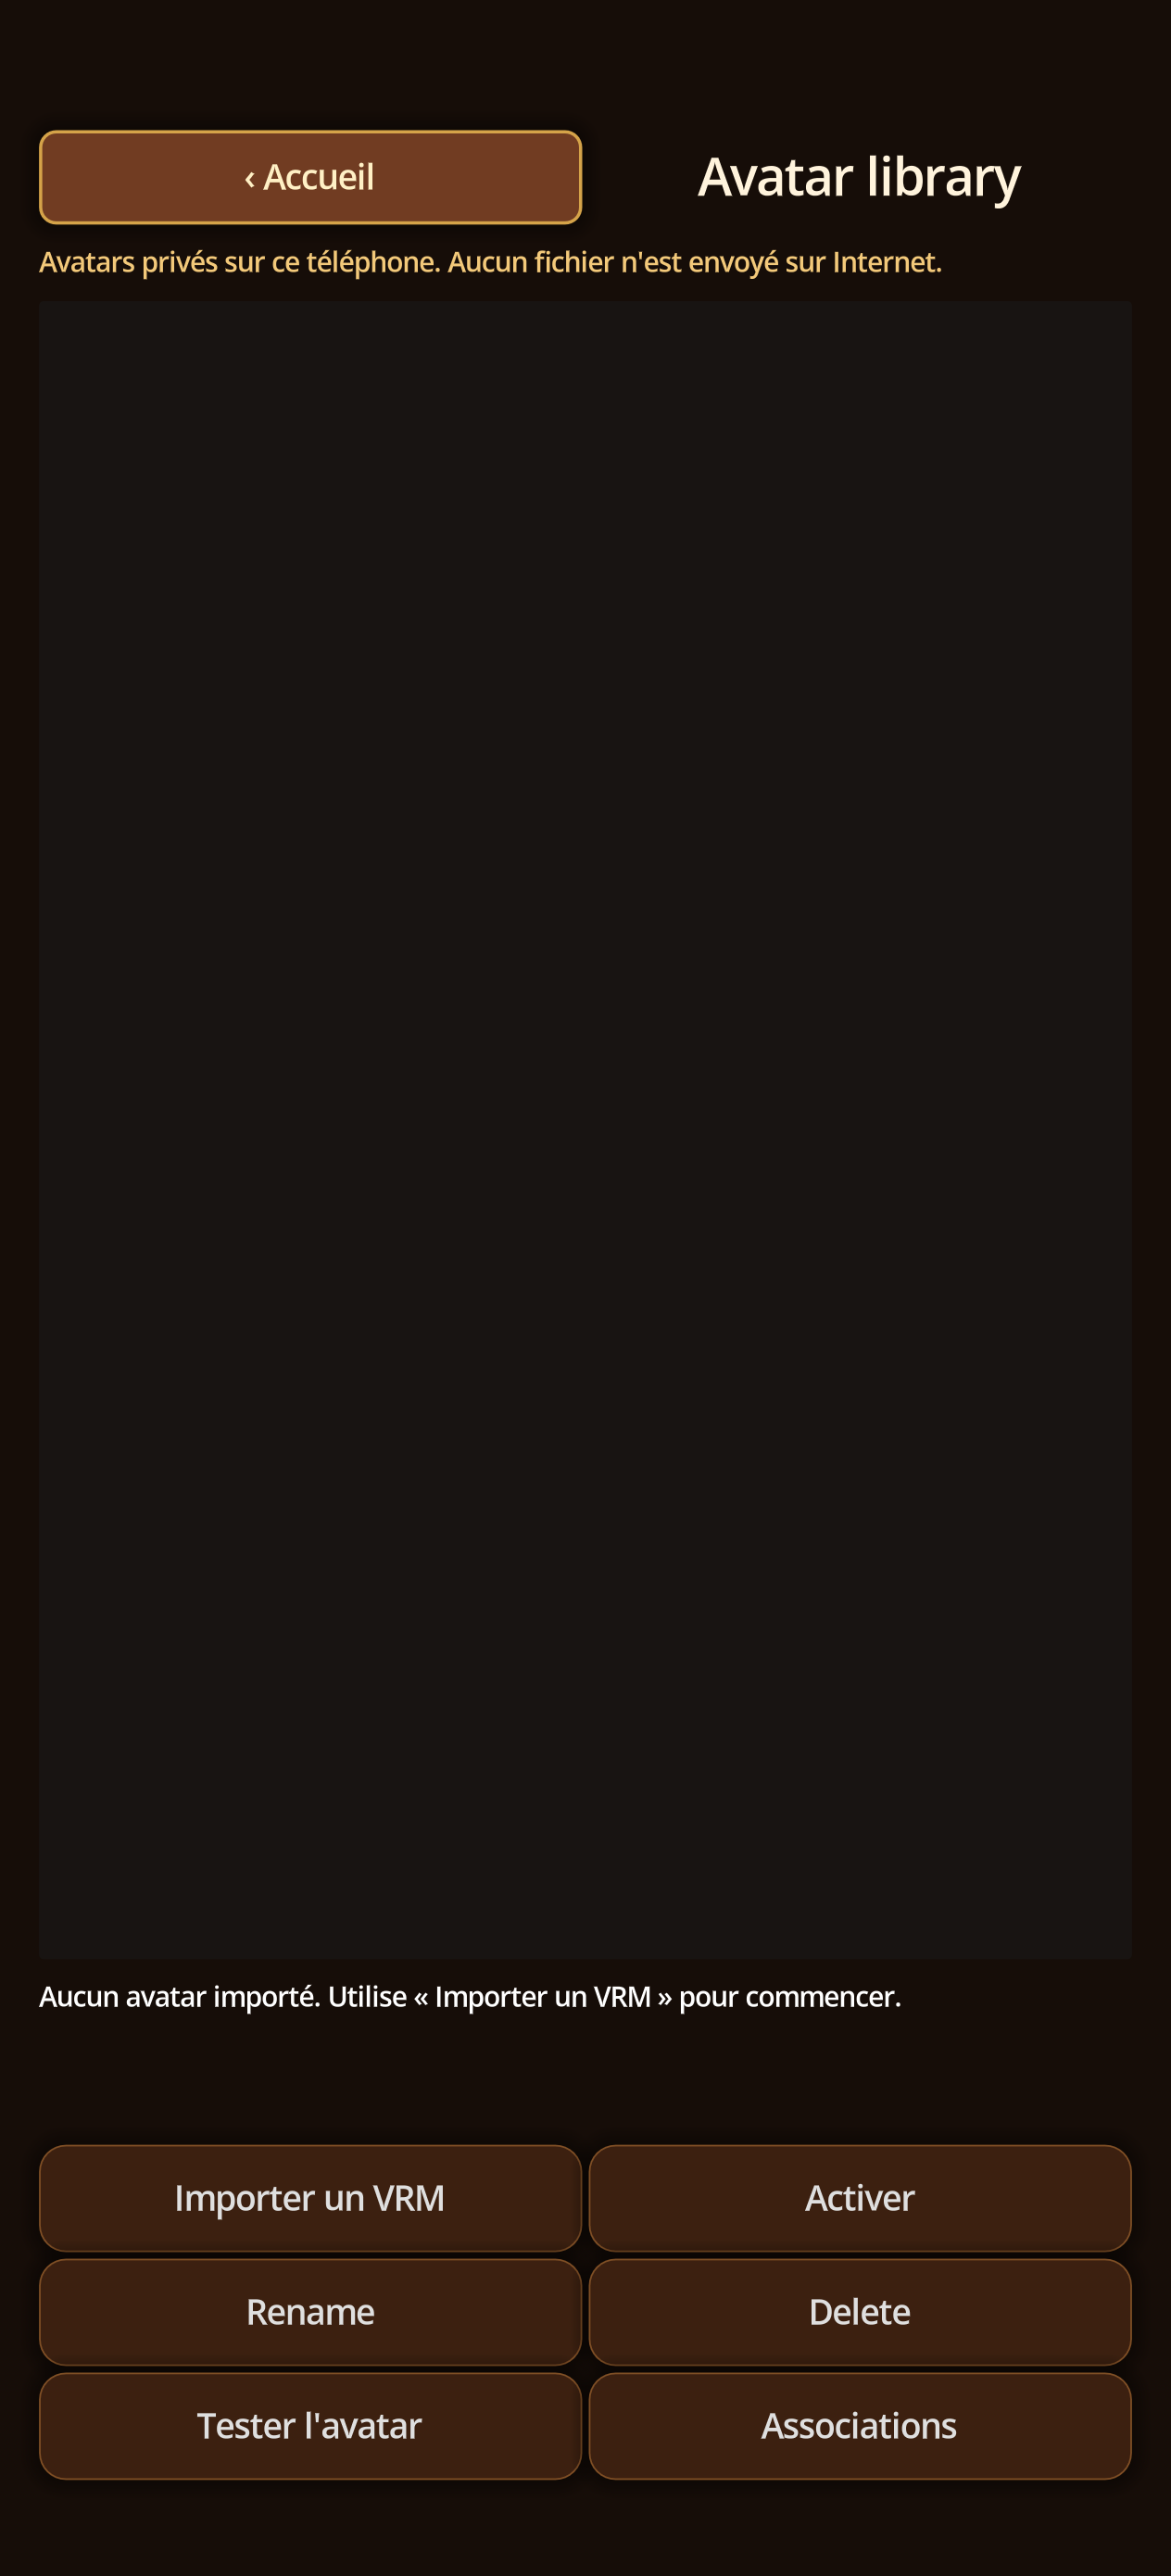
20 · VRM library
Import only an authorized avatar
Steps
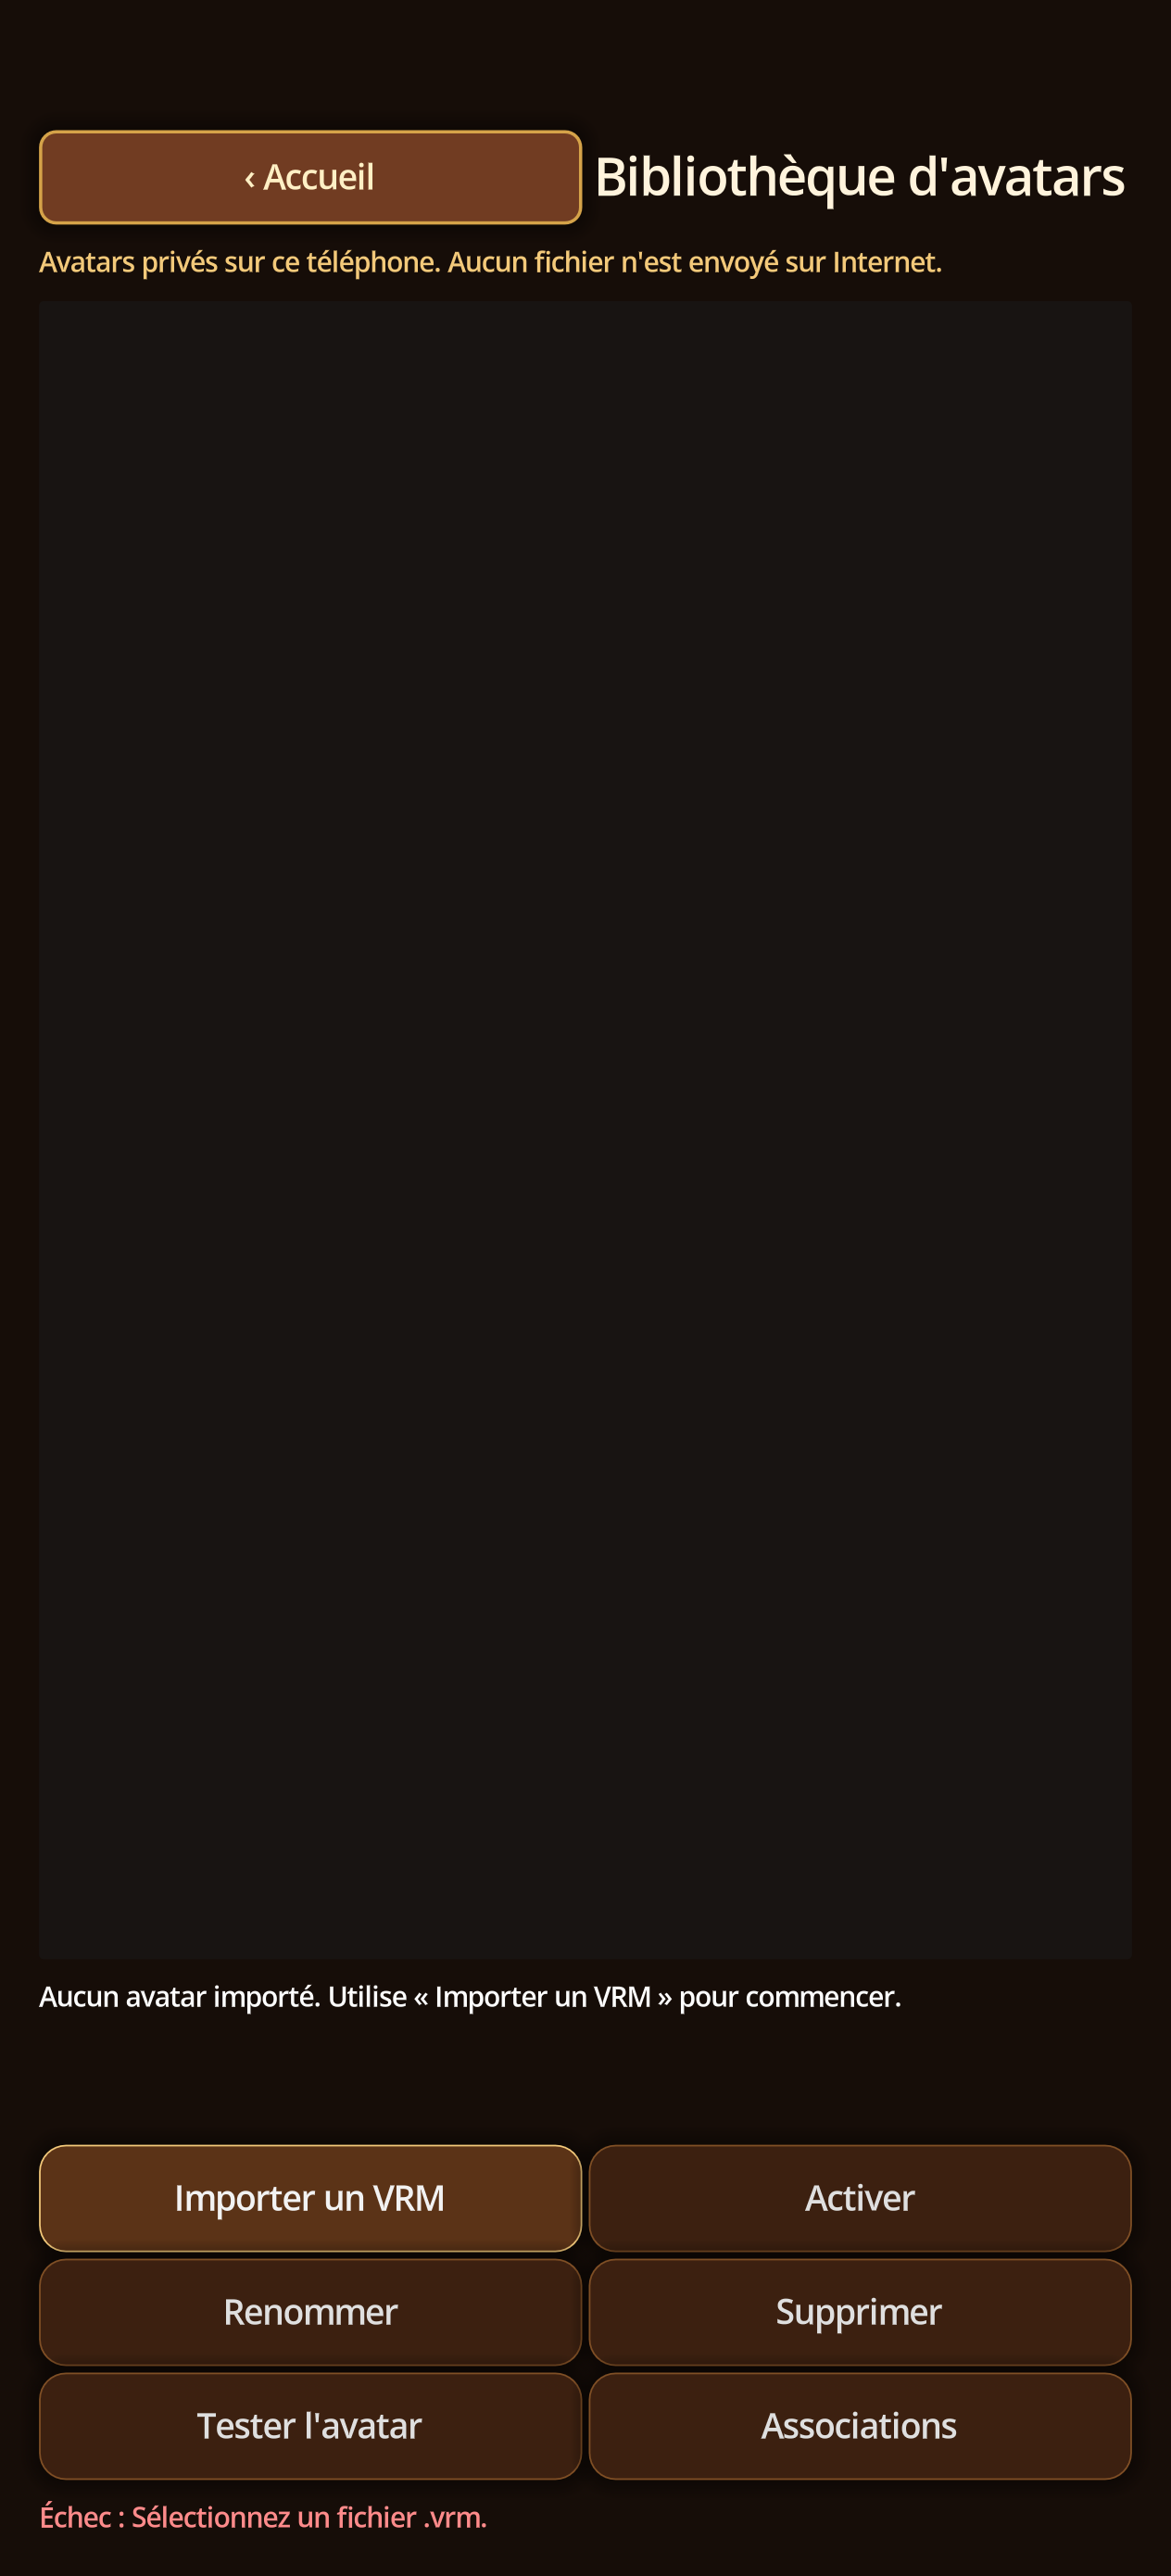
- Open Avatar library then Import VRM file. The picker must receive a valid .vrm file.
- Enter or verify name, author, license, and provenance. Do not import a model you are not allowed to use.
- Select the avatar and Activate. Rename changes its local label; Test avatar opens the real prototype.
- Associations opens expressions and motions. Return to the character profile, select the avatar, and Save.
- Delete asks for confirmation. First change any character that uses the avatar.
21 · Emotions, lips, and BVH
Test before saving
Steps
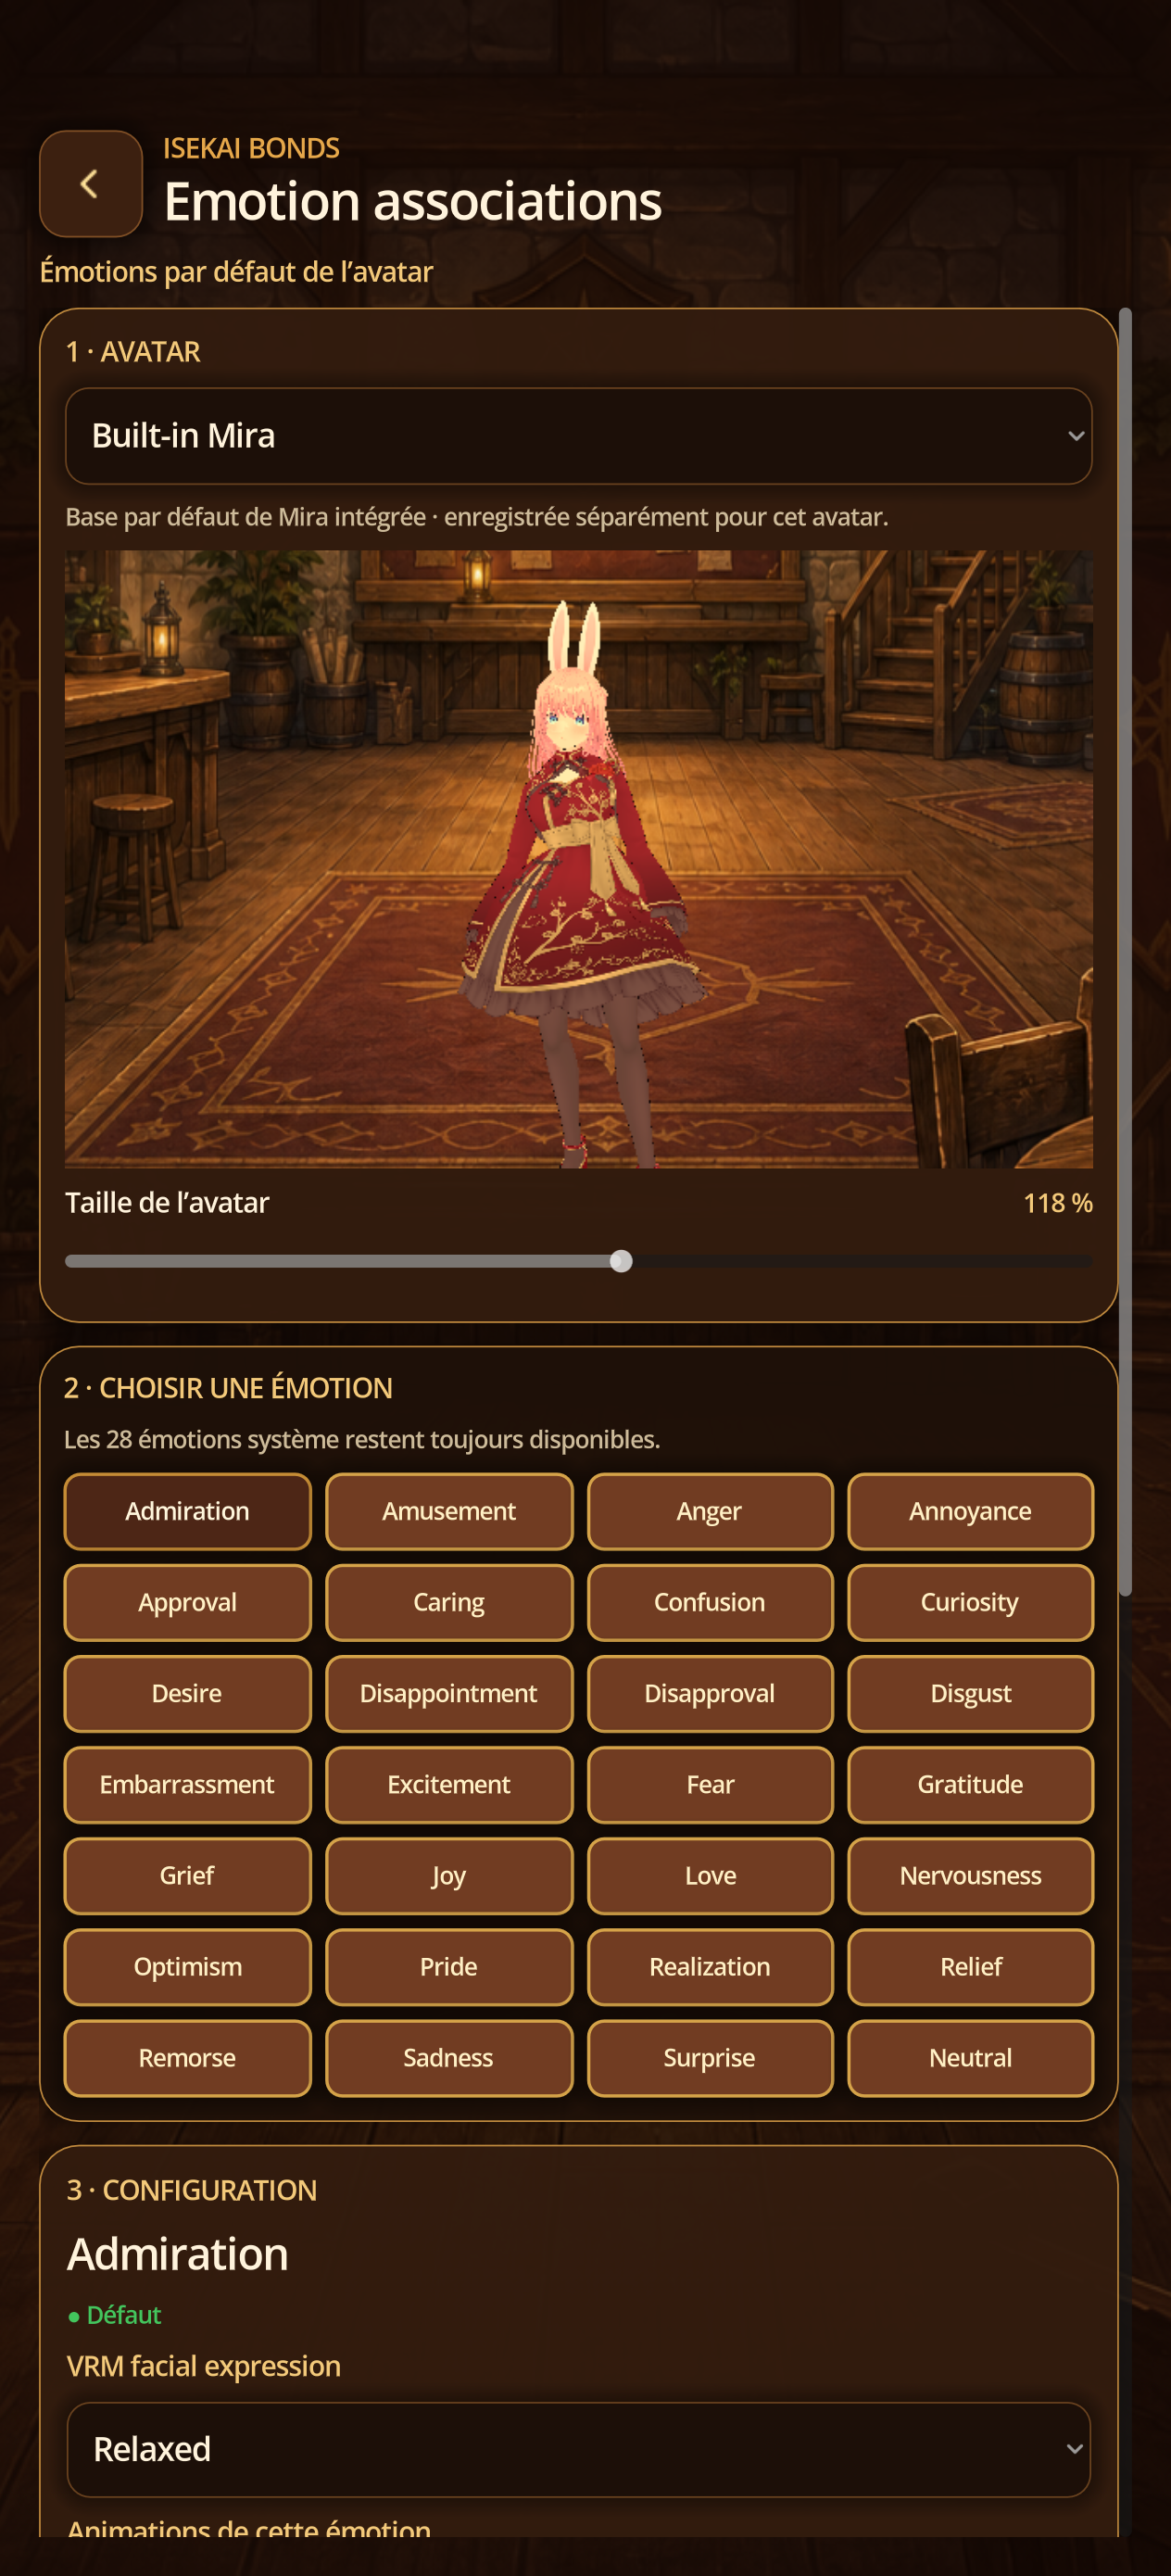
- In Associations, choose avatar or character target and one of 28 emotions.
- Set VRM facial expression, intensity, duration, and playback mode. System emotions remain available without customization.
- Import BVH starts a wizard: choose file, choose an emotion, verify compatibility, test, then save.
- Manage BVH lets you enable, loop, choose primary, add to another emotion, move, or delete.
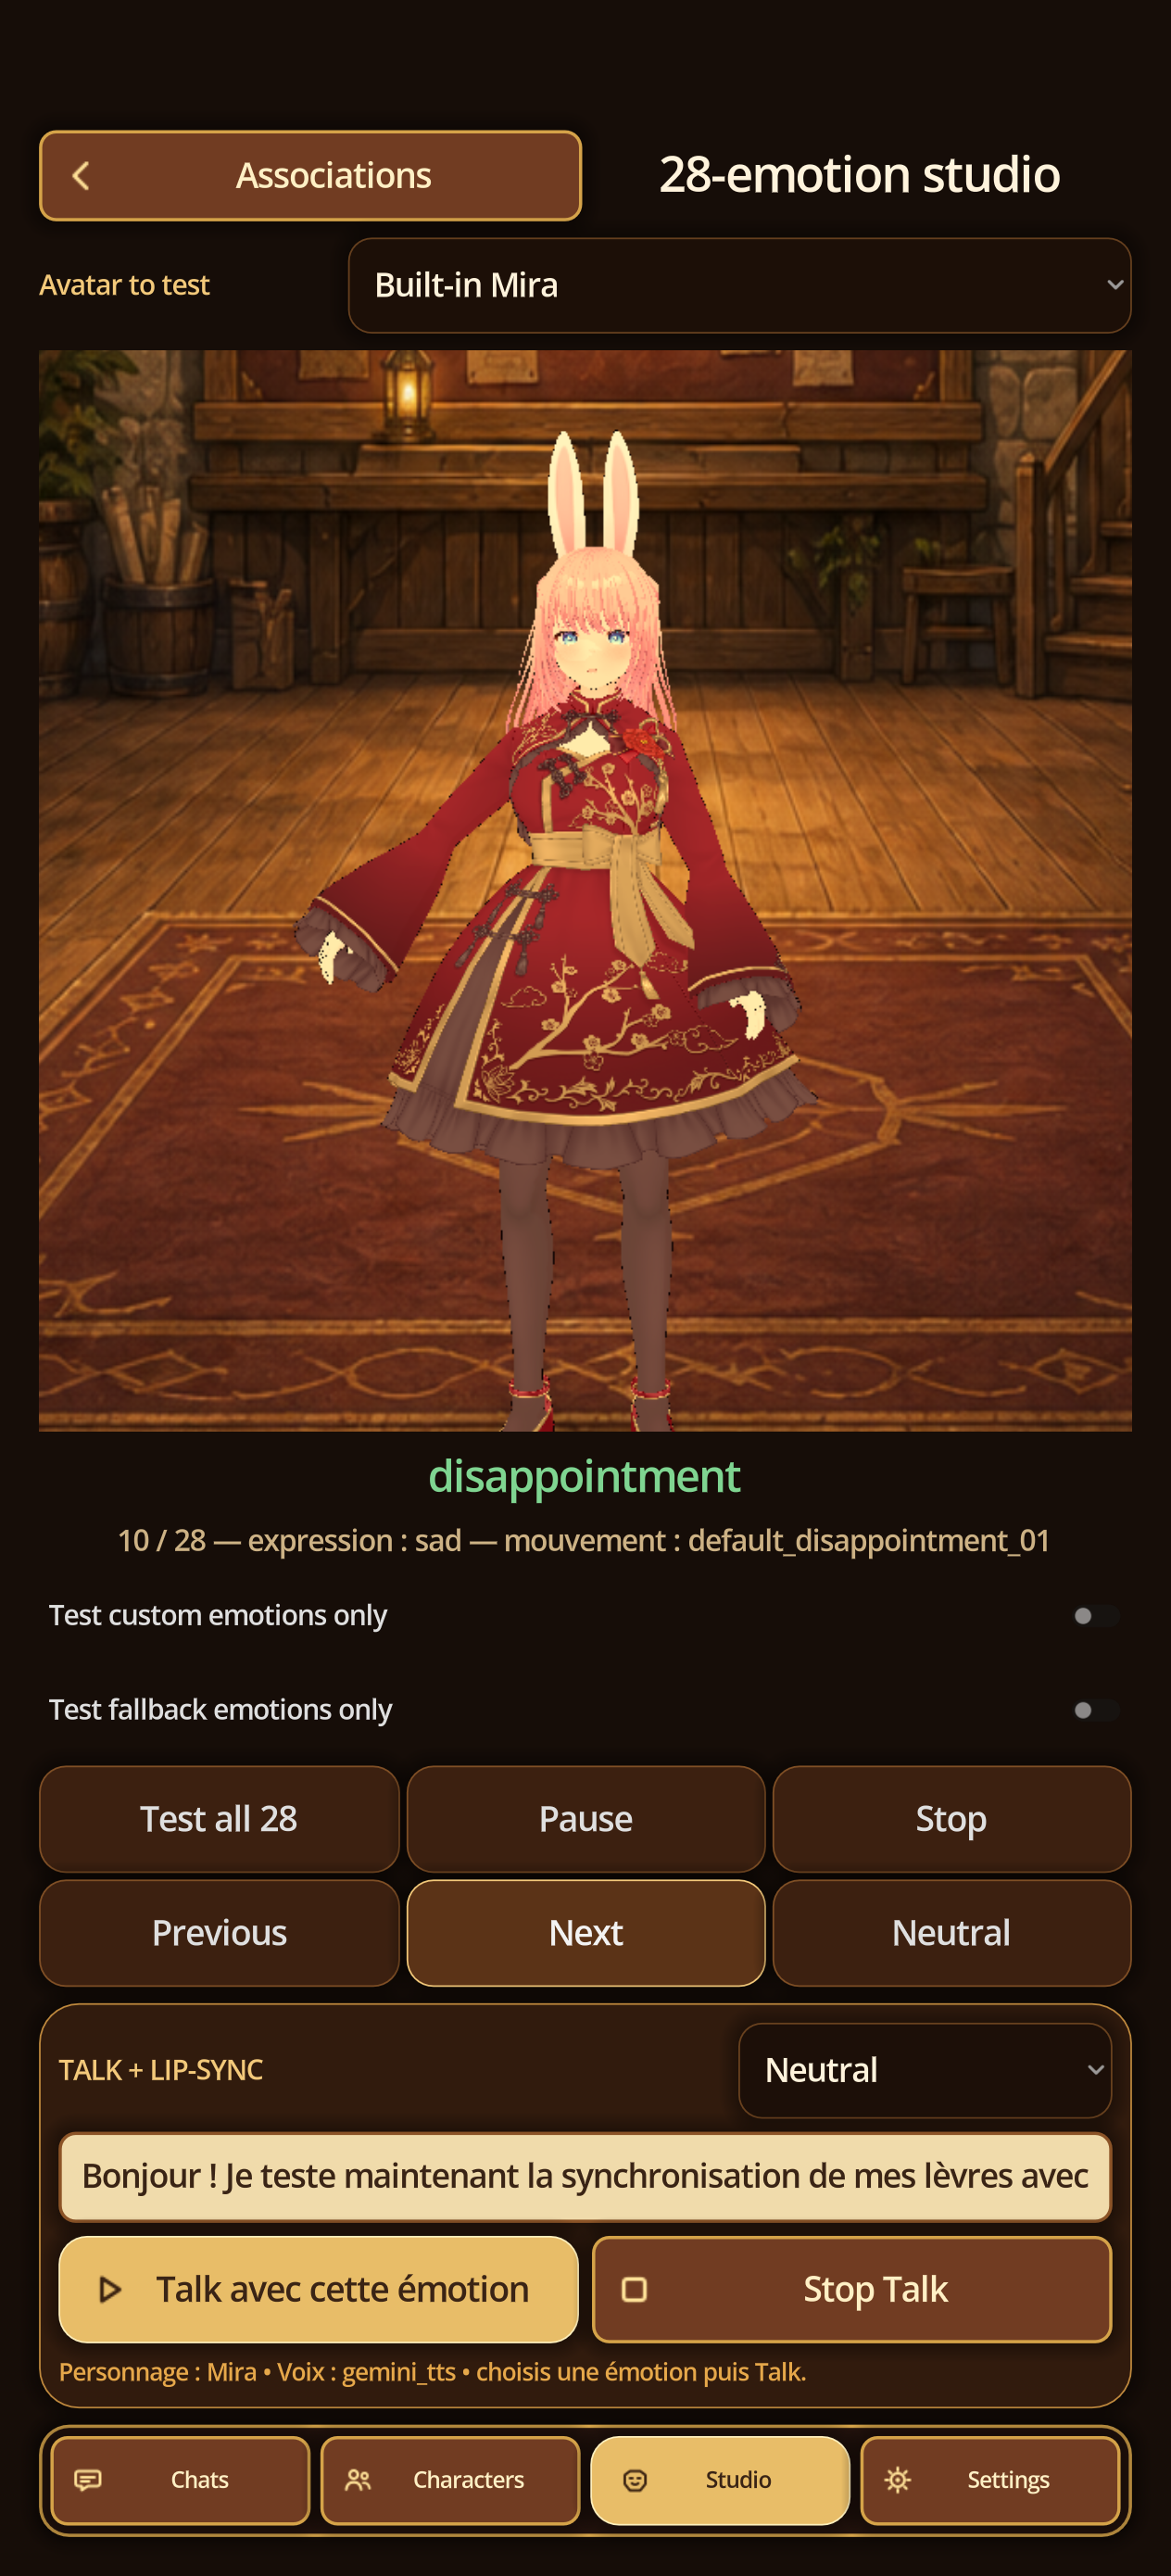
- In Studio, run Test all 28, Pause, Next, Stop, and Neutral. Talk with this emotion tests voice, lips, expression, and motion together.
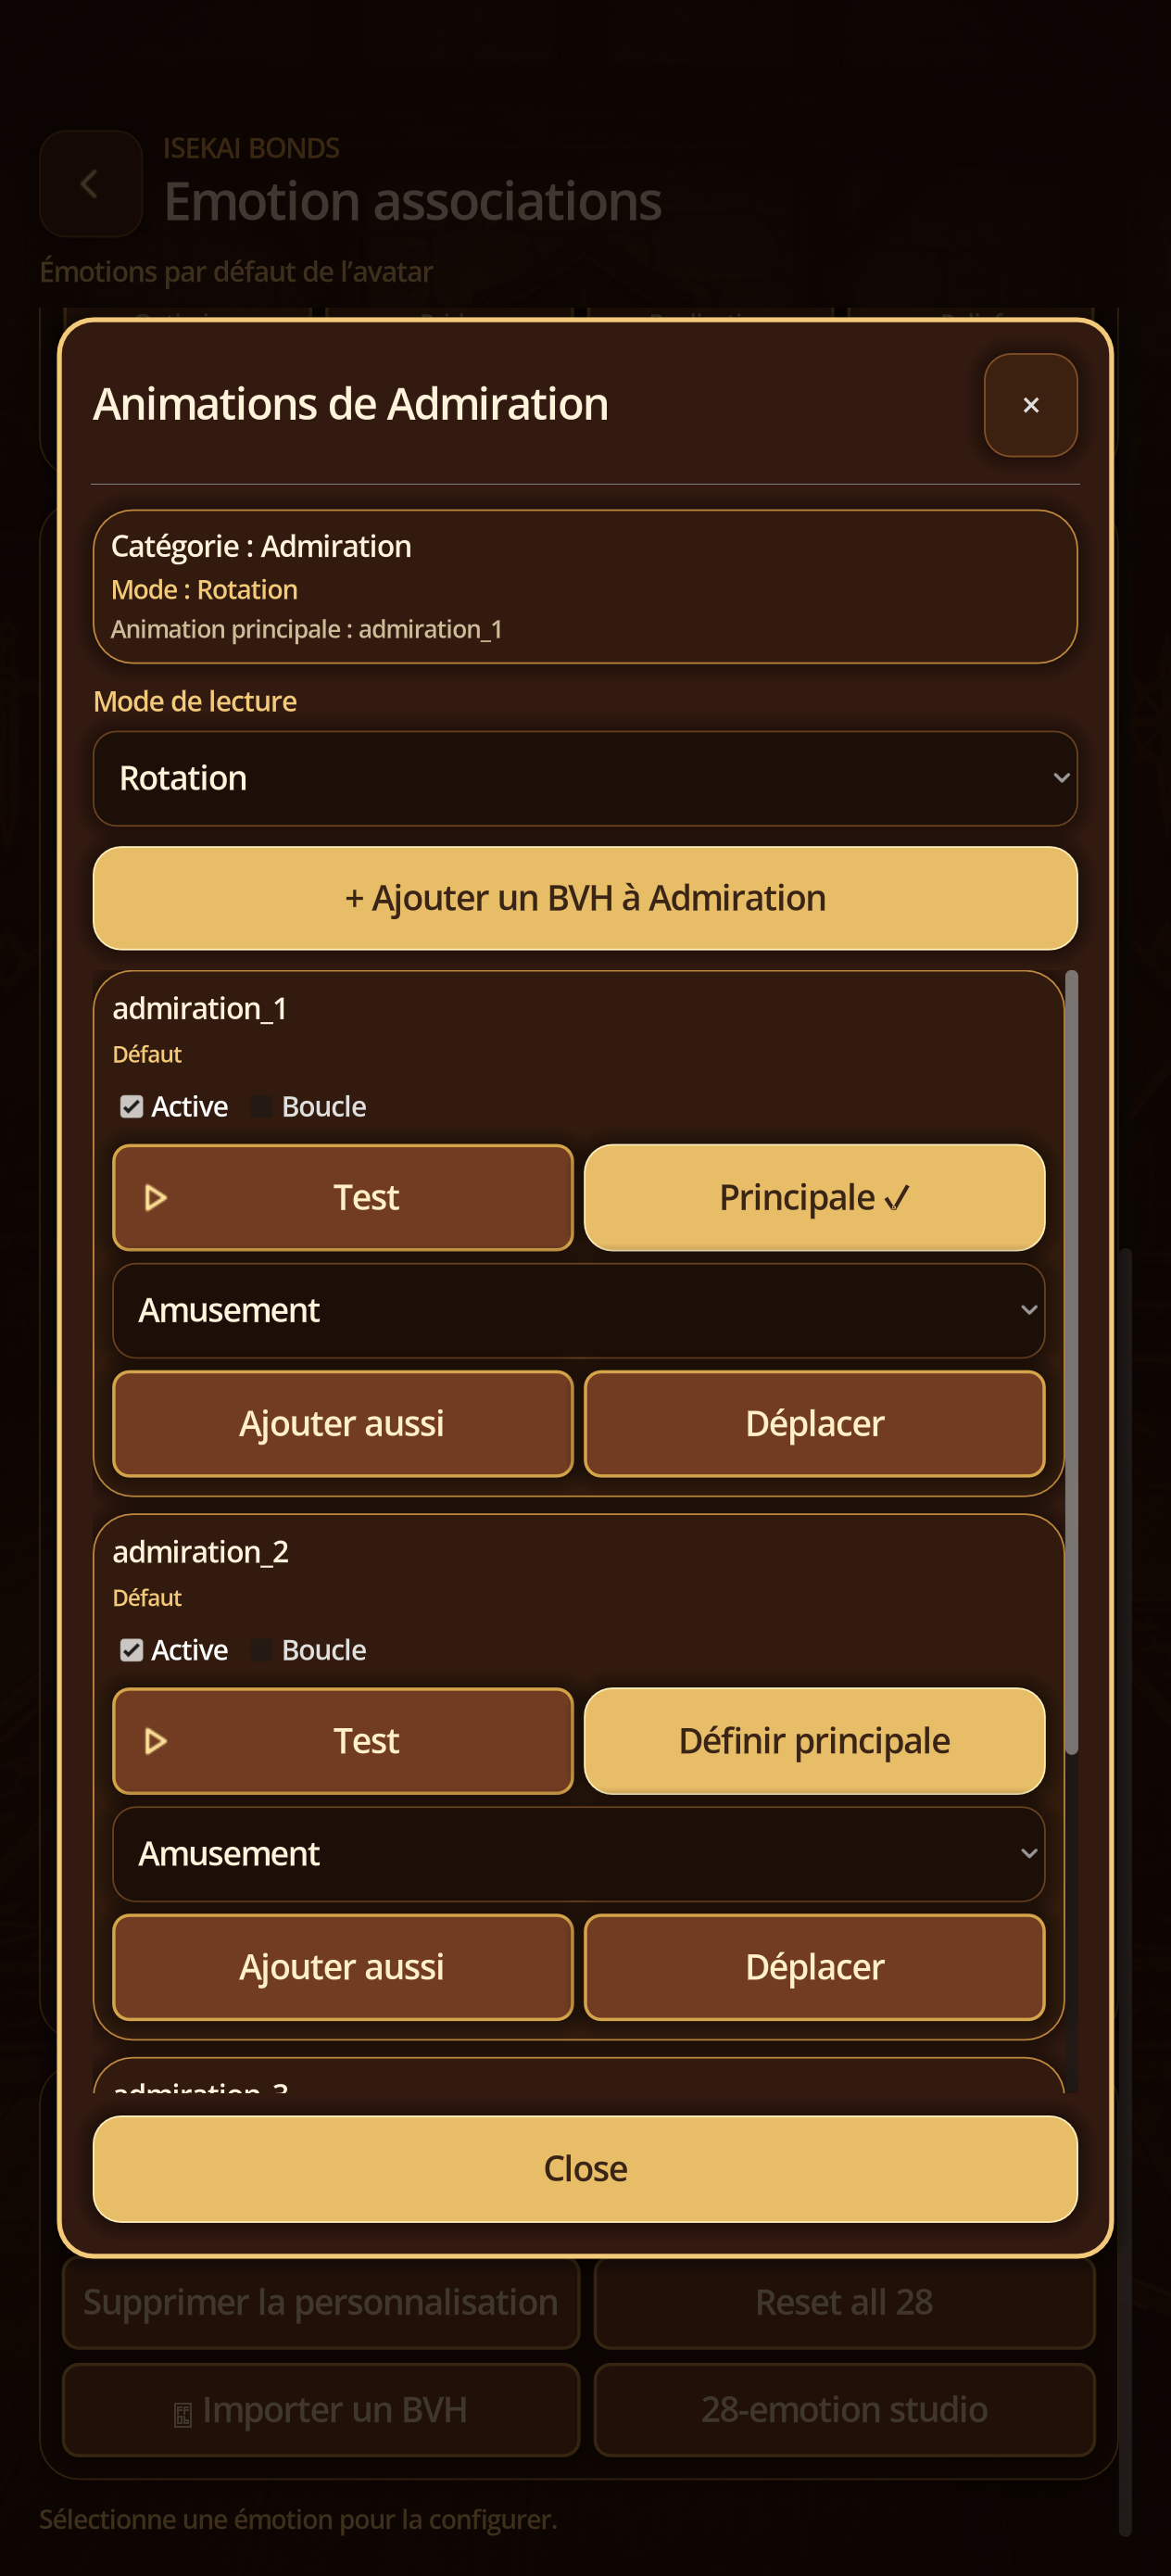
15E · Associations
Match each emotion to the character
Steps
- From Library d的avatars, tap Associations, then choose the Avatar or Character target.
- Select one of the 28 emotions and choose “Hériter” (the app’s French label for Inherit) to maintain general behavior, or Customize for this target only.
- Match the VRM expression, its intensity, duration and mode of playback; add a BVH only after compatibility validation.
- Tap Test before recording, then Save; Delete customization returns to the legacy without erasing shared resources.
15F · Studio emotions
Test 28 emotions and the Talk animation
Steps
- Open Studio avatar, choose an authorized avatar and launch Test 28.
- Use Pause, Previous, Next, Stop and Neutral to control every face and movement change.
- Filter custom or fallback emotions to quickly identify a missing association.
- Choose character and emotion, touch Talk with this emotion, control voice and lips, then Stop Talk to interrupt immediately.
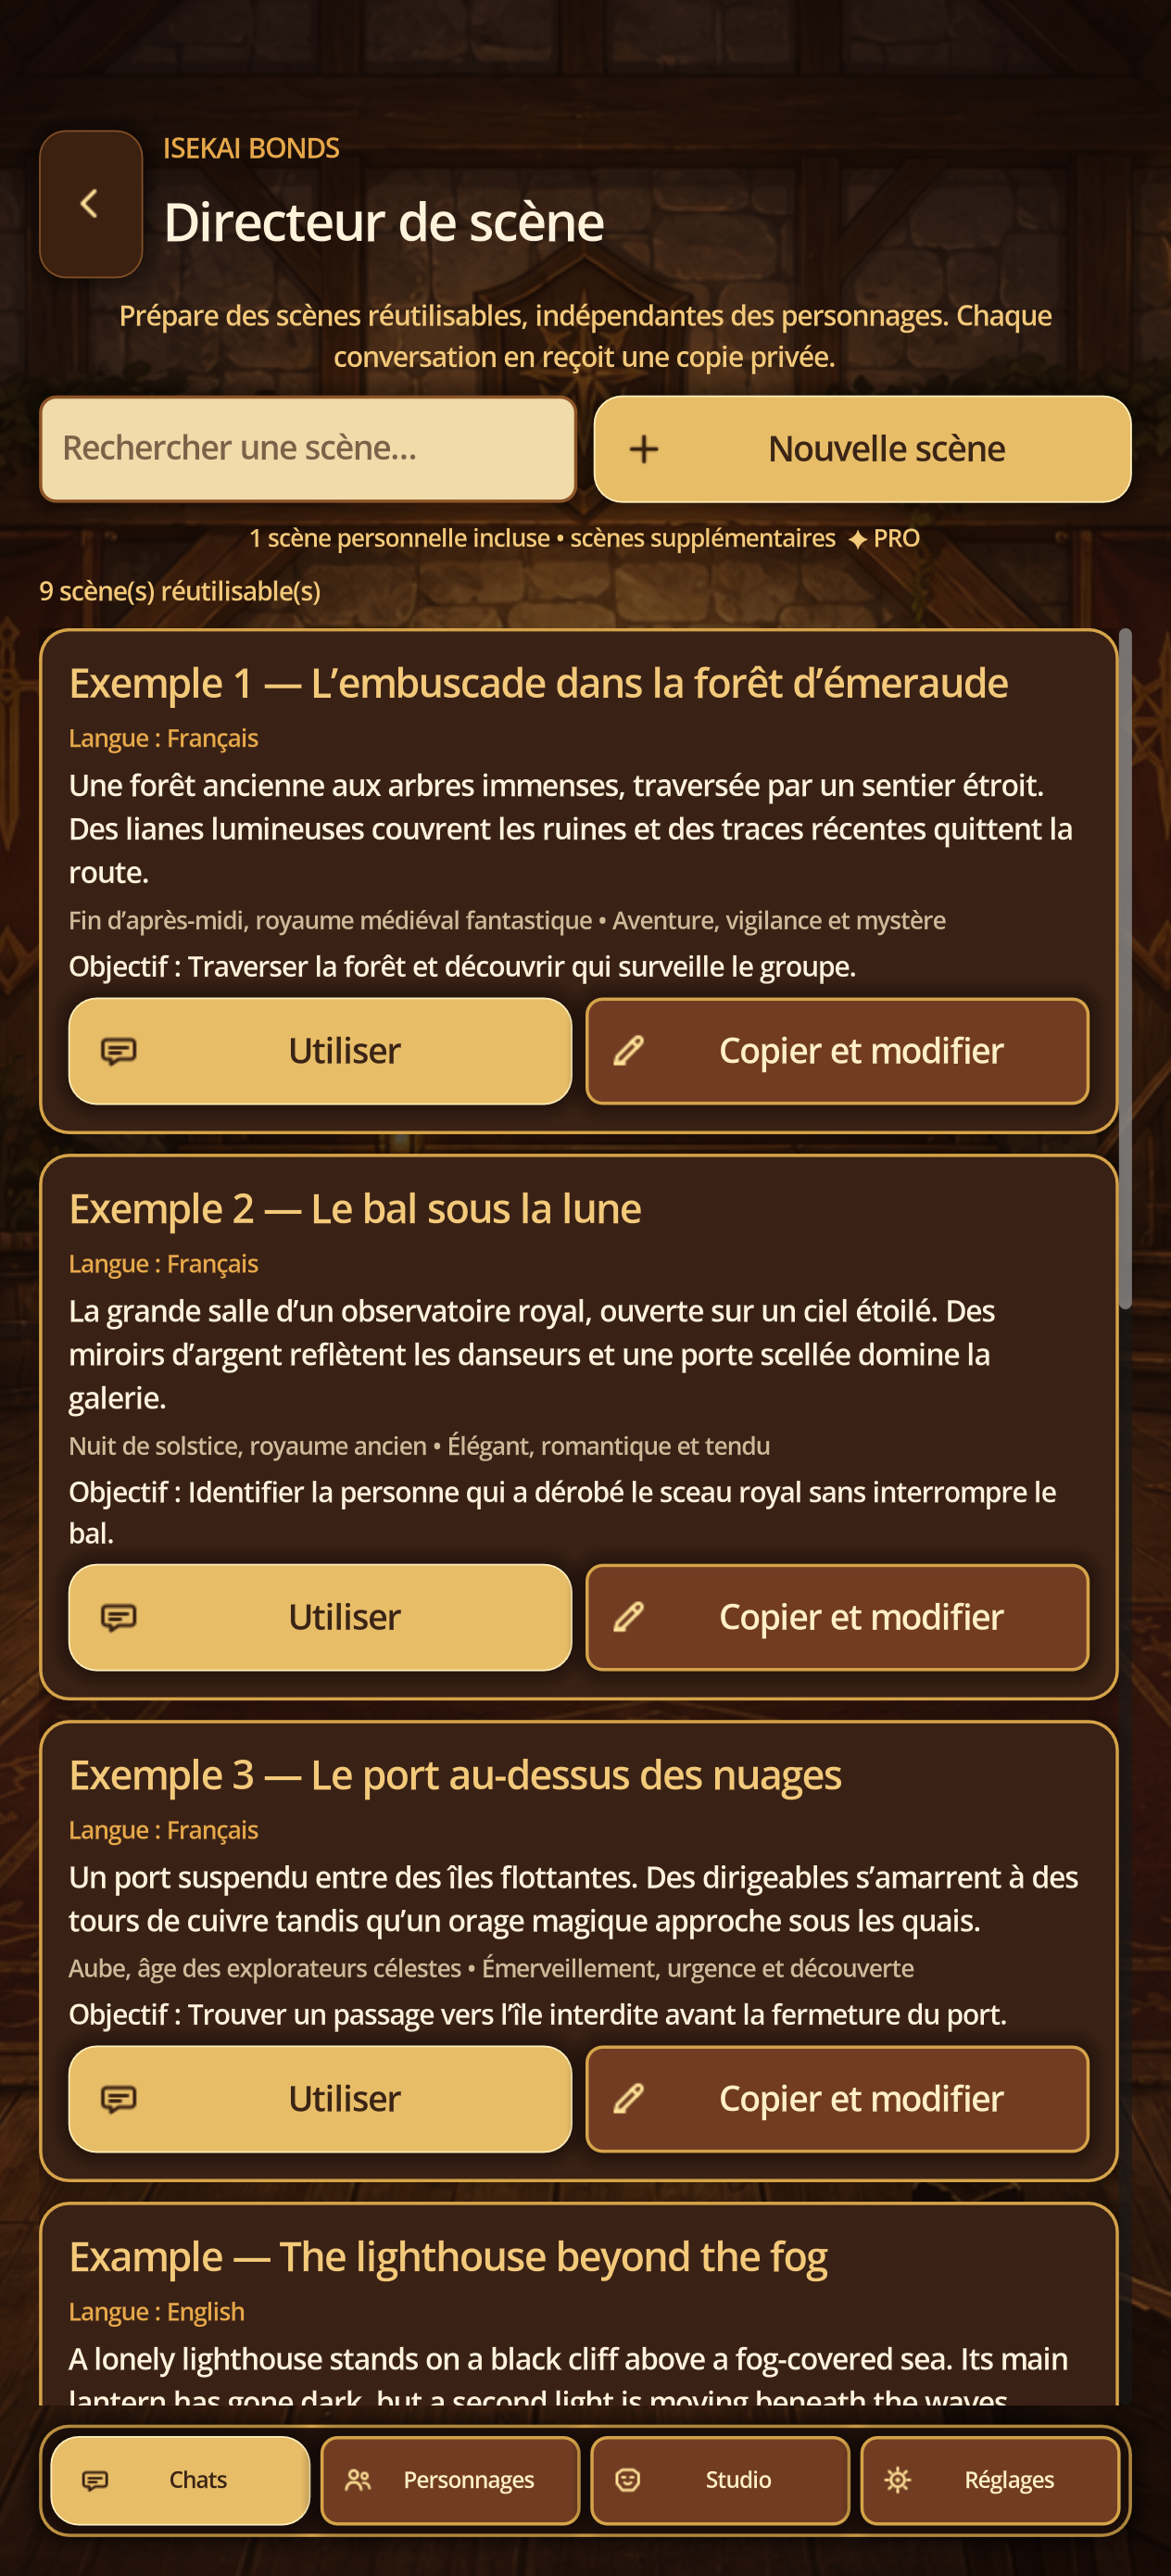
10 · Scene Director
Frame roleplay with your local model
Steps
- Load a GGUF, make it active, then open Scene Director from Chat.
- Copy a built-in example or create a personal scene; Free allows one.
- Fill language, name, setting, era, tone, goal, stakes, cast, and introduction.
- Save and apply it to Narrative roleplay or Group roleplay.
- With a loaded GGUF, speakers and World Master answer sequentially; keep replies short on modest hardware.
16A · Stage director
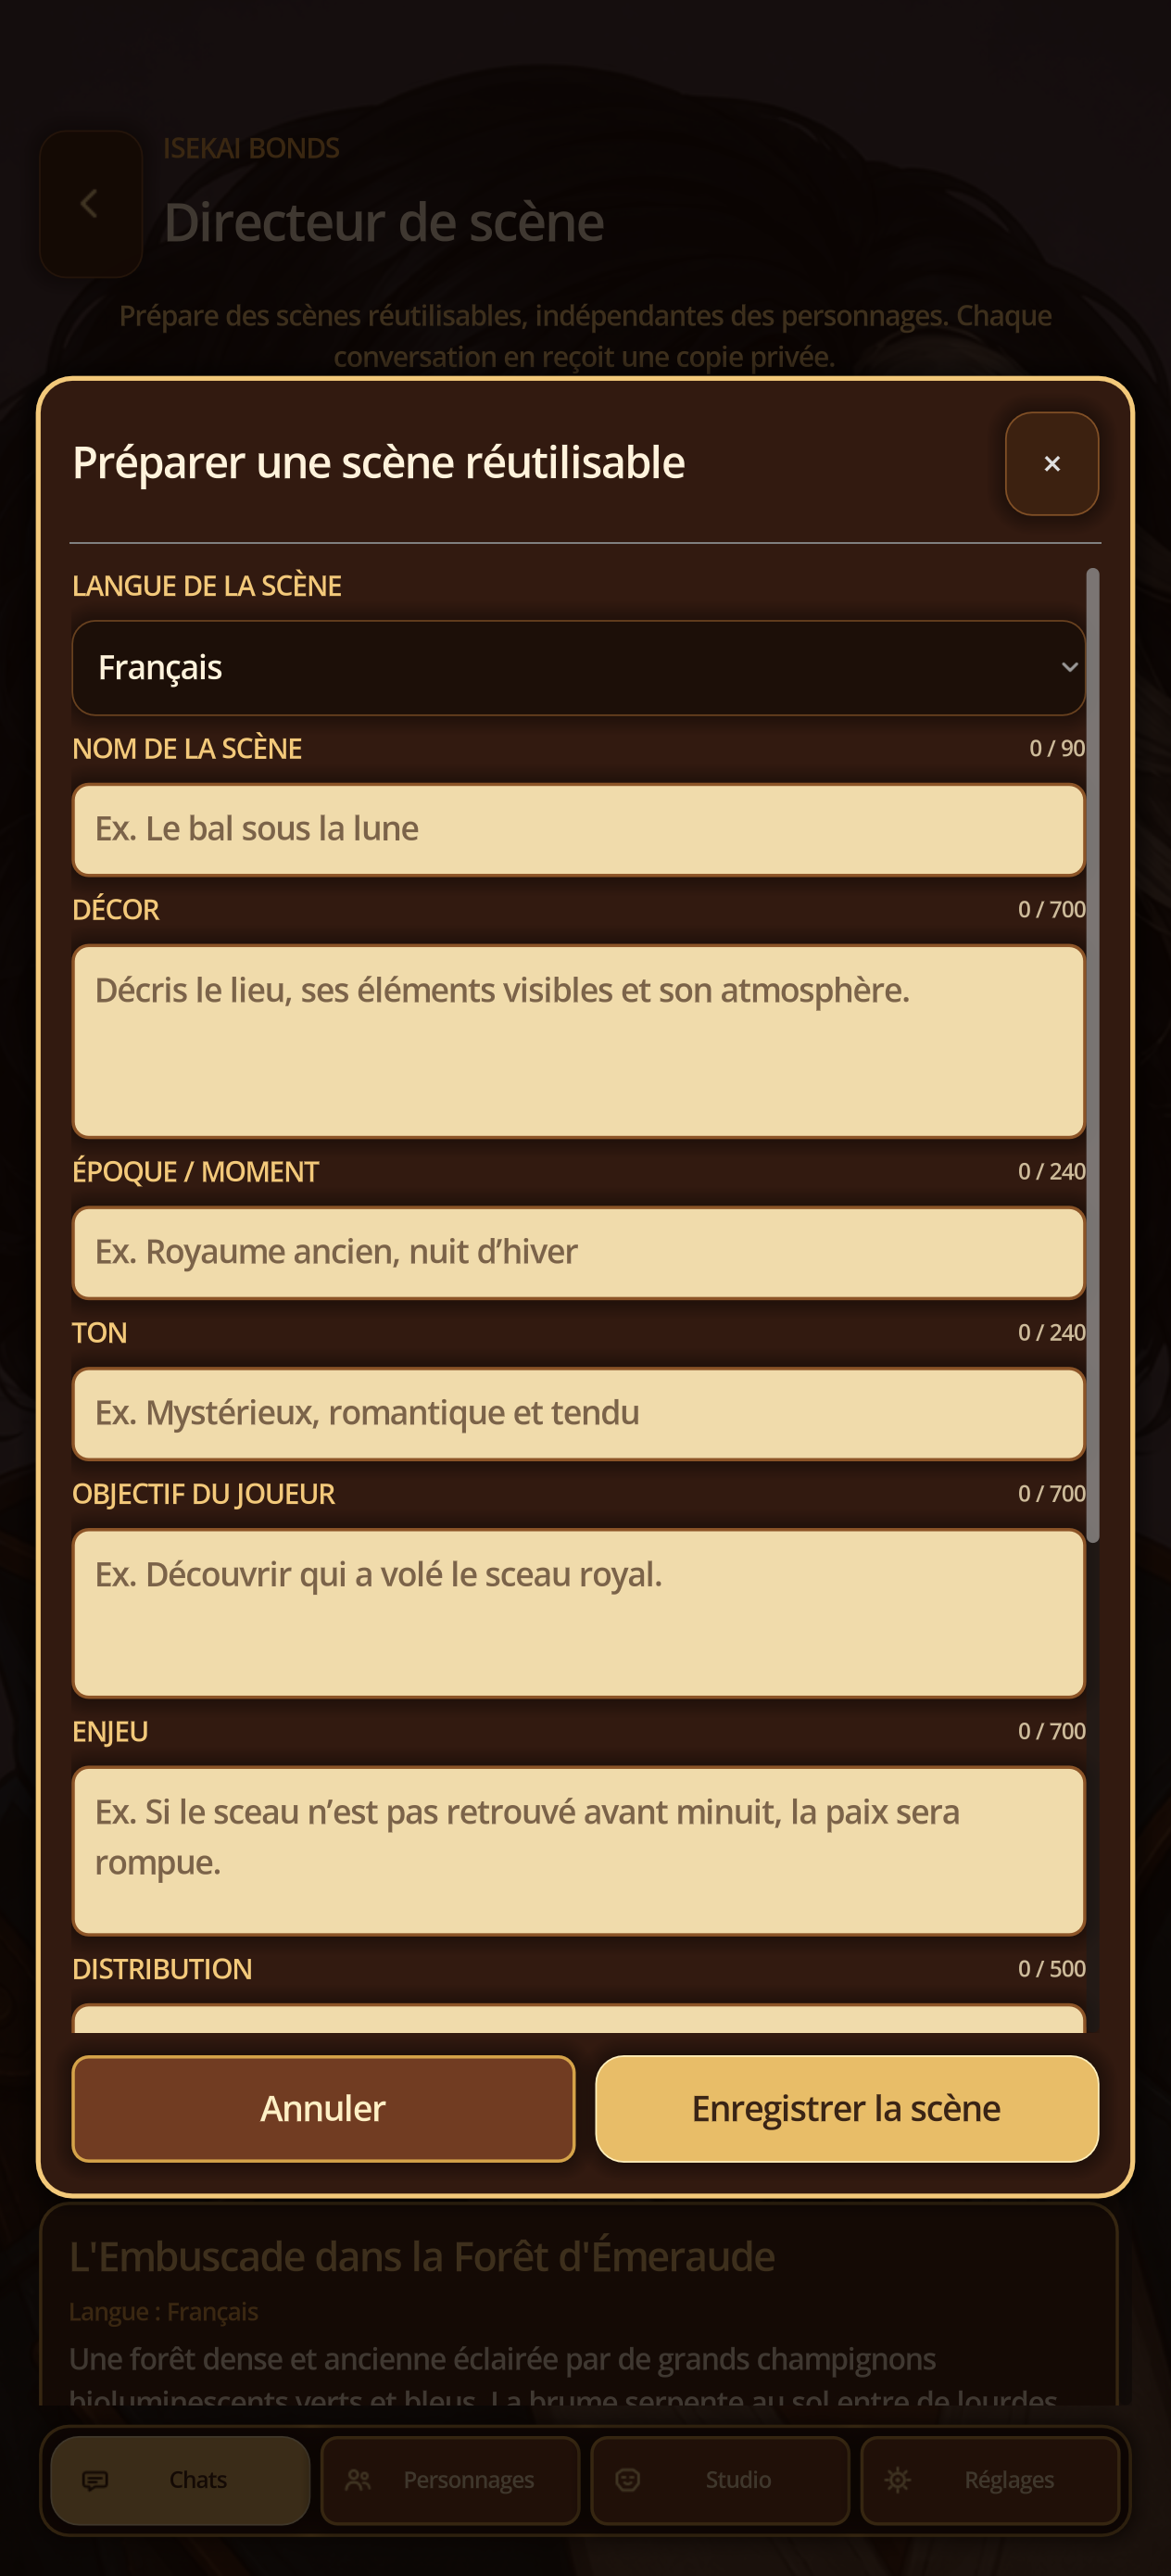
Create a personal scene
Steps
- From Chats, open Stage Director and then New Scene.
- Inquire title, hanger, frame, atmosphere, conflict, instructions from the Master of the World and visual instructions.
- Choose the characters and model, then save.
16B · Stage director
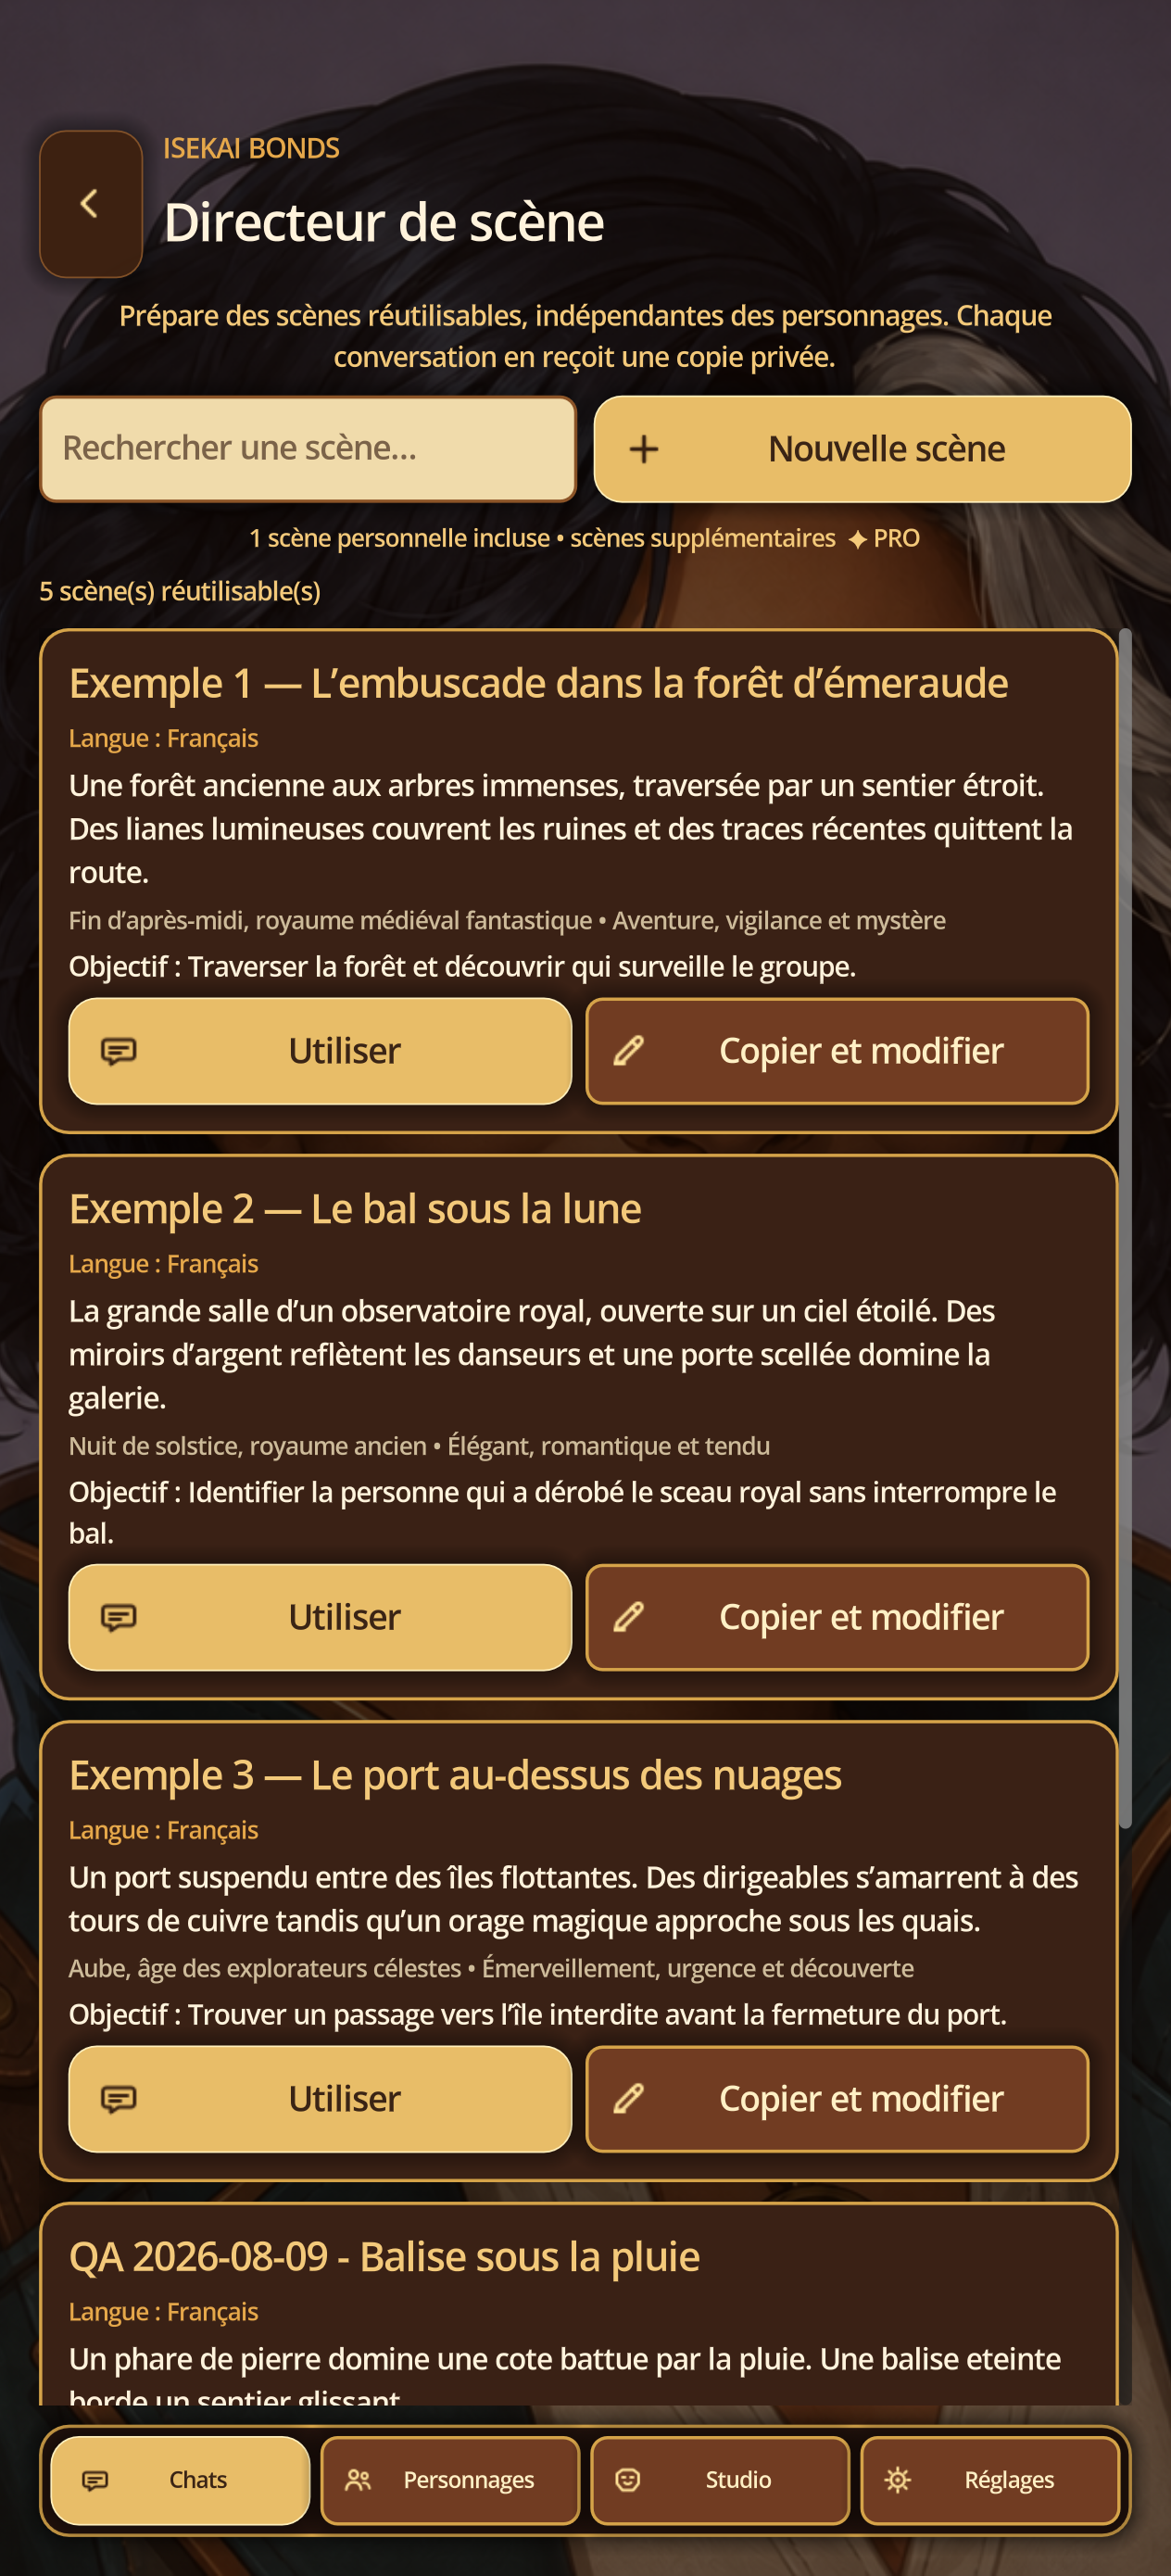
Edit and review the saved scene
Steps
- Open the created card, tap Edit and change a field.
- Save and return to the list.
- Open the scene and check that the fields and meters match.
16C · Stage director
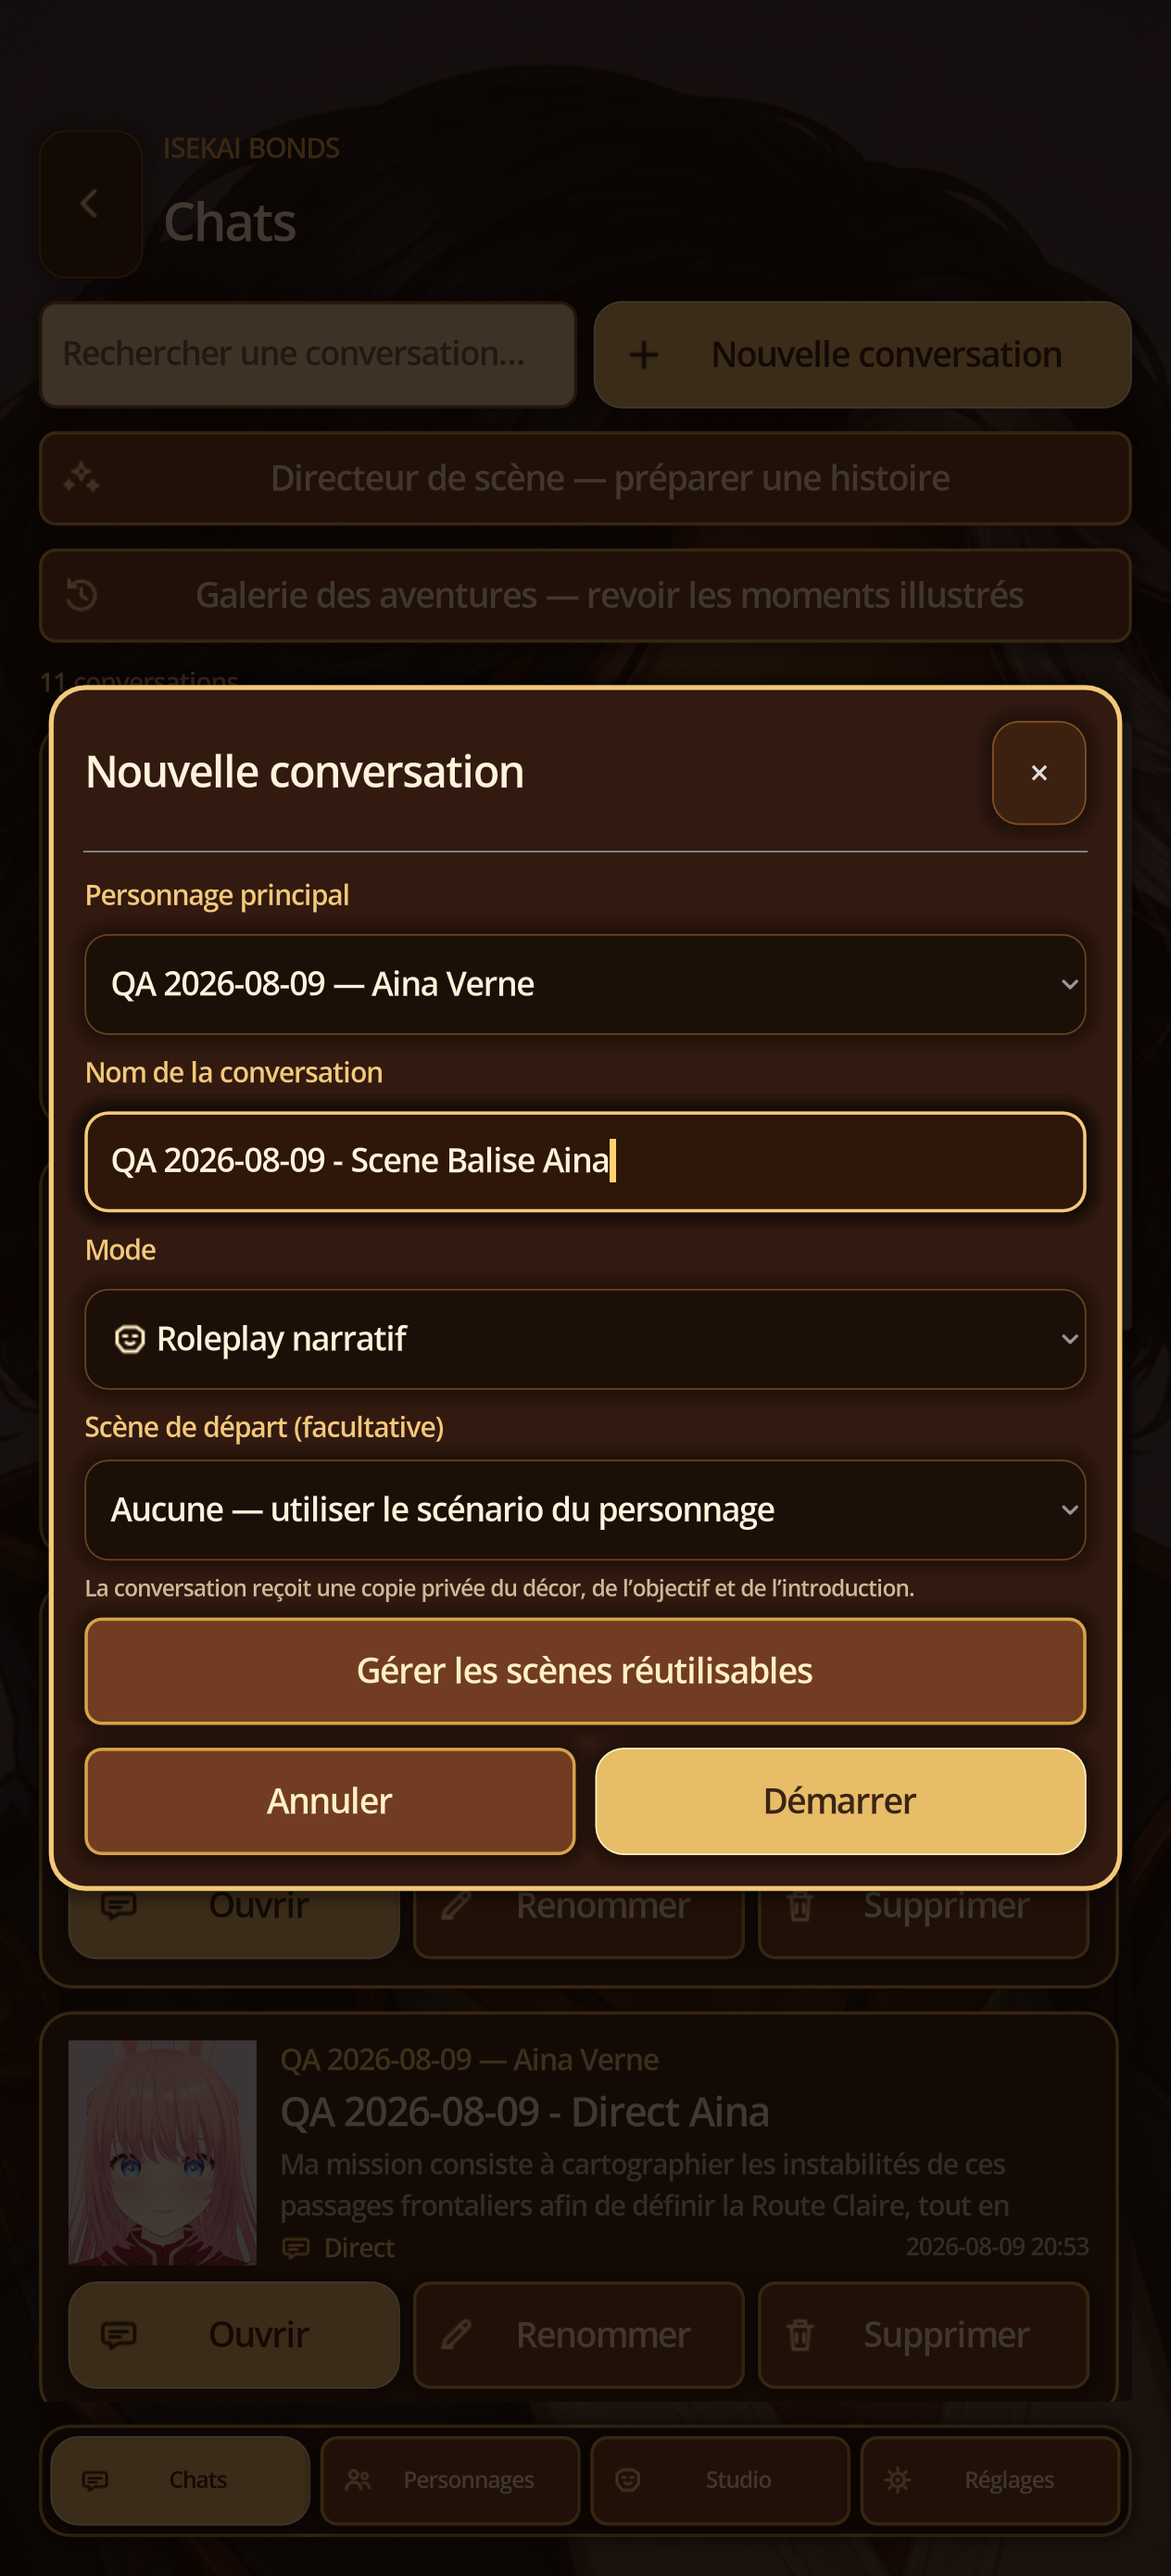
Apply the scene to a conversation
Steps
- Touch Use in a conversation.
- Choose mode, distribution, characters and model available.
- Create the conversation and check that the original context and the Master of the World reflect the scene.
- The local model must be installed and ready; Otherwise select a configured cloud provider.
11 · Settings
Adjust the experience and protect data
Steps
- Check language, text size, enhanced contrast, and reduced motion.
- Review default solo mode, proactive messages, LLM provider, and generation profile.
- Choose local or cloud speech, performance metrics, and scene background.
- Export and restore an encrypted .isekai private backup using test data only.
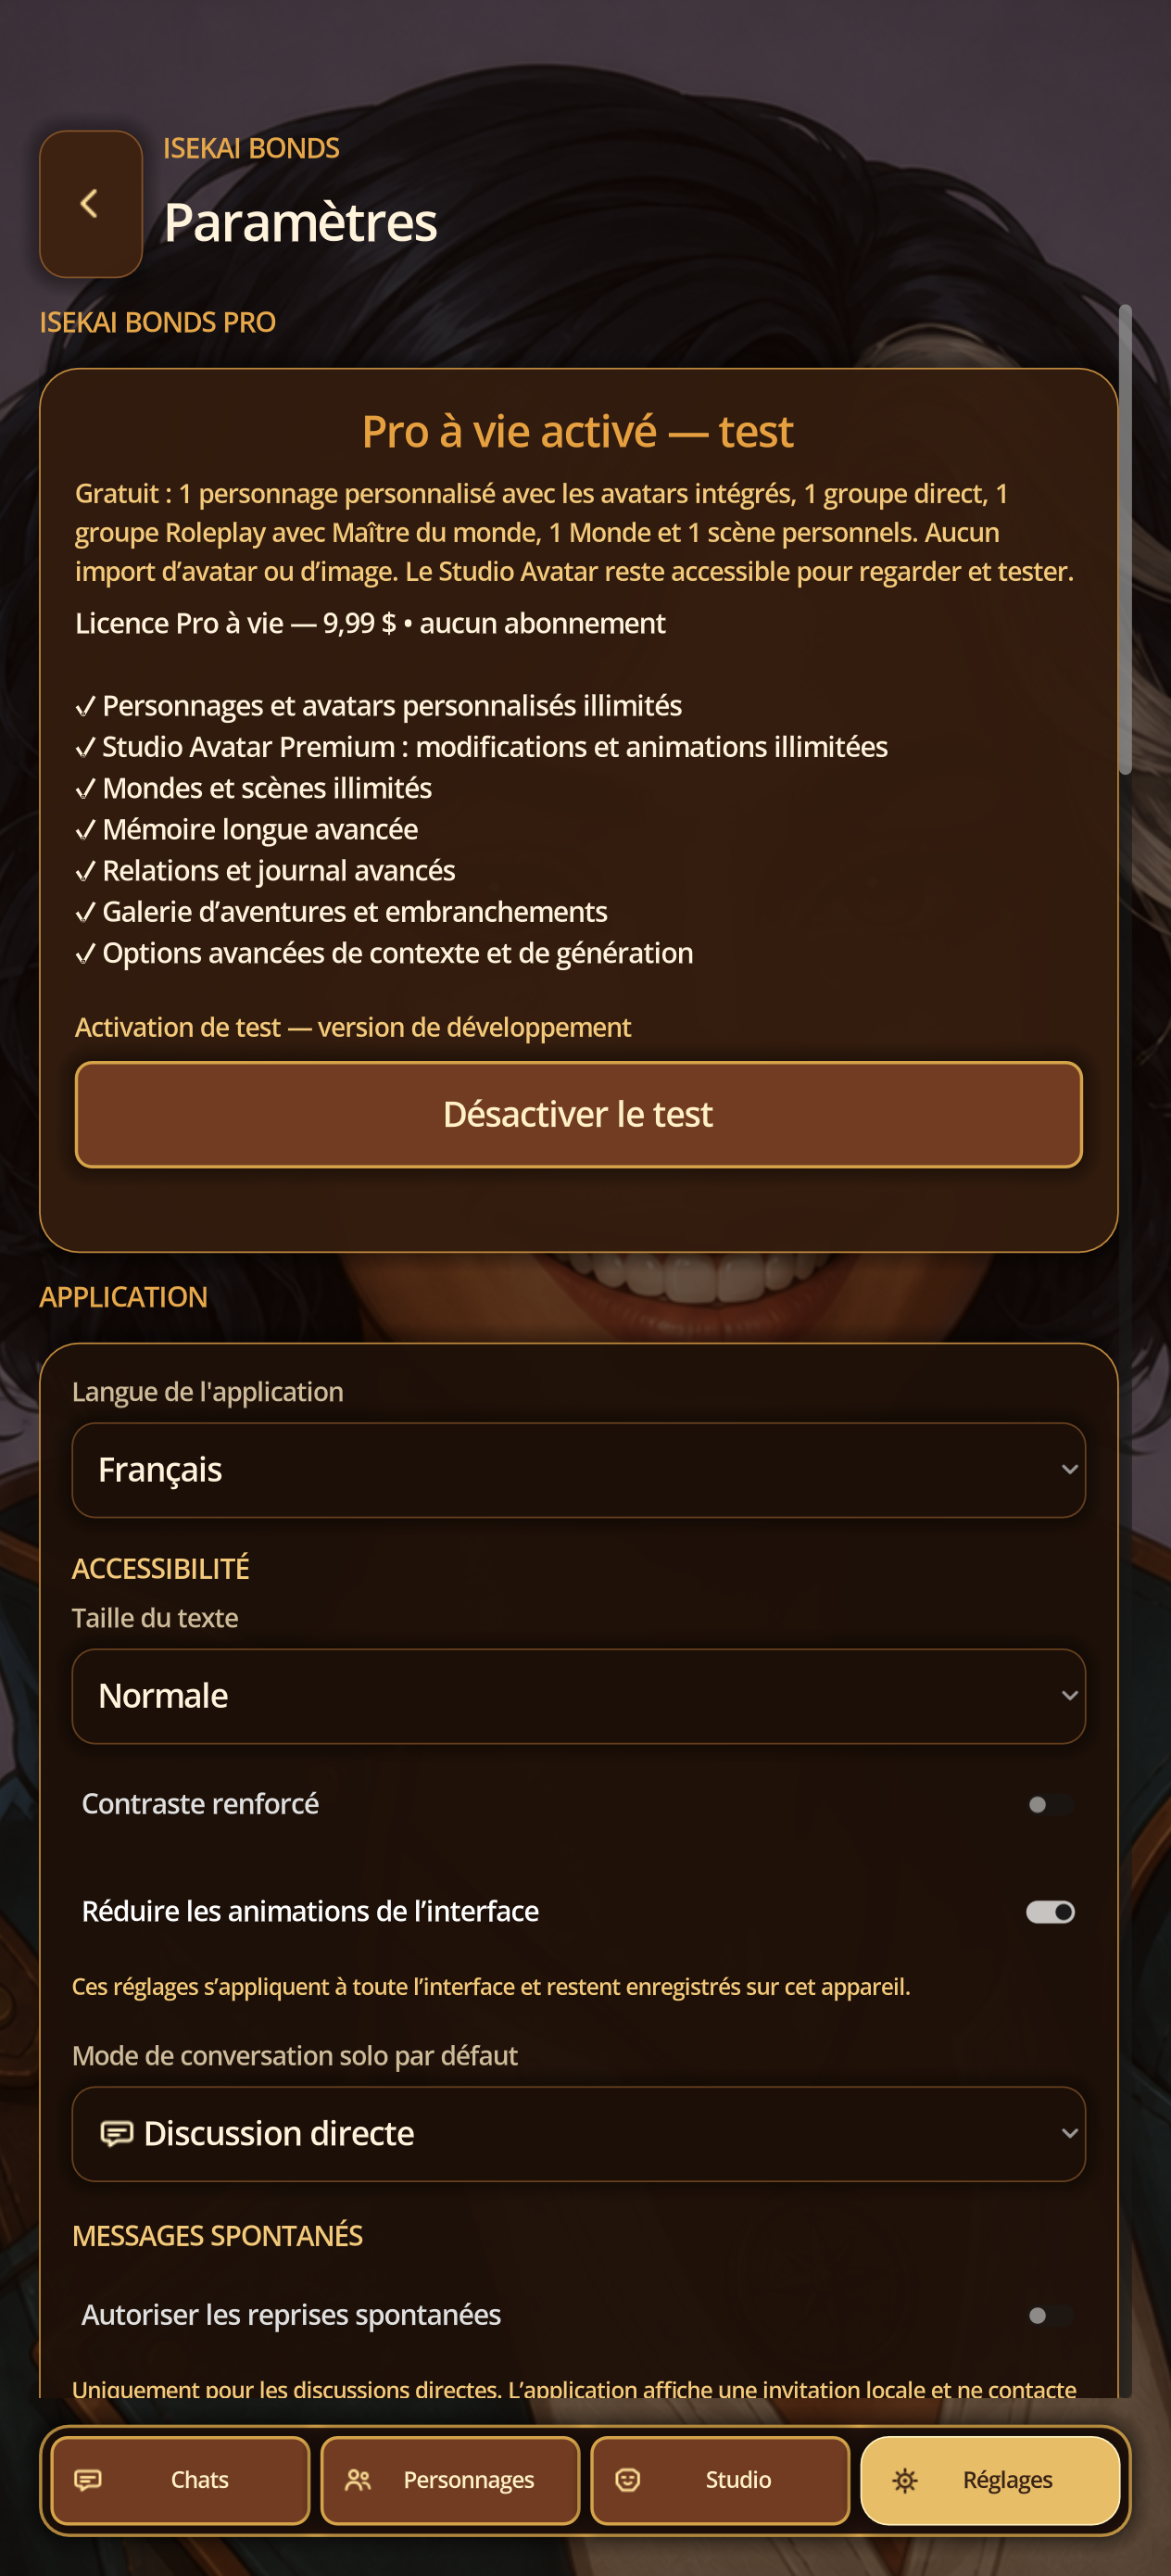
24 · Languages, privacy, and backup
Keep control of local data
Steps
- Under Application, choose French, English, German, Portuguese (Brazil), or Spanish (Latin America). The change is immediate.
- Set text size, high contrast, and reduced motion. No other visual theme is available.
- Private backup exports characters, avatars, conversations, Worlds, scenes, and images to an encrypted file.
- Enter the same password twice, at least eight characters. It is never stored and the backup cannot be opened without it.
- Import requires the file and password. API keys, settings, GGUF models, downloaded voices, and caches are intentionally excluded.
- Reset preferences restores settings but does not delete adventures.
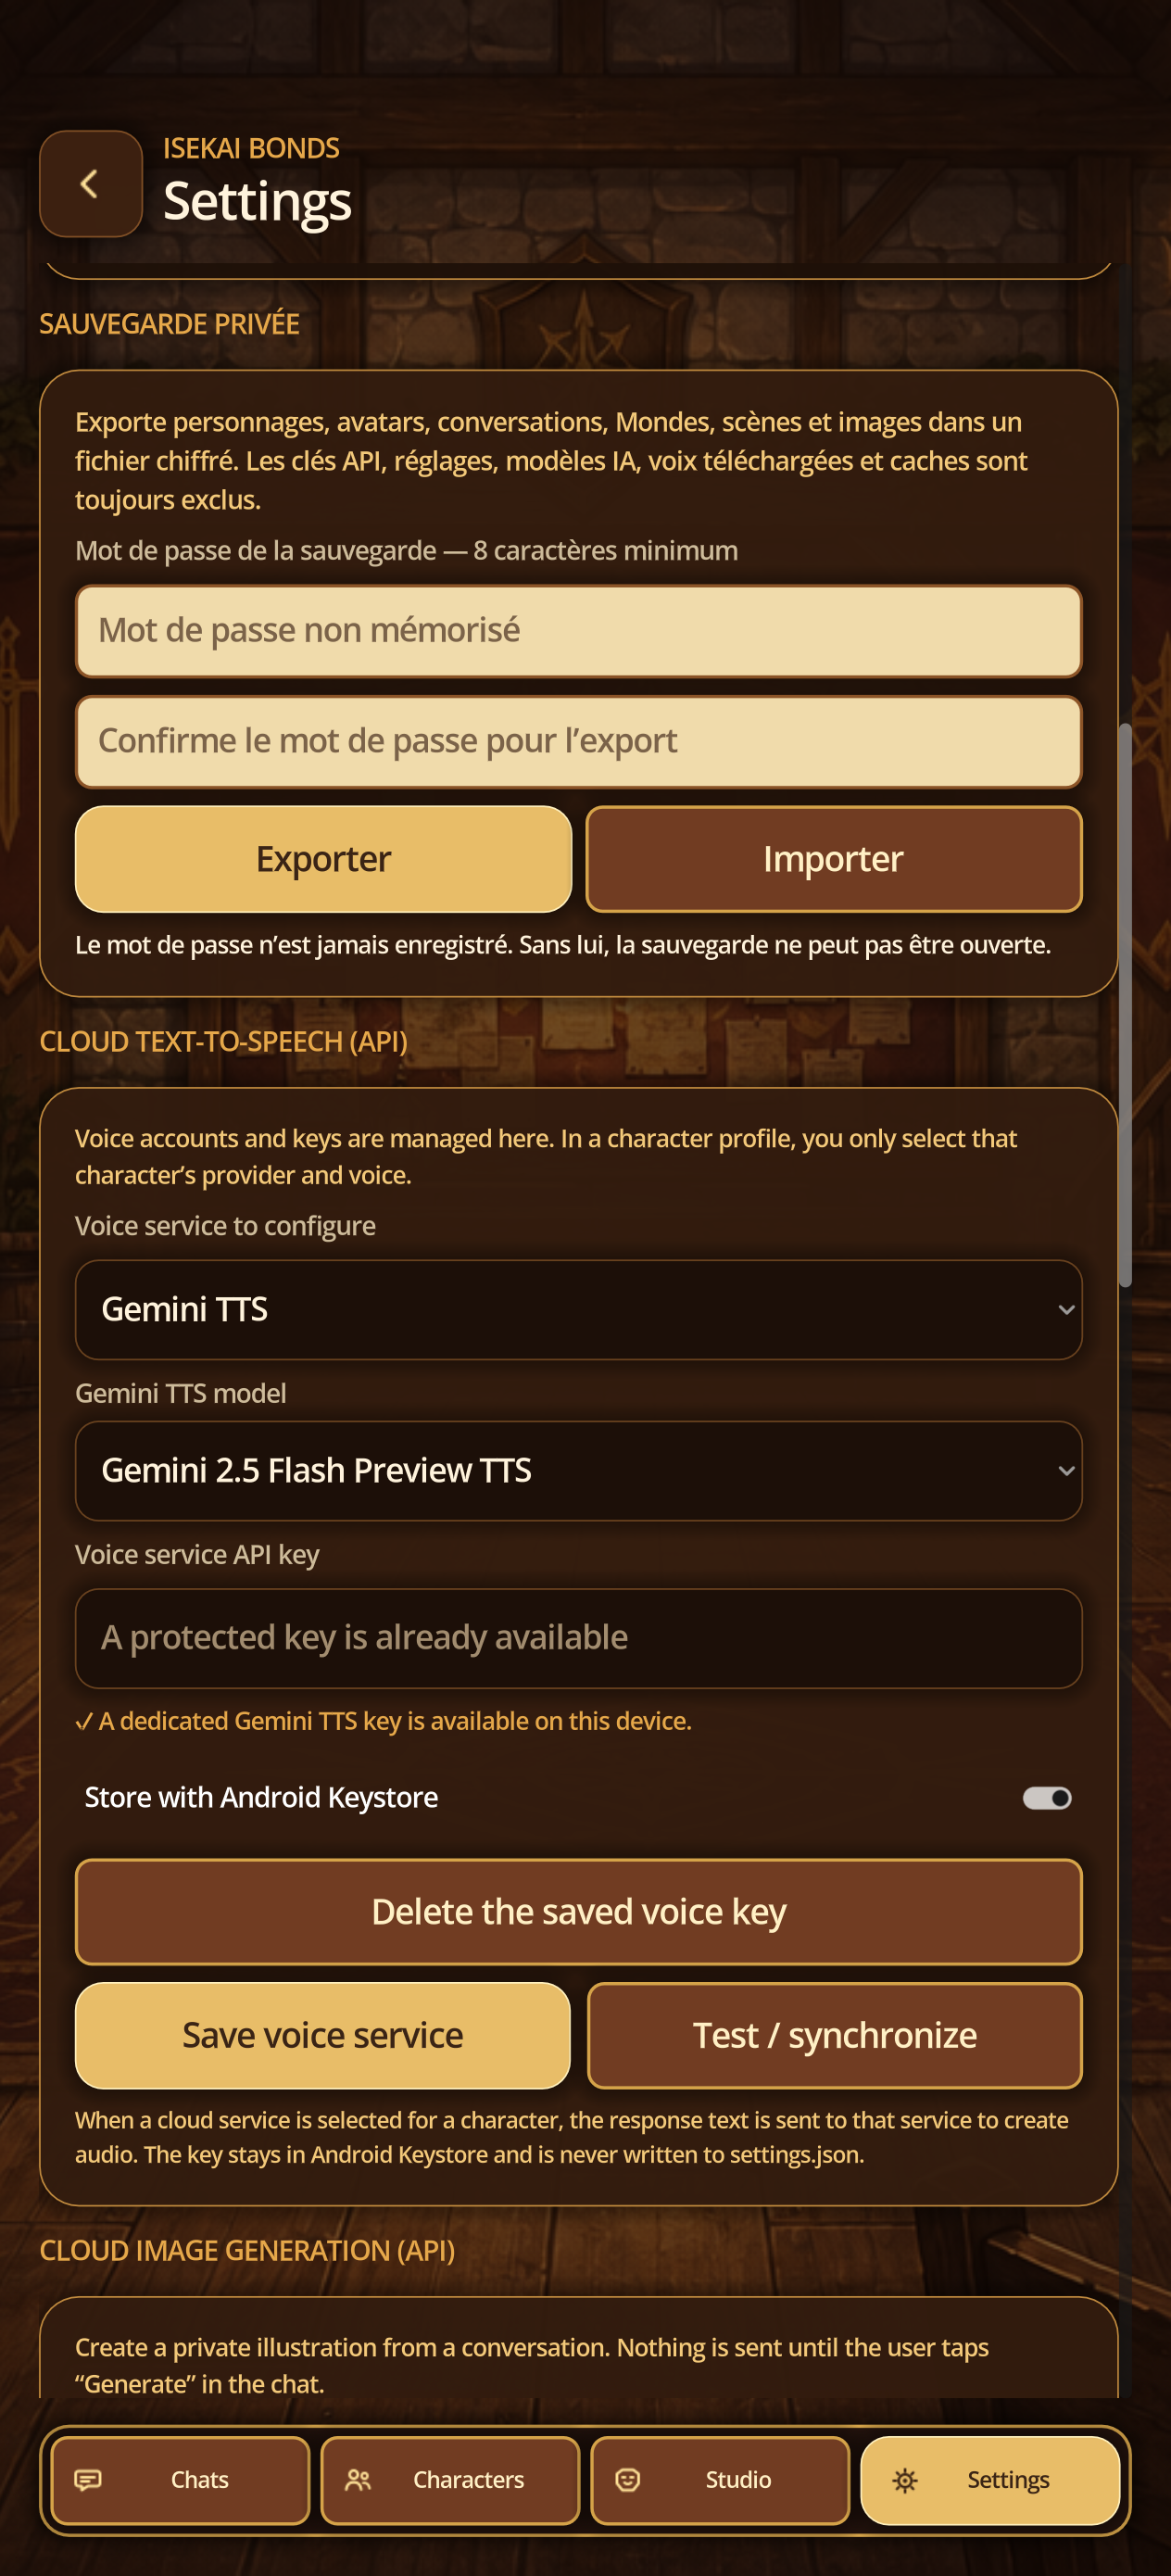
18A · Private data
Export an encrypted backup
Steps
- Open Settings → Private backup.
- Choose Export, set a highly unused password and keep it out of the report.
- Save the archive in a controlled location and check that it exists.
18B · Private data
Import without unexpected overwrites
Steps
- Before import, export the current state.
- Choose Import, select the archive and enter its password locally.
- Read the summary/confirmation and confirm only if the scope is correct.
- Launch the main screens and check characters, conversations, scenes and media.
12 · Reports and feedback
Send only what is necessary
Steps
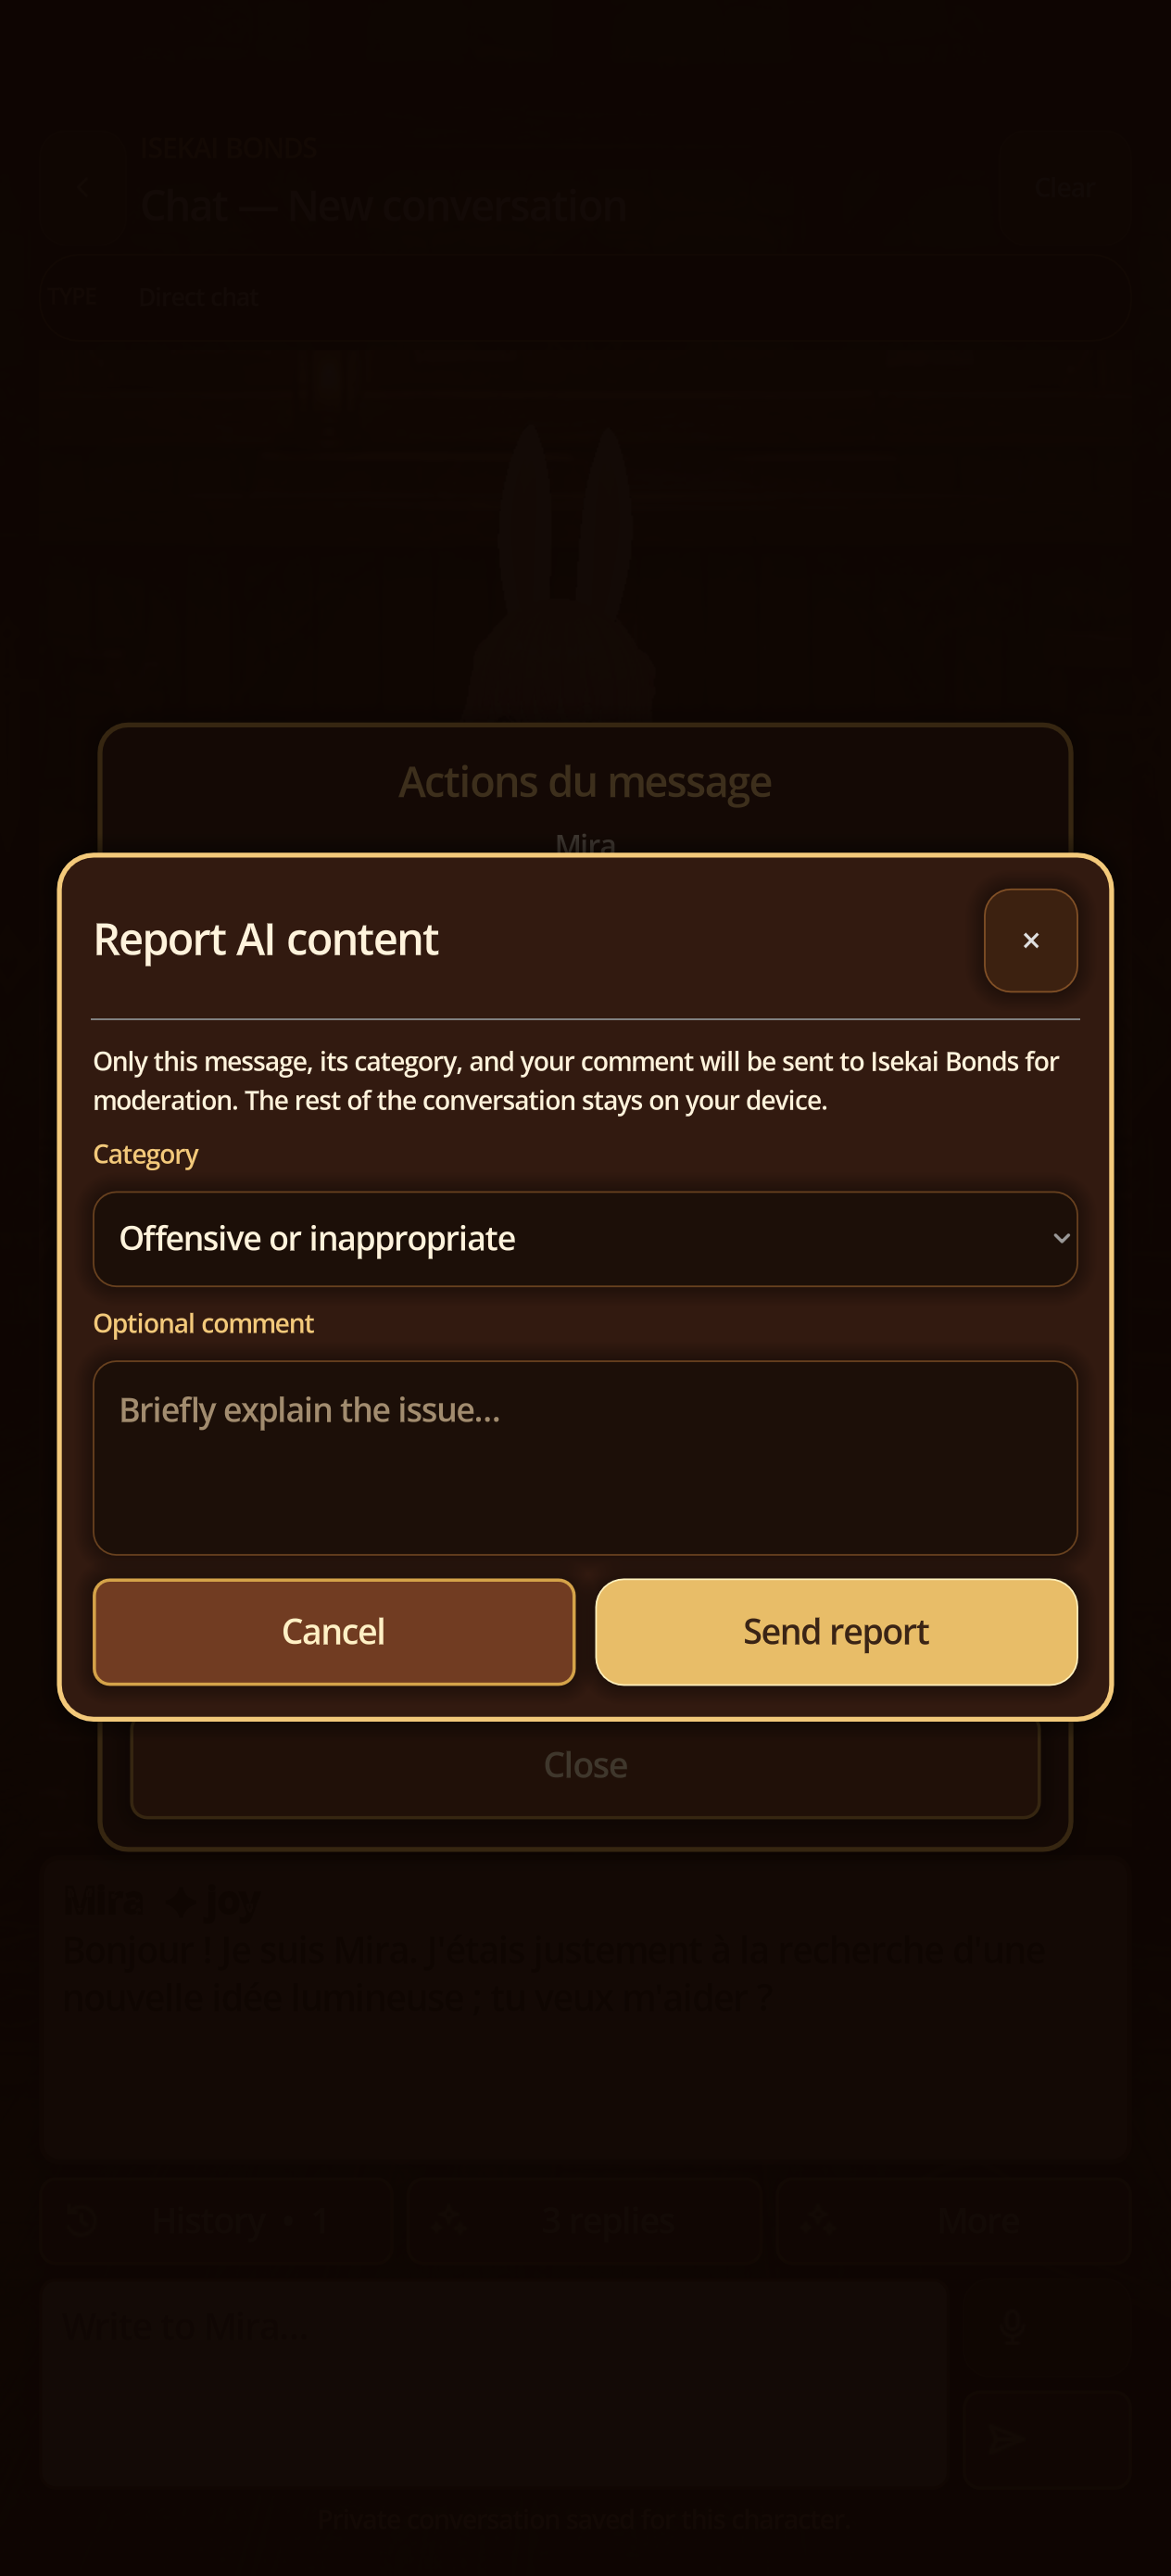
- Long press the exact AI reply.
- Open Message actions, then Report this content.
- Select a category, add an optional comment, review, and send.
- For a general bug, use the private testing-listing channel or support@isekaibonds.com with app version, Android, device, steps, expected, observed, and frequency.
- After Send, wait for confirmation of account or network error, then return to the message: the conversation should not be deleted or replaced.
Pro · Google Play
How do I manage a Pro purchase?
Steps
- Open Settings and the Isekai Bonds Pro section.
- Review the benefits and regional Google Play price before choosing a one-time purchase.
- For an existing purchase, use Restore purchases with the same Google Play account. Contact support if the entitlement is missing.
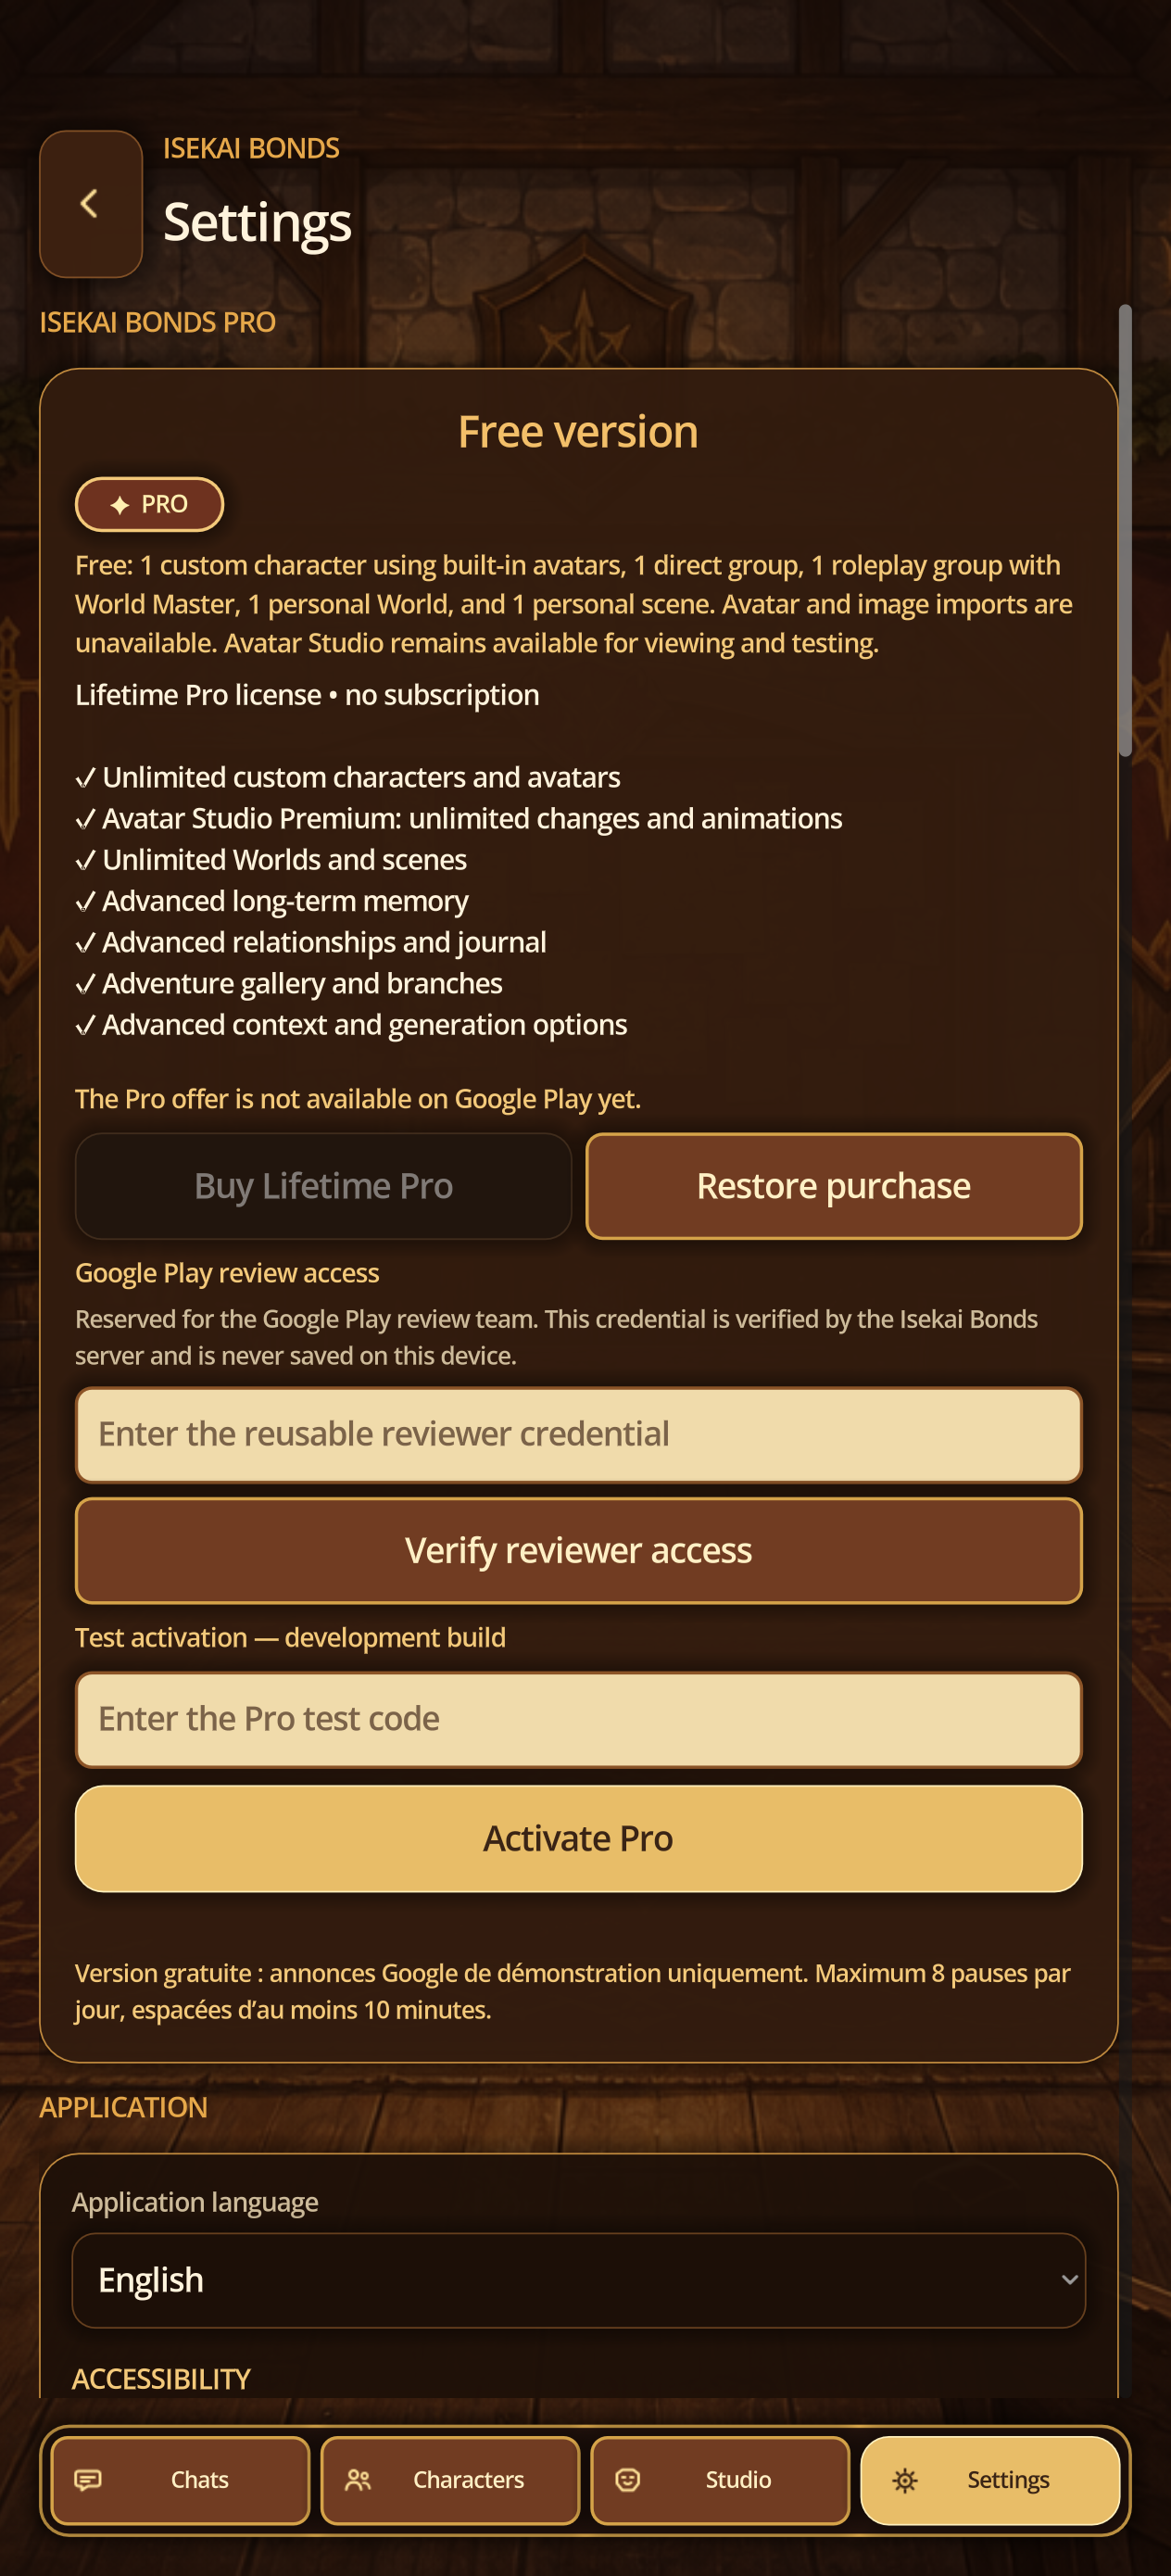
Pro · Google Play
How do I manage a Pro purchase?
Steps
- Open Settings and the Isekai Bonds Pro section.
- Review the benefits and regional Google Play price before choosing a one-time purchase.
- For an existing purchase, use Restore purchases with the same Google Play account. Contact support if the entitlement is missing.
21A · Dictated Android
Allow microphone only if necessary
Steps
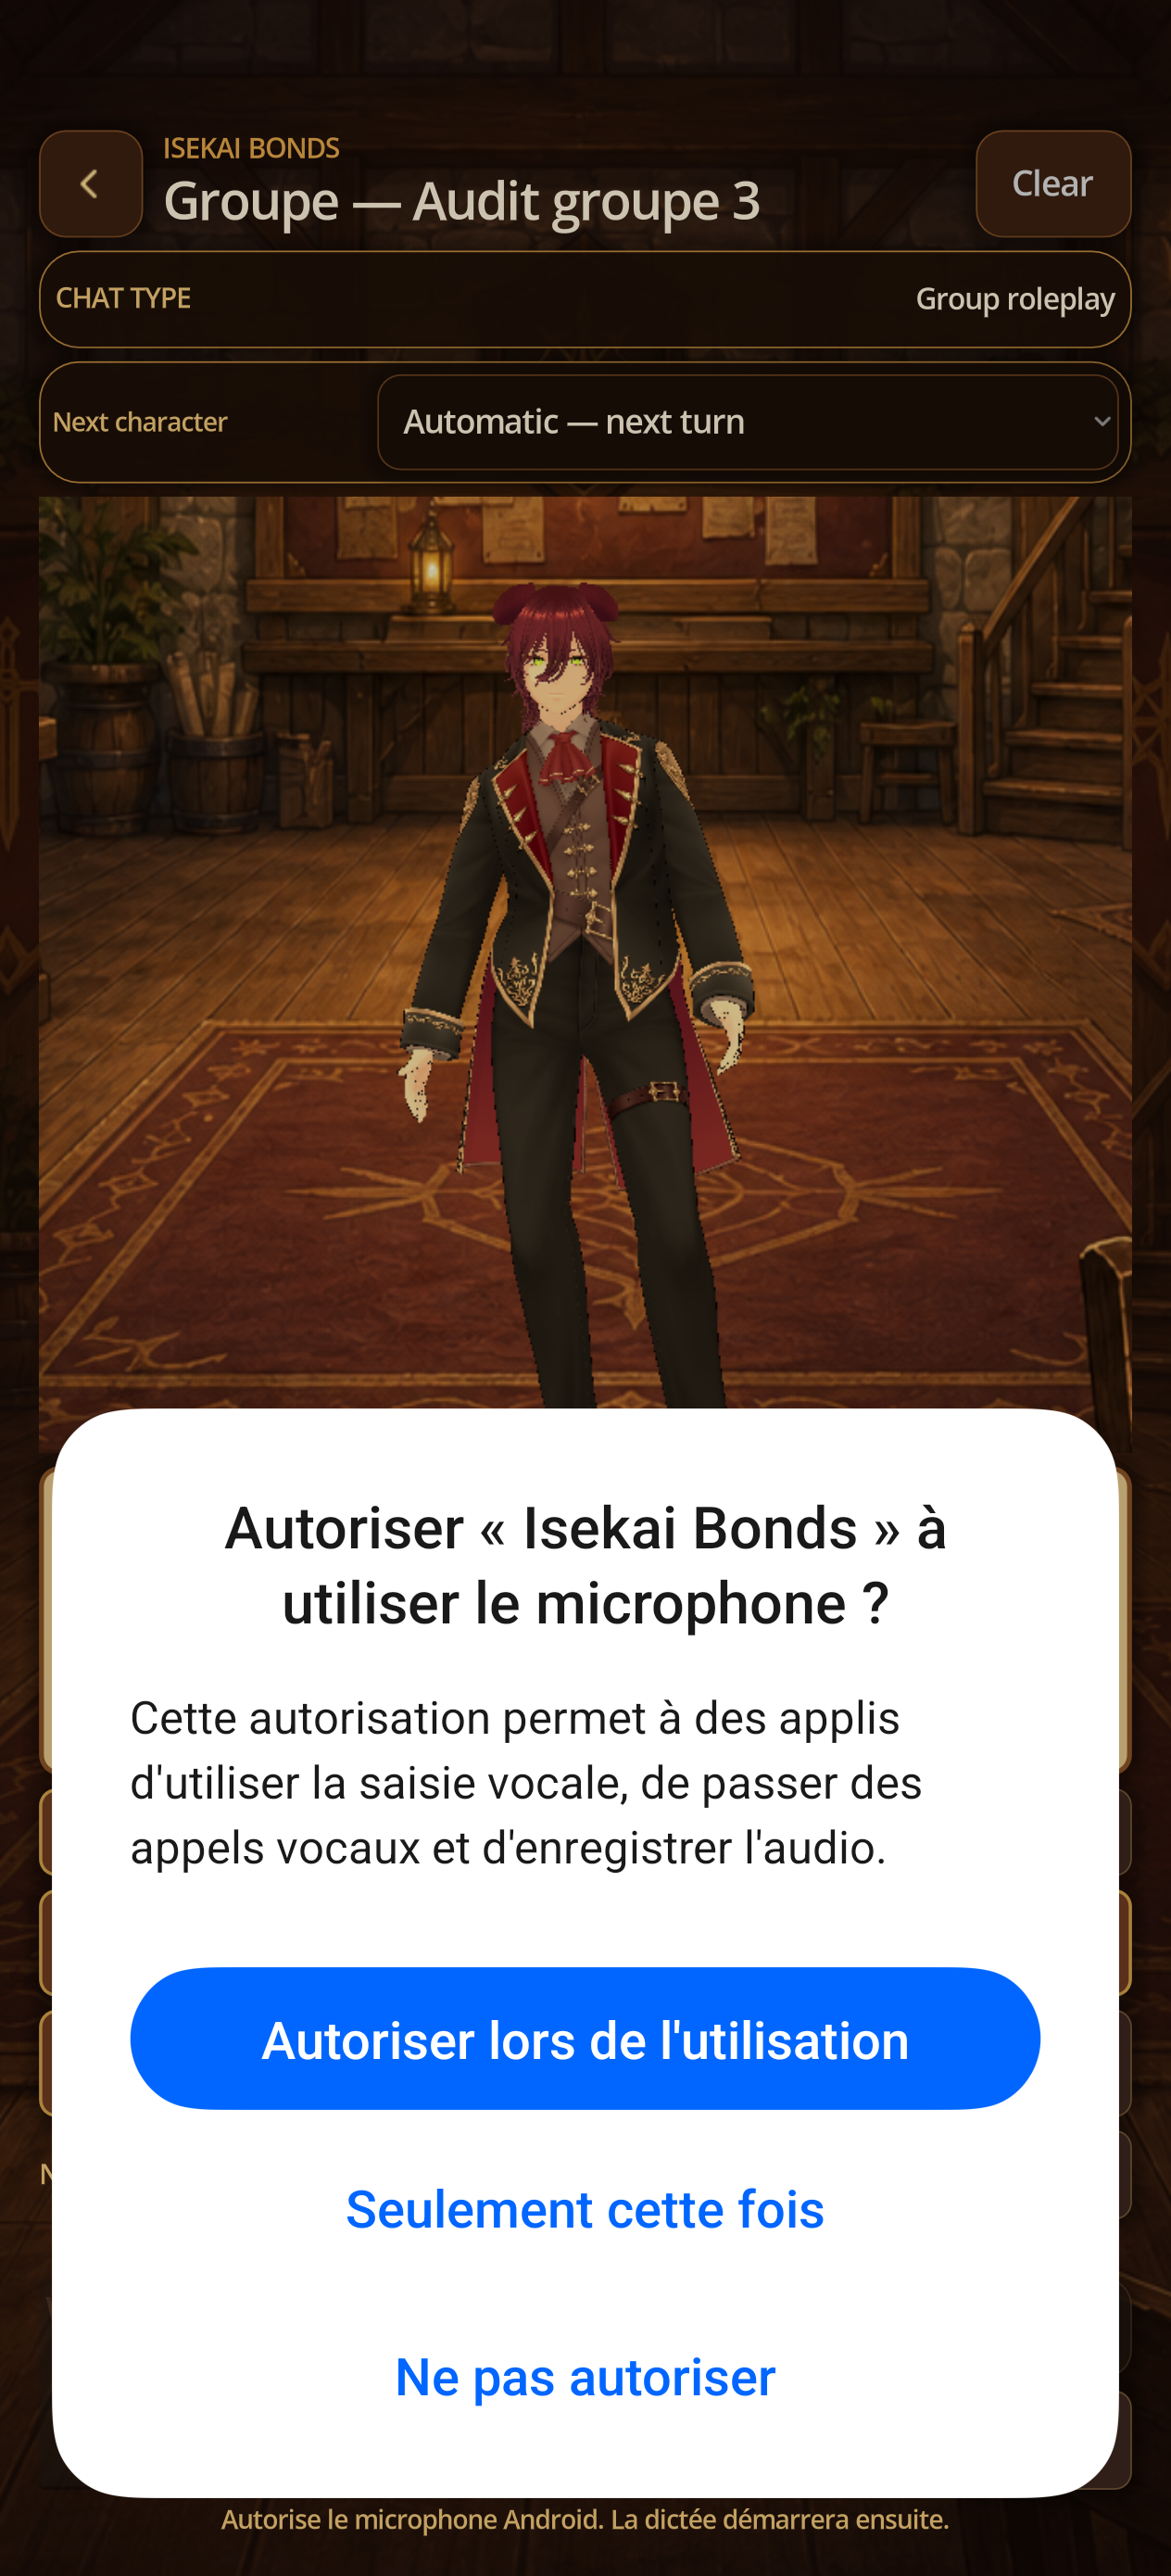
- In the Android chat, tap the microphone icon.
- Accept RECORD AUDIO if you wish to dictate; otherwise refuse and continue on the keyboard.
- If the native service is not available, the app opens the dictation of the Android keyboard.
21B · Dictated Android
Check recognized text before sending
Steps
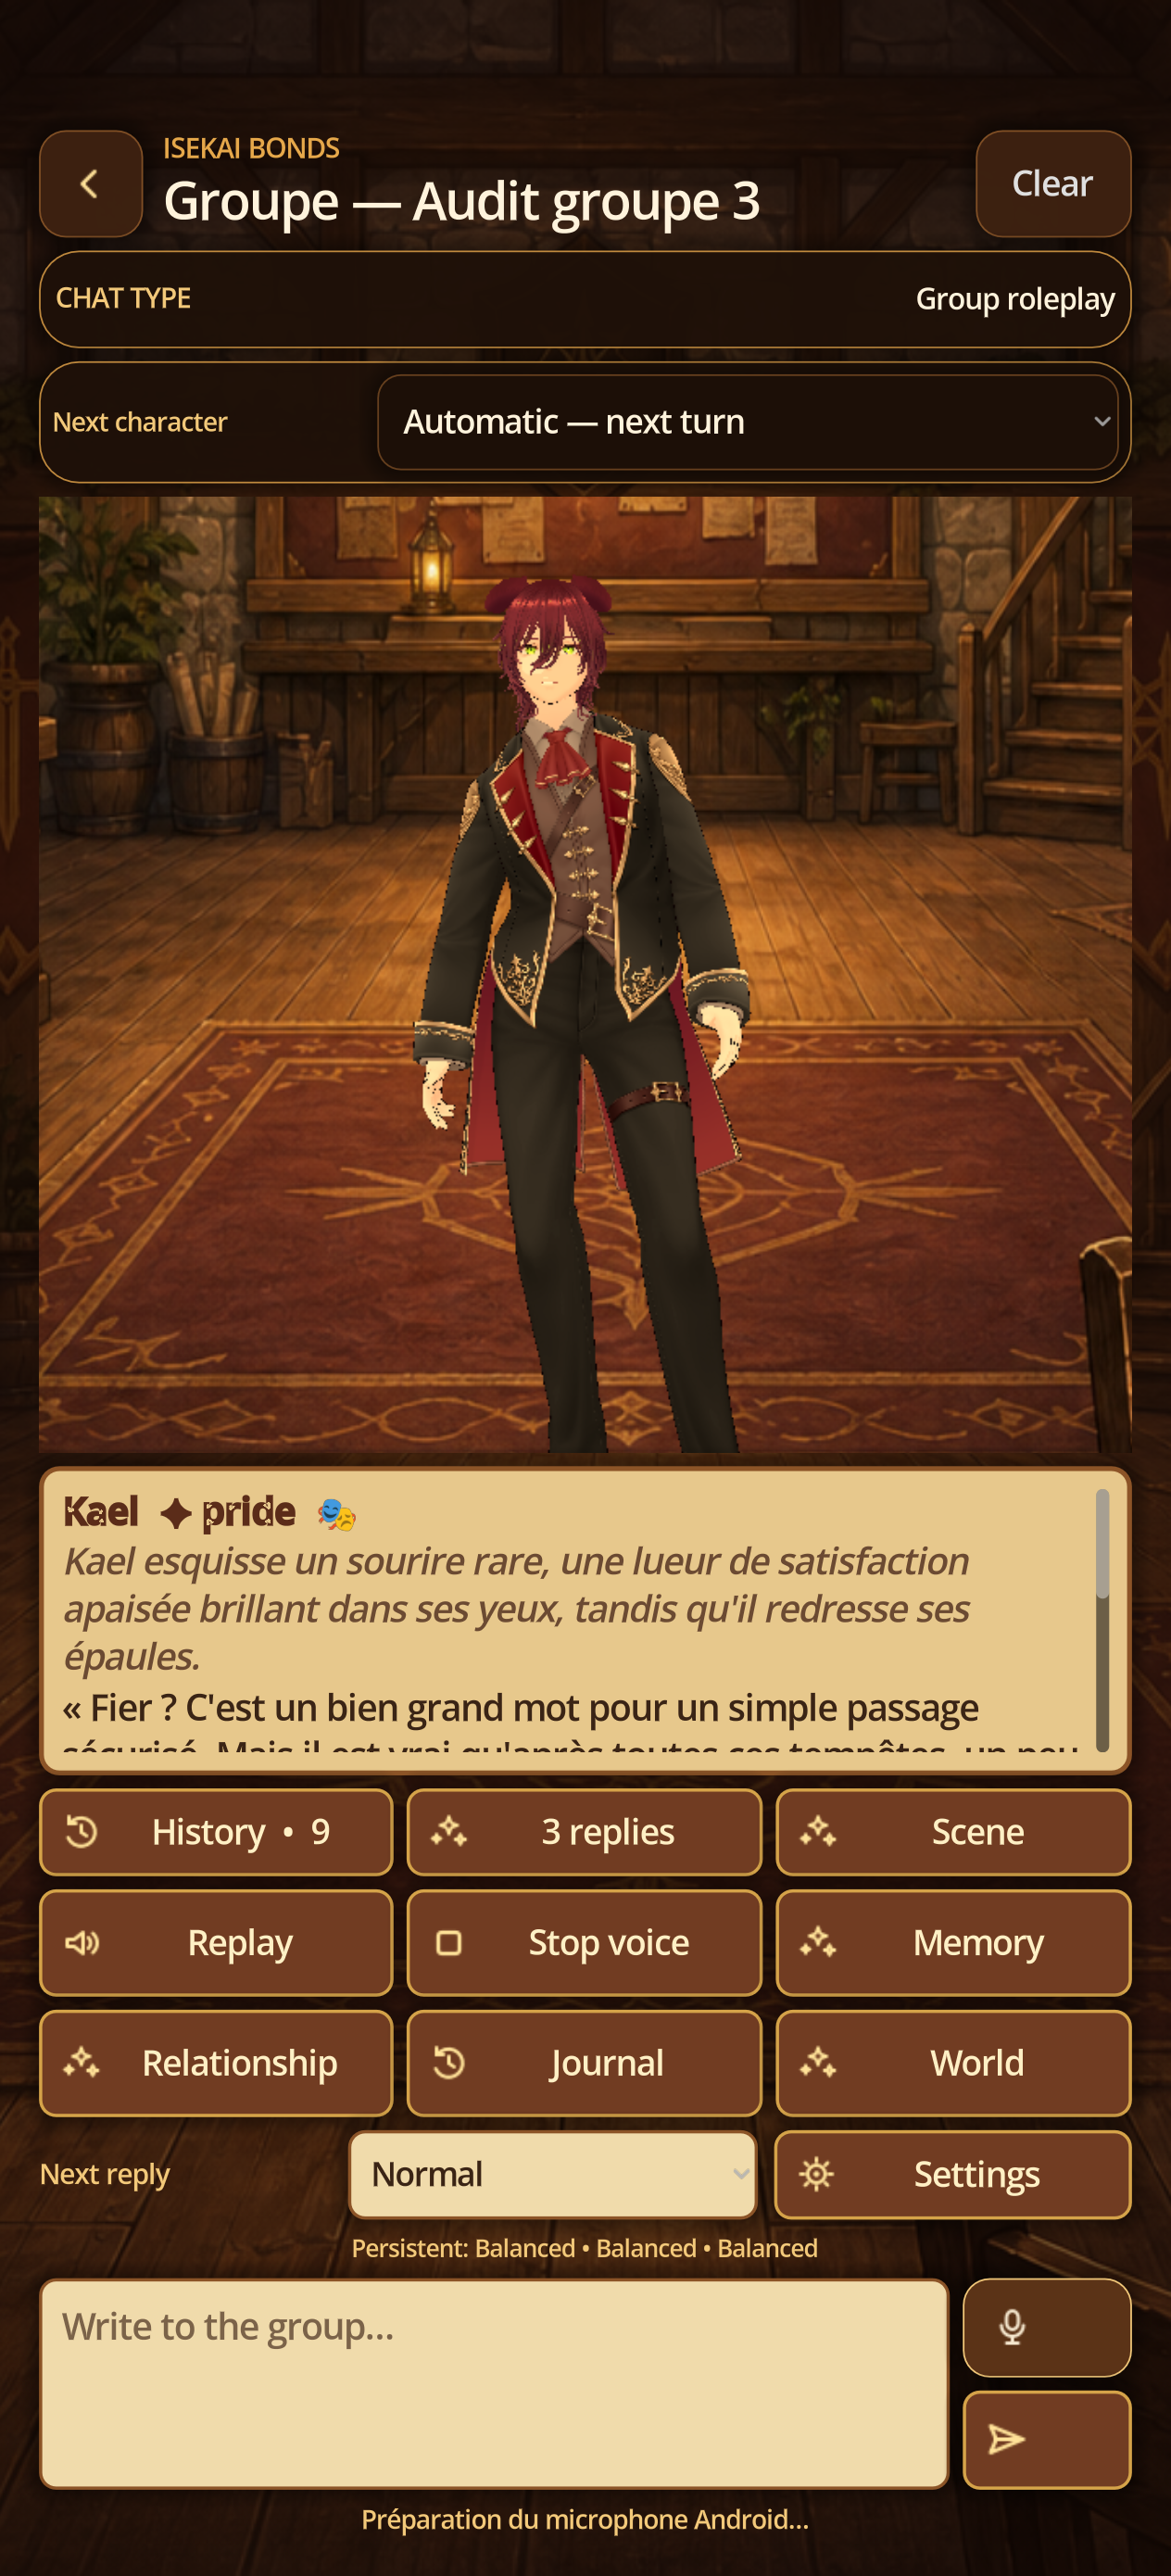
- During listening, the icon becomes Stop and partial results fill the draft.
- Tap Stop or wait for the final result.
- Read and correct the recognized text before pressing Send.
- In case of silence, denied permission or missing service, use the keyboard and only attach the error message to the report.
22 · Reading screenshots
Understand the occasional English labels
Steps
- The text of the French tutorial describes the current V0.21.26.
- Some authentic screenshots come from earlier validation states where French and English were mixed; their legend reports it.
- Rely on the section IDs, command position and expected result, then report any non-localized wording in the tested version.
28 · Troubleshooting
Diagnose without erasing data
Steps
- Cloud model error: check provider, model, base URL, network, and key, then Test connection. Never copy the key into a report.
- Rejected GGUF: verify .gguf extension, complete file, supported quantization, and free space. Try a small 1B-3B Q4.
- Load stuck or low memory: unload, choose CPU, reduce context/profile, and retry. GPU remains prioritized for the avatar.
- Missing voice: open Library, accept license, finish download, and retest the profile. Supertonic shared core downloads only once.
- Rejected avatar/BVH: verify file, license, metadata, and skeleton compatibility. Do not merely rename a wrong extension.
- Stuck streaming or TTS: use Stop, wait for Ready, then send a short message.
- Before resetting anything, export a private backup and note the displayed version.
29 · Complete tester checklist
Finish a reproducible cycle
Steps
- Version and language checked; onboarding and navigation completed.
- Built-in character opened; custom character created, edited, avatar changed, and new-chat avatar verified.
- Direct chat, solo roleplay, group chat, and group roleplay tested; resume, search, rename, and delete confirmed.
- History, actions, suggestions, branch, context, memory, relationship, journal, World, and report tested as entitled.
- Cloud provider tested without exposing a key; GGUF imported or downloaded, loaded, used, stopped, and unloaded.
- Piper or Supertonic downloaded with license, assigned, played, and stopped; Studio, emotions, lips, and avatar tested.
- Scene Director created/applied; languages, accessibility, and encrypted backup tested.
- Free/Pro, purchase/restore, or reviewer access observed without an unrequested real purchase.
- Report sent with steps, expected/actual result, version, language, and anonymized screenshots.
30 · Reports and feedback
Send useful, safe evidence
Steps
- For one AI message, open History > Actions > Report this content, choose a category, and optionally comment.
- The report sends only the selected message and minimal metadata; the rest of the chat remains local.
- For an app bug, record version, language, Free/Pro status, screen, time, exact steps, expected result, and actual result.
- Attach a cropped screenshot only if it contains no API key, reviewer ID, real name, password, private backup, or restricted file.
- Include cloud/local model, GGUF size, and voice only when relevant. Replace sensitive values with [redacted].
- Send through the support channel listed on Google Play or the official website.
14 · Checklist
Before you send feedback
Steps
- onboarding and Home
- built-in and custom character
- solo chat and roleplay
- Group chat and Group roleplay
- one cloud model without exposing its key
- GGUF, load, streaming, and stop
- Piper or Android, then Supertonic
- Studio and built-in avatar
- authorized Pro VRM
- scene with local model
- accessibility and test-data backup
- sanitized report and Pro features